Salta al contenuto principale

Digiland 10.1'' DL1016 Screen Replacement

Cosa ti serve

  1. Attenzione: i passaggi 1-2 provengono da una guida contrassegnata come in corso.

    Digiland 10.1'' DL1016 Screen Replacement, Digiland 10.1'' DL1016 Remove Backing: passo 1, immagine 1 di 2 Digiland 10.1'' DL1016 Screen Replacement, Digiland 10.1'' DL1016 Remove Backing: passo 1, immagine 2 di 2
    • Use an opening pick and an opening tool to pry the backing off the back of the tablet.
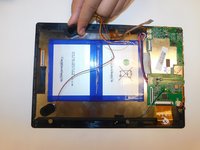
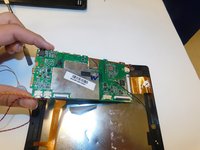
    • You may need some force when doing this and if needed use a metal spudger.

  2. Digiland 10.1'' DL1016 Screen Replacement: passo 2, immagine 1 di 2 Digiland 10.1'' DL1016 Screen Replacement: passo 2, immagine 2 di 2
    • Gently lift the backing off.

  3. Attenzione: il passaggio 3 proviene da una guida contrassegnata come in corso.

    Digiland 10.1'' DL1016 Screen Replacement, Digiland 10.1'' DL1016 Disconnect Wires going off the Motherboard: passo 3, immagine 1 di 2 Digiland 10.1'' DL1016 Screen Replacement, Digiland 10.1'' DL1016 Disconnect Wires going off the Motherboard: passo 3, immagine 2 di 2
    • Gently pull the wiring back.

    • You may need to use a metal spudger to lift the wire connector off the back of the screen.

  4. Attenzione: il passaggio 4 proviene da una guida contrassegnata come in corso.

    Digiland 10.1'' DL1016 Screen Replacement, Digiland 10.1'' DL1016 Remove Battery: passo 4, immagine 1 di 2 Digiland 10.1'' DL1016 Screen Replacement, Digiland 10.1'' DL1016 Remove Battery: passo 4, immagine 2 di 2
    • Use an ESD safe pryer to lift the battery up.

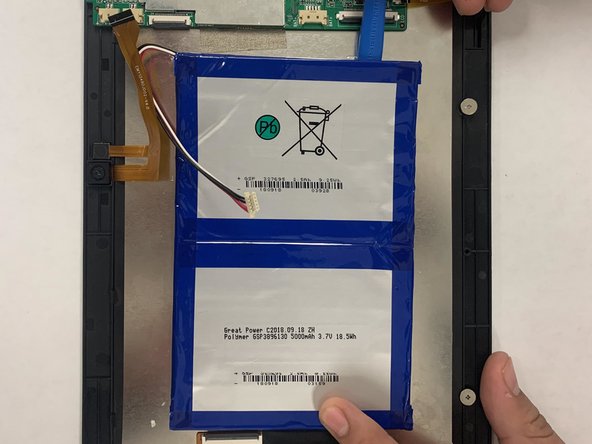
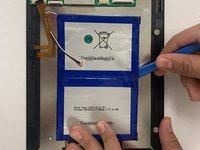
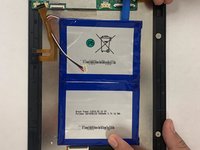
    • There is glue that holds the battery down, so carefully pry it open. You may need to use some force.

  5. Digiland 10.1'' DL1016 Screen Replacement, Power Button: passo 5, immagine 1 di 1
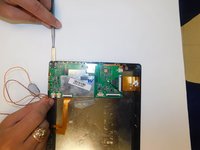
    • Disconnect the black cable off the motherboard.

    • Remove the four 1.5mm Phillips #000 screws from the motherboard.

  6. Digiland 10.1'' DL1016 Screen Replacement: passo 6, immagine 1 di 2 Digiland 10.1'' DL1016 Screen Replacement: passo 6, immagine 2 di 2
    • Make sure the ribbon cables are free or unconnected so the motherboard is able to be moved.

    • Use a metal spudger to slide underneath the motherboard and push it up so it's unstuck from the tablet.

    • Lift up the motherboard and place it somewhere that is clean and kept safe.

  7. Digiland 10.1'' DL1016 Screen Replacement, Screen: passo 7, immagine 1 di 2 Digiland 10.1'' DL1016 Screen Replacement, Screen: passo 7, immagine 2 di 2
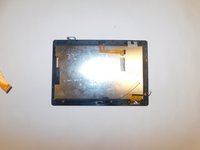
    • Remove the tape from the backside of the tablet along with the wiring.

    • Make space so you can pry the motherboard away from the digitizer.

  8. Digiland 10.1'' DL1016 Screen Replacement: passo 8, immagine 1 di 2 Digiland 10.1'' DL1016 Screen Replacement: passo 8, immagine 2 di 2
    • Once the motherboard is pulled away, the screen should be free of all other components.

    • Check around the edges so that no tape is stuck to the edges or wiring and just push off digitizer and replace screen if needed.

Conclusione

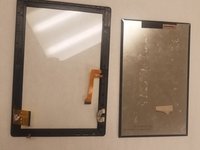
To reassemble your device, follow these instructions in reverse order.

Team

Gateway, Team S1-G2, Saknee Fall 2019 Membro di Gateway, Team S1-G2, Saknee Fall 2019

GCC-SAKNEE-F19S1G2

4 Membri

5 Guide realizzate

3 Commenti

Where can i get the screen for this tablet? i need to order online and currently i am in india.

Arivu Alagan - Replica

Where will I get screen in kenya

Josphat Mutai - Replica

My phone crack,I need screen only

Josphat Mutai - Replica

Aggiungi Commento

Visualizza Statistiche:

Ultime 24 Ore: 0

Ultimi 7 Giorni: 3

Ultimi 30 Giorni: 14

Tutti i Tempi: 1,801