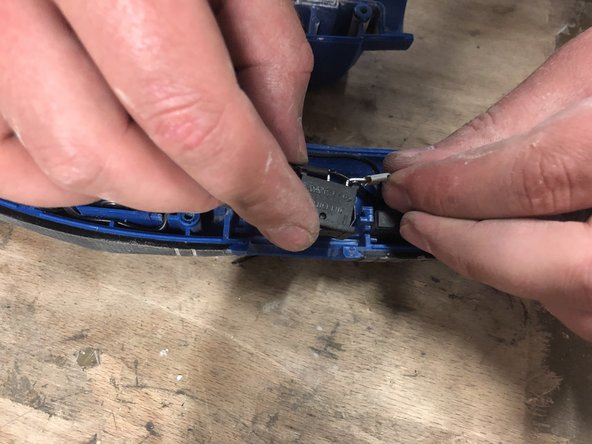
Salta al contenuto principale

Dexter 200W Corded Orbital Sander - 200SHS2.5 Switch Replacement

Cosa ti serve

  1. Dexter 200W Corded Orbital Sander - 200SHS2.5 Switch Replacement, Unplug: passo 1, immagine 1 di 1
    • Before you begin, remember to disconnect the mains plug.

  2. Dexter 200W Corded Orbital Sander - 200SHS2.5 Switch Replacement: passo 2, immagine 1 di 2 Dexter 200W Corded Orbital Sander - 200SHS2.5 Switch Replacement: passo 2, immagine 2 di 2
    • Unscrew the four screws from the tray.

    • Then the four screws inside the tray.

  3. Dexter 200W Corded Orbital Sander - 200SHS2.5 Switch Replacement: passo 3, immagine 1 di 2 Dexter 200W Corded Orbital Sander - 200SHS2.5 Switch Replacement: passo 3, immagine 2 di 2
    • Unscrew the screws of the shell to open the machine.

  4. Dexter 200W Corded Orbital Sander - 200SHS2.5 Switch Replacement: passo 4, immagine 1 di 2 Dexter 200W Corded Orbital Sander - 200SHS2.5 Switch Replacement: passo 4, immagine 2 di 2
    • Remove the orange switch cap for more space.

    • Use pliers to disconnect the wires from the switch. Press the tab to extract it.

  5. Dexter 200W Corded Orbital Sander - 200SHS2.5 Switch Replacement: passo 6, immagine 1 di 3 Dexter 200W Corded Orbital Sander - 200SHS2.5 Switch Replacement: passo 6, immagine 2 di 3 Dexter 200W Corded Orbital Sander - 200SHS2.5 Switch Replacement: passo 6, immagine 3 di 3
    • Replace the new switch, then reconnect the wires.

    • Replace the sheath, then check that no cable is blocked and that each part is in its housing.

  6. Dexter 200W Corded Orbital Sander - 200SHS2.5 Switch Replacement: passo 7, immagine 1 di 1
    • Replace the orange cap.

  7. Dexter 200W Corded Orbital Sander - 200SHS2.5 Switch Replacement: passo 8, immagine 1 di 1
    • Before closing, check that no cable is blocked and that each part is in its place.

    • Replace the shell and screws.

  8. Dexter 200W Corded Orbital Sander - 200SHS2.5 Switch Replacement: passo 9, immagine 1 di 2 Dexter 200W Corded Orbital Sander - 200SHS2.5 Switch Replacement: passo 9, immagine 2 di 2
    • Replace the four screws located inside.

    • Then the screws of the plate.

Conclusione

To reassemble perform steps in reverse.

Un ringraziamento speciale a questi traduttori:

fr en

100%

HelloMacOS ci sta aiutando ad aggiustare il mondo! Vuoi partecipare?
Inizia a tradurre ›

Céline Chemineau

Membro da: 01/29/20

16.581 Reputazione

95 Guide realizzate

Team

Leroy Merlin Membro di Leroy Merlin

Community

36 Membri

239 Guide realizzate

0 Commenti

Aggiungi Commento

Visualizza Statistiche:

Ultime 24 Ore: 1

Ultimi 7 Giorni: 4

Ultimi 30 Giorni: 10

Tutti i Tempi: 193