Salta al contenuto principale
Dell XPS 17 9710 SSD Replacement

Dell XPS 17 9710 SSD Replacement

Abigail Matos

Abigail Matos e 3 altri collaboratori

Ultimo aggiornamento il July 9, 2024

5 minuti
Moderato
Passi mancanti
Guida Archiviata
Questa guida è mantenuta solo per scopi storici. Usa la versione aggiornata della guida per eseguire la riparazione.

Introduzione

Vai al passo 1

If your current SSD card in your Dell XPS17 9710 no longer has enough storage space or is failing, you may need to replace it.

Before replacing the SSD, make sure to back up any storage currently on the card to another hard drive.

Before beginning make sure to power off your device completely.

Cosa ti serve

Kit di riparazione

Questi kit contengono tutti i ricambi e gli strumenti necessari per completare questa guida.

Ricambi

Strumenti

Mostra di più…

  1. Dell XPS 17 9710 SSD Replacement, Back Panel: passo 1, immagine 1 di 2 Dell XPS 17 9710 SSD Replacement, Back Panel: passo 1, immagine 2 di 2
    • Remove eight 5 mm screws from the back panel using a T5 Torx screwdriver.

    • Use the opening tool to loosen the panel on all sides and then lift it from the device.

  2. Dell XPS 17 9710 SSD Replacement, SSD: passo 2, immagine 1 di 2 Dell XPS 17 9710 SSD Replacement, SSD: passo 2, immagine 2 di 2
    • Remove two 3 mm screws (four total) from each of the copper plates using a JIS #1 screwdriver.

  3. Dell XPS 17 9710 SSD Replacement: passo 3, immagine 1 di 2 Dell XPS 17 9710 SSD Replacement: passo 3, immagine 2 di 2
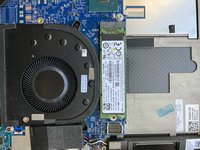
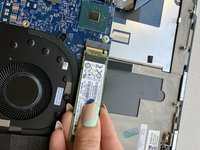
    • Unplug the SSD card underneath each plate.

    • There may be two slots for SSD cards, but only one card. You can install another card for storage customizability in the laptop.

Linea Traguardo

Abigail Matos

Membro da: 03/28/22

308 Reputazione

3 Guide realizzate

Team

0Commenti sulla guida

Aggiungi Commento

Visualizza Statistiche:

Ultime 24 Ore: 2

Ultimi 7 Giorni: 7

Ultimi 30 Giorni: 16

Tutti i Tempi: 1,872