Cosa ti serve
-
-
Slide the battery release latch until it clicks into place.
-
Slide the battery out of the battery bay.
-
-
-
-
Remove the six screws that secure the base cover to the computer base.
-
Lift the base cover off the computer at an angle as shown in the following illustration.
-
-
-
Remove the four screws that secure the hard drive assembly to the computer base.
-
Using the pull-tab, slide the hard drive towards the left to disconnect the hard drive assembly from the connector on the system board.
-
Lift the hard drive assembly out of the computer base.
-
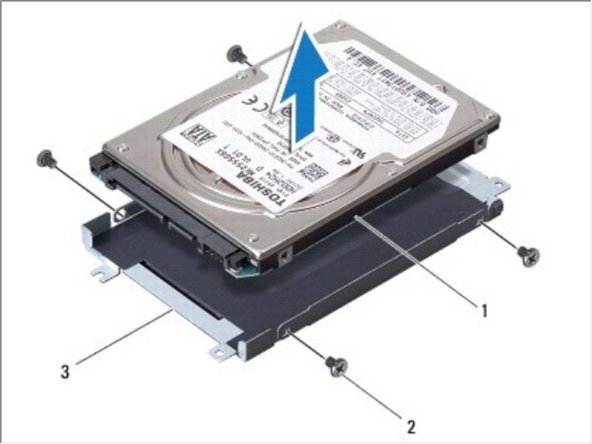
Remove the four screws that secure the hard drive cage to the hard drive.
-
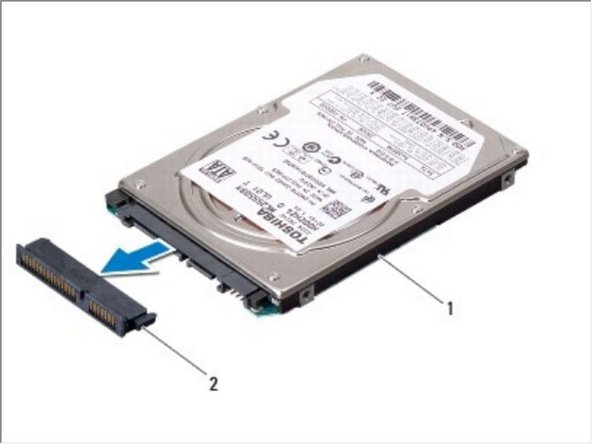
Pull the interposer to disconnect it from the hard drive.
-
Lift the hard drive off the hard drive cage.
-


To reassemble your device, follow these instructions in reverse order.
To reassemble your device, follow these instructions in reverse order.
Team
