Salta al contenuto principale

Dell Latitude E6410 CMOS Battery Replacement

Cosa ti serve

  1. Dell Latitude E6410 CMOS Battery Replacement, Remove all external components: passo 1, immagine 1 di 1
    • Make sure you have removed all external components from your device (ie. USBs, ethernets, power cords, audio devices, SD cards, etc.)

  2. Dell Latitude E6410 CMOS Battery Replacement, Remove battery: passo 2, immagine 1 di 3 Dell Latitude E6410 CMOS Battery Replacement, Remove battery: passo 2, immagine 2 di 3 Dell Latitude E6410 CMOS Battery Replacement, Remove battery: passo 2, immagine 3 di 3
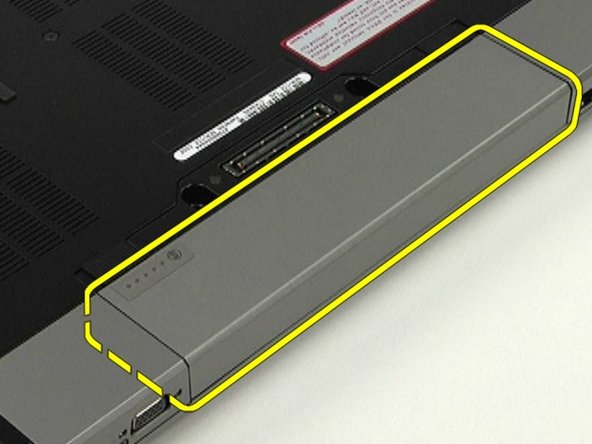
    • To remove the battery, slide the latches inward, and remove the battery from the system.

  3. Dell Latitude E6410 CMOS Battery Replacement, Remove the access panel: passo 3, immagine 1 di 3 Dell Latitude E6410 CMOS Battery Replacement, Remove the access panel: passo 3, immagine 2 di 3 Dell Latitude E6410 CMOS Battery Replacement, Remove the access panel: passo 3, immagine 3 di 3
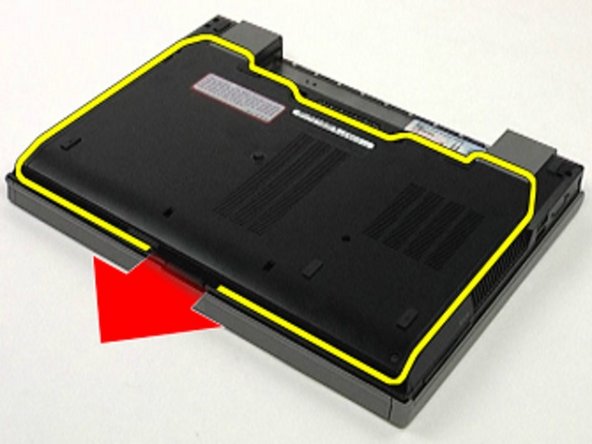
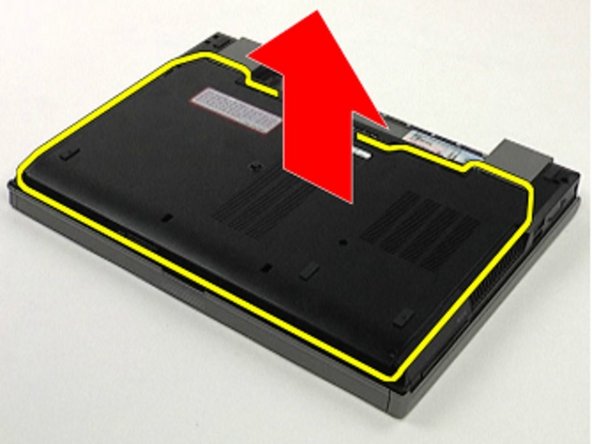
    • To remove the access panel, use your screwdriver to remove the single screw in the center of the base. Then, slide the access panel toward the front of the system and lift it from the system.

  4. Dell Latitude E6410 CMOS Battery Replacement, Disconnect the coin-cell battery cable from the system board: passo 4, immagine 1 di 3 Dell Latitude E6410 CMOS Battery Replacement, Disconnect the coin-cell battery cable from the system board: passo 4, immagine 2 di 3 Dell Latitude E6410 CMOS Battery Replacement, Disconnect the coin-cell battery cable from the system board: passo 4, immagine 3 di 3
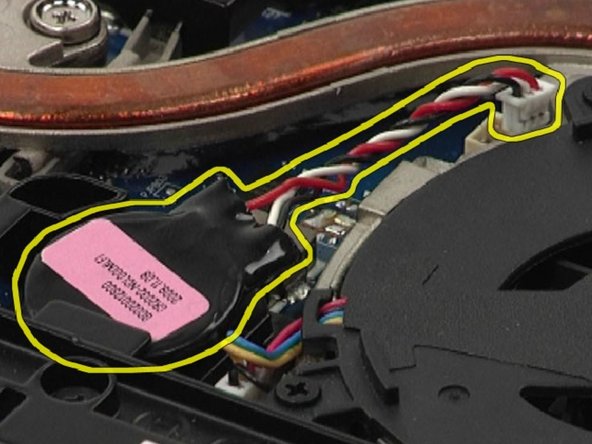
    • After removing the access panel, locate the coin cell battery. Then disconnect the battery cable from the system board and lift the coin-cell battery out of its socket to remove.

  5. Dell Latitude E6410 CMOS Battery Replacement, Replace battery.: passo 5, immagine 1 di 3 Dell Latitude E6410 CMOS Battery Replacement, Replace battery.: passo 5, immagine 2 di 3 Dell Latitude E6410 CMOS Battery Replacement, Replace battery.: passo 5, immagine 3 di 3
    • With your replacement battery, perform the previous steps in reverse order.

Conclusione

To reassemble your device, follow these instructions in reverse order.

Un'altra persona ha completato questa guida.

Aaron Thomas

Membro da: 02/16/21

1.194 Reputazione

10 Guide realizzate

Team

RampUP America, Inc. Membro di RampUP America, Inc.

Community

42 Membri

1.985 Guide realizzate

0 Commenti

Aggiungi Commento

Visualizza Statistiche:

Ultime 24 Ore: 1

Ultimi 7 Giorni: 10

Ultimi 30 Giorni: 46

Tutti i Tempi: 1,352