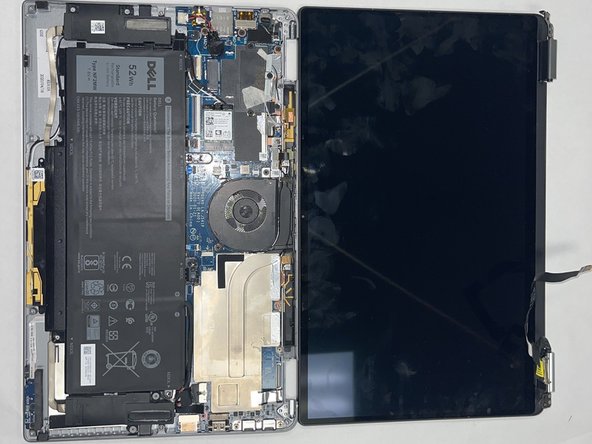
Salta al contenuto principale

Dell Latitude 9410 2-in-1 Display Replacement

Cosa ti serve

  1. Dell Latitude 9410 2-in-1 Display Replacement, Base Panel: passo 1, immagine 1 di 1
    • Ensure that the laptop is unplugged and powered off before beginning.

    • Place the laptop upside down on a flat surface.

  2. Dell Latitude 9410 2-in-1 Display Replacement: passo 2, immagine 1 di 2 Dell Latitude 9410 2-in-1 Display Replacement: passo 2, immagine 2 di 2
    • Use a Phillips #00 screwdriver to loosen the ten captive screws.

    • The screws are permanently fastened to the base panel; do not attempt to remove them.

  3. Dell Latitude 9410 2-in-1 Display Replacement: passo 3, immagine 1 di 3 Dell Latitude 9410 2-in-1 Display Replacement: passo 3, immagine 2 di 3 Dell Latitude 9410 2-in-1 Display Replacement: passo 3, immagine 3 di 3
    • Carefully lift off the back panel.

  4. Dell Latitude 9410 2-in-1 Display Replacement, Battery: passo 4, immagine 1 di 2 Dell Latitude 9410 2-in-1 Display Replacement, Battery: passo 4, immagine 2 di 2
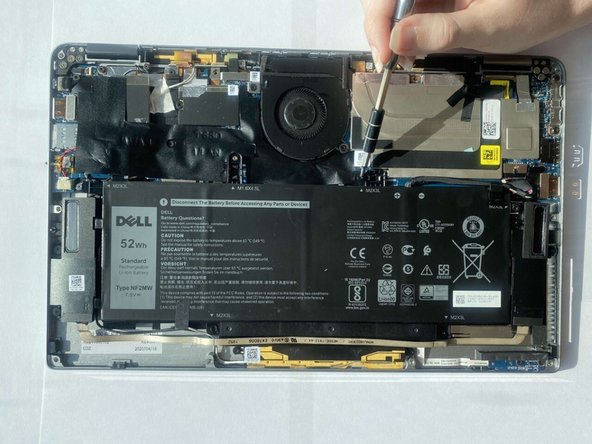
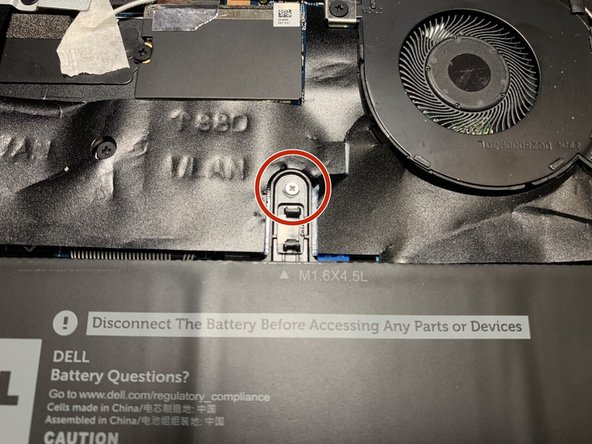
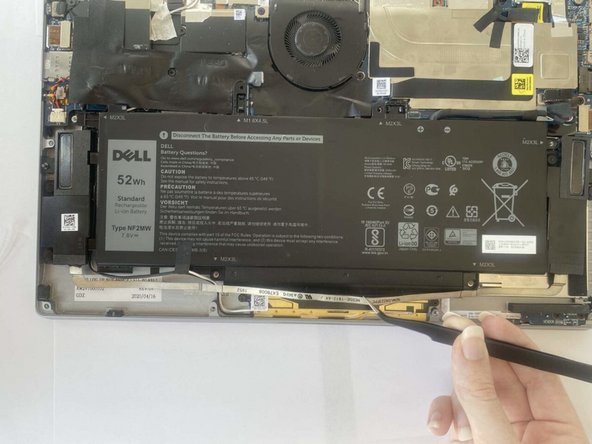
    • Use a Philips #00 screwdriver to remove the five 3mm screws that secure the battery.

  5. Dell Latitude 9410 2-in-1 Display Replacement: passo 5, immagine 1 di 3 Dell Latitude 9410 2-in-1 Display Replacement: passo 5, immagine 2 di 3 Dell Latitude 9410 2-in-1 Display Replacement: passo 5, immagine 3 di 3
    • Use a Philips #00 screwdriver to remove one 4.5 mm screw.

  6. Dell Latitude 9410 2-in-1 Display Replacement: passo 6, immagine 1 di 2 Dell Latitude 9410 2-in-1 Display Replacement: passo 6, immagine 2 di 2
    • Grip the battery cable near the plug and pull it straight out, in the direction of the cable.

  7. Dell Latitude 9410 2-in-1 Display Replacement: passo 7, immagine 1 di 2 Dell Latitude 9410 2-in-1 Display Replacement: passo 7, immagine 2 di 2
    Attrezzo utilizzato in questo passaggio:
    Tweezers
    $4.99
    Compra
    • Use tweezers to gently move the speaker ribbon cable away from the bottom of the battery.

    • The ribbon cable is thin and fragile; handle it carefully.

    • The ribbon cable only needs to be moved so that the battery can be removed; do not completely remove the ribbon cable.

  8. Dell Latitude 9410 2-in-1 Display Replacement: passo 8, immagine 1 di 2 Dell Latitude 9410 2-in-1 Display Replacement: passo 8, immagine 2 di 2
    • Lift the battery out with two hands.

  9. Dell Latitude 9410 2-in-1 Display Replacement, Display: passo 9, immagine 1 di 3 Dell Latitude 9410 2-in-1 Display Replacement, Display: passo 9, immagine 2 di 3 Dell Latitude 9410 2-in-1 Display Replacement, Display: passo 9, immagine 3 di 3
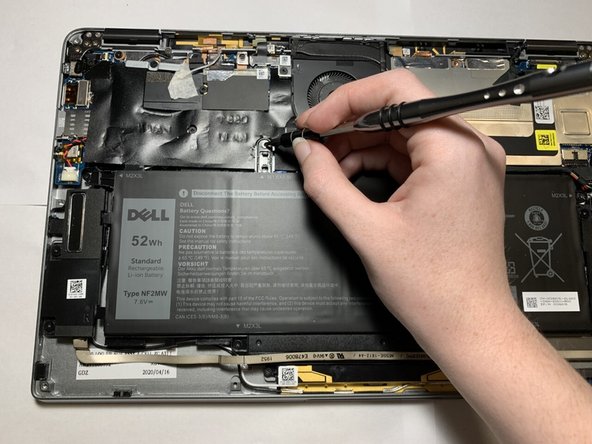
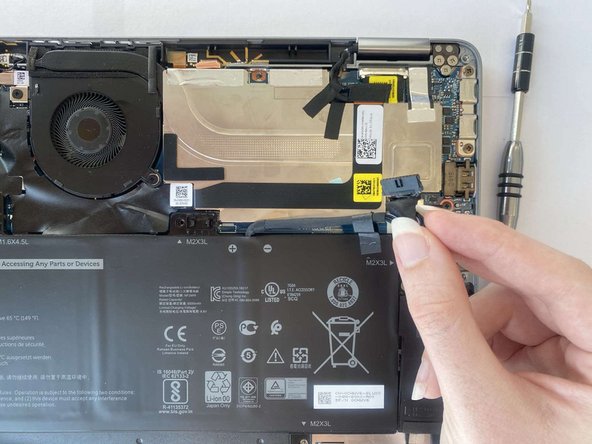
    • Carefully detach the ribbon that is affixed to the HDD.

    • Using a Philips #00 screwdriver, unscrew the 3, top left and top right 4mm screws located about the hinge.

  10. Dell Latitude 9410 2-in-1 Display Replacement: passo 10, immagine 1 di 2 Dell Latitude 9410 2-in-1 Display Replacement: passo 10, immagine 2 di 2
    • Carefully detach the back panel from the screen via the hinges.

Conclusione

To reassemble your device, follow these instructions in reverse order.

0 Commenti

Aggiungi Commento

Visualizza Statistiche:

Ultime 24 Ore: 0

Ultimi 7 Giorni: 3

Ultimi 30 Giorni: 19

Tutti i Tempi: 387