Salta al contenuto principale

Dell Latitude 5480 Fan Replacement

Cosa ti serve

  1. Dell Latitude 5480 Fan Replacement, Lower Case: passo 1, immagine 1 di 1
    • Use a Phillips screwdriver to remove the eight 5.6 mm screws that secure the lower case.

  2. Dell Latitude 5480 Fan Replacement: passo 2, immagine 1 di 3 Dell Latitude 5480 Fan Replacement: passo 2, immagine 2 di 3 Dell Latitude 5480 Fan Replacement: passo 2, immagine 3 di 3
    • Insert an opening tool into the seam between the lower case and chassis.

    • Pry up around the perimeter of the device until the lower case fully releases.

    • Lift off the lower case.

  3. Dell Latitude 5480 Fan Replacement, Dell Latitude 5480 Battery Disconnection: passo 3, immagine 1 di 2 Dell Latitude 5480 Fan Replacement, Dell Latitude 5480 Battery Disconnection: passo 3, immagine 2 di 2
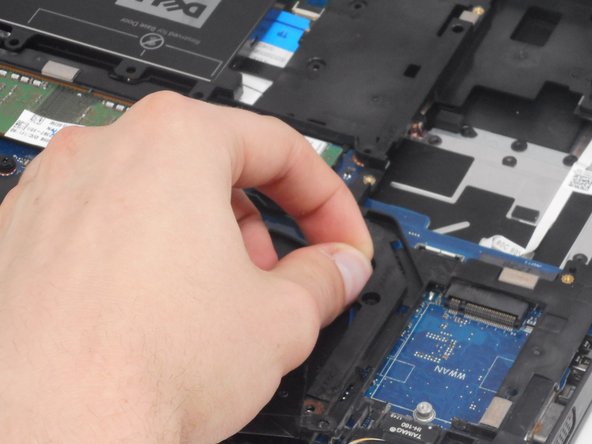
    • Grip the black battery cable connector loop and pull it directly up to disconnect the battery.

  4. Dell Latitude 5480 Fan Replacement, Fan: passo 4, immagine 1 di 3 Dell Latitude 5480 Fan Replacement, Fan: passo 4, immagine 2 di 3 Dell Latitude 5480 Fan Replacement, Fan: passo 4, immagine 3 di 3
    • Remove the two 3.7 mm Phillips screws that secure the fan.

  5. Dell Latitude 5480 Fan Replacement: passo 5, immagine 1 di 3 Dell Latitude 5480 Fan Replacement: passo 5, immagine 2 di 3 Dell Latitude 5480 Fan Replacement: passo 5, immagine 3 di 3
    • Grip the fan connector and pull it directly out of its motherboard port.

    • Do not pull on the wires.

    • Lift the fan up and out of the chassis.

Conclusione

To reassemble your device, follow these instructions in reverse order.

0 Commenti

Aggiungi Commento

Visualizza Statistiche:

Ultime 24 Ore: 1

Ultimi 7 Giorni: 7

Ultimi 30 Giorni: 15

Tutti i Tempi: 43