Salta al contenuto principale

Dell Latitude 3380 Fan Replacement

Cosa ti serve

  1. Dell Latitude 3380 Fan Replacement, Back Cover: passo 1, immagine 1 di 2 Dell Latitude 3380 Fan Replacement, Back Cover: passo 1, immagine 2 di 2
    • Turn the laptop over so that the back is facing up.

    • Remove the nine 3 mm screws with a Phillips #0 screwdriver.

  2. Dell Latitude 3380 Fan Replacement: passo 2, immagine 1 di 2 Dell Latitude 3380 Fan Replacement: passo 2, immagine 2 di 2
    • Use an opening tool to pry the back cover away from the laptop.

  3. Dell Latitude 3380 Fan Replacement, Fan: passo 3, immagine 1 di 1
    • Remove the two 5 mm screws from the fan using a Phillips #0 screwdriver.

  4. Dell Latitude 3380 Fan Replacement: passo 4, immagine 1 di 1
    • Loosen the four captive screws on the heatsink using a Phillips #0 screwdriver.

  5. Dell Latitude 3380 Fan Replacement: passo 5, immagine 1 di 1
    • Remove the heatsink from the motherboard.

  6. Dell Latitude 3380 Fan Replacement: passo 6, immagine 1 di 2 Dell Latitude 3380 Fan Replacement: passo 6, immagine 2 di 2
    Attrezzo utilizzato in questo passaggio:
    Tweezers
    $4.99
    Compra
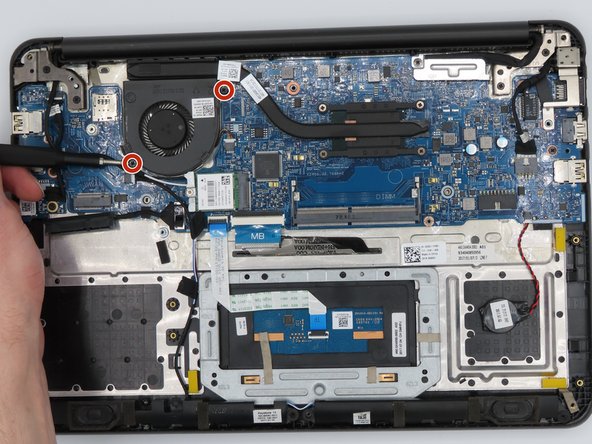
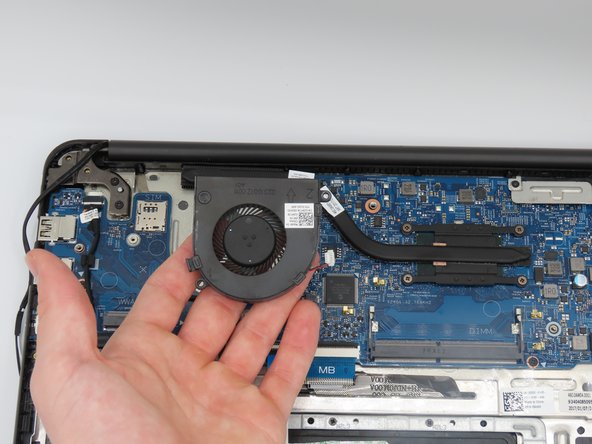
    • Using tweezers, loosen the power connector from the fan to the motherboard, fully disconnecting the fan.

Conclusione

To reassemble your device, follow these instructions in reverse order.

0 Commenti

Aggiungi Commento

Visualizza Statistiche:

Ultime 24 Ore: 0

Ultimi 7 Giorni: 5

Ultimi 30 Giorni: 11

Tutti i Tempi: 81