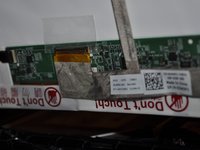
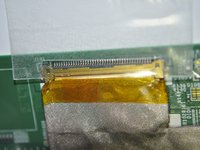
Salta al contenuto principale

Dell Inspiron n5050 Display Replacement

Cosa ti serve

  1. Attenzione: i passaggi 1-3 provengono da una guida contrassegnata come in corso.

    Dell Inspiron n5050 Display Replacement, Battery: passo 1, immagine 1 di 1
    • Flip your laptop over to view the bottom and locate the two locks.

  2. Dell Inspiron n5050 Display Replacement: passo 2, immagine 1 di 1
    • Slide the two locks away from each other.

    • Sliding these locks will loosen the battery to allow removal.

  3. Dell Inspiron n5050 Display Replacement: passo 3, immagine 1 di 2 Dell Inspiron n5050 Display Replacement: passo 3, immagine 2 di 2
    • Pull battery out of the laptop.

    • Your laptop's battery should be completely removed.

  4. Dell Inspiron n5050 Display Replacement, Display: passo 4, immagine 1 di 1
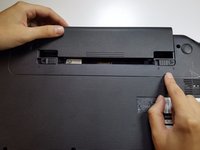
    • Flip laptop right side up and open

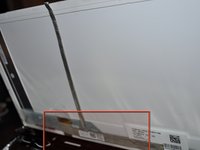
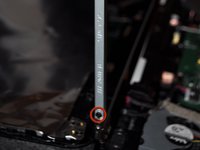
    • Insert flat side of spudger gently along inside of screen and screen surround.

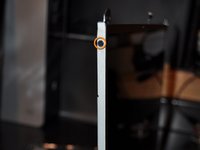
    • Work your way around the screen carefully releasing the screen surround from the lid.

    • The screen surround is held in place by delicate plastic clips, so don't use too much force.

  5. Dell Inspiron n5050 Display Replacement: passo 5, immagine 1 di 1
    • Unplug the cable from the camera.

    • Unscrew the six screws attaching the display support frame to the laptop lid. Lower lid to desk.

    • The lid still has the WIFI antenna connected to it.

    • When reassembling, plug the cable to the camera first, then screw in the lid.

  6. Dell Inspiron n5050 Display Replacement: passo 6, immagine 1 di 3 Dell Inspiron n5050 Display Replacement: passo 6, immagine 2 di 3 Dell Inspiron n5050 Display Replacement: passo 6, immagine 3 di 3
    • Unplug the cable from the display.

    • This cable has delicate wires that can easily break. It is glued to the back of the display, but can be carefully peeled away.

    • The plug is held in on the sides with two clips. Gently pull on the each side of the cable to remove it from its connector.

  7. Dell Inspiron n5050 Display Replacement: passo 7, immagine 1 di 2 Dell Inspiron n5050 Display Replacement: passo 7, immagine 2 di 2
    • For this part, it is easiest to use a magnetized screw driver.

    • Unscrew display from display hinge/support bracket. There are two screws on each side.

    • Unscrew the bottom screws first.

    • Unscrew the top screws while holding onto the screen with your other hand so it doesn't fall.

Conclusione

To reassemble your device, follow these instructions in reverse order.

Altre 6 persone hanno completato questa guida.

Tyler

Membro da: 06/19/12

4.920 Reputazione

16 Guide realizzate

Team

TechForce Membro di TechForce

Business

2 Membri

25 Guide realizzate

4 Commenti

i cant figure out how to take off the cable to the display help

timothyamorrison - Replica

in step 4

jhgfds

timothyamorrison - Replica

This should be listed as "easy", and time taken around 10-15 minutes.

Paul Freeman-Powell - Replica

Agreed should be labeled easier. 10-15 minutes

Jake Fisher - Replica

Aggiungi Commento

Visualizza Statistiche:

Ultime 24 Ore: 1

Ultimi 7 Giorni: 7

Ultimi 30 Giorni: 8

Tutti i Tempi: 10,486