Salta al contenuto principale

Dell Inspiron 3148 Hard Drive Replacement

Cosa ti serve

  1. Dell Inspiron 3148 Hard Drive Replacement, Back Panel: passo 1, immagine 1 di 2 Dell Inspiron 3148 Hard Drive Replacement, Back Panel: passo 1, immagine 2 di 2
    • Ensure the device is powered off and unplugged. Close the device and orient it face up, with the hinges further away from you.

    • Flip the device over so the backside is facing you.

  2. Dell Inspiron 3148 Hard Drive Replacement: passo 2, immagine 1 di 1
    • Using the Phillips #1 screwdriver, remove all nine 7mm screws.

  3. Dell Inspiron 3148 Hard Drive Replacement: passo 3, immagine 1 di 2 Dell Inspiron 3148 Hard Drive Replacement: passo 3, immagine 2 di 2
    • Using the plastic opening tool, pull the back panel upward. Move the opening tool along the edge of the device and lift the panel off of your device.

    • Be aware, the back panel is kept in place by magnetic clips. They will offer some resistance, but continue to gently leverage upwards.

  4. Dell Inspiron 3148 Hard Drive Replacement, Battery: passo 4, immagine 1 di 1
    • Remove the three 4mm screws holding battery in place using the Phillips #0 screwdriver.

  5. Dell Inspiron 3148 Hard Drive Replacement: passo 5, immagine 1 di 1
    • Using the iFixit opening tools, lift the battery out of its housing.

  6. Dell Inspiron 3148 Hard Drive Replacement: passo 6, immagine 1 di 1
    • Once loosened, use your fingers to lift the battery up and out of its housing.

    • There is a small cable which sits in a rut in the top of the battery. Ensure that it is pushed out of the way before removing completely.

  7. Dell Inspiron 3148 Hard Drive Replacement: passo 7, immagine 1 di 1
    • Remove the battery completely.

  8. Dell Inspiron 3148 Hard Drive Replacement, Hard Drive: passo 8, immagine 1 di 3 Dell Inspiron 3148 Hard Drive Replacement, Hard Drive: passo 8, immagine 2 di 3 Dell Inspiron 3148 Hard Drive Replacement, Hard Drive: passo 8, immagine 3 di 3
    • If there is a piece of tape connecting the hard drive and a small power cord, remove the tape.

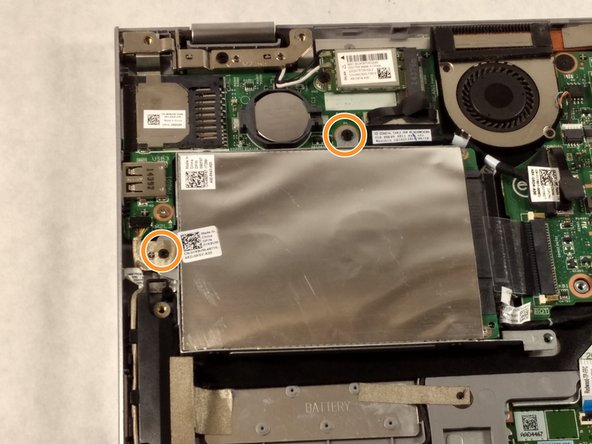
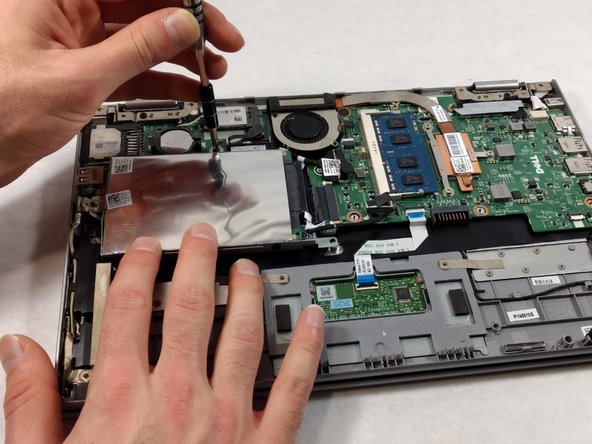
    • Using the Phillips #0 screwdriver, remove the two 4mm screws.

  9. Dell Inspiron 3148 Hard Drive Replacement: passo 9, immagine 1 di 3 Dell Inspiron 3148 Hard Drive Replacement: passo 9, immagine 2 di 3 Dell Inspiron 3148 Hard Drive Replacement: passo 9, immagine 3 di 3
    • Notice: there is a small data cable connecting the hard drive to the motherboard. Do not attempt to lift the hard drive all the way out before removing this cable.

    • Lift the hard drive slightly out of the device.

    • Grasp the head of the cable, not the cable itself.

    • Pull away from the hard drive, removing the data cable. The hard drive may now be fully removed.

Conclusione

To reassemble your device, follow these instructions in reverse order.

0 Commenti

Aggiungi Commento

Visualizza Statistiche:

Ultime 24 Ore: 1

Ultimi 7 Giorni: 2

Ultimi 30 Giorni: 16

Tutti i Tempi: 462