Questa versione può contenere modifiche errate. Passa all'ultima istantanea verificata.
Cosa ti serve
-
Questo passaggio è privo di traduzione. Aiuta a tradurlo
-
Place the laptop on a flat stable surface.
-
Flip the laptop over so the underside is visible.
-
-
Questo passaggio è privo di traduzione. Aiuta a tradurlo
-
Locate the battery lock switch.
-
Slide the lock switch to the left (away from the lock symbol).
-
Slide the battery out away from the laptop.
-
-
Questo passaggio è privo di traduzione. Aiuta a tradurlo
-
Remove the sixteen 2mm Phillips #00 screws from the bottom of the laptop.
-
Remove the two 2mm Phillips #0 screws from the hard drive port.
-
-
Questo passaggio è privo di traduzione. Aiuta a tradurlo
-
Flip the laptop over horizontally and open up the lid.
-
Insert the tip of the plastic opening tool into the upper left corner of the panel.
-
Keeping its tip under the top panel, slide the plastic opening tool around the panel until the panel is completely loose. Next gently remove the panel.
-
Remove the four 2mm Phillips #0 screws at the top of the keyboard.
-
Slide the plastic opening tool around the keyboard until the keyboard is completely loose. Gently remove the keyboard.
-
-
-
Questo passaggio è privo di traduzione. Aiuta a tradurlo
-
Locate the small black latch attached to blue tape.
-
Lift the small latch with your finger and pull the blue tape from its port.
-
Slide the keyboard away from the mousepad and set it aside.
-
-
Questo passaggio è privo di traduzione. Aiuta a tradurlo
-
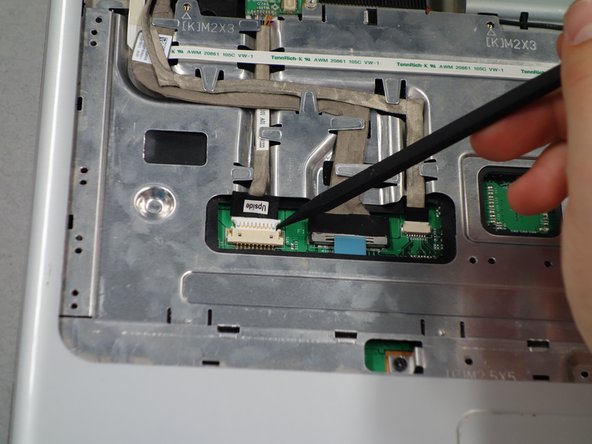
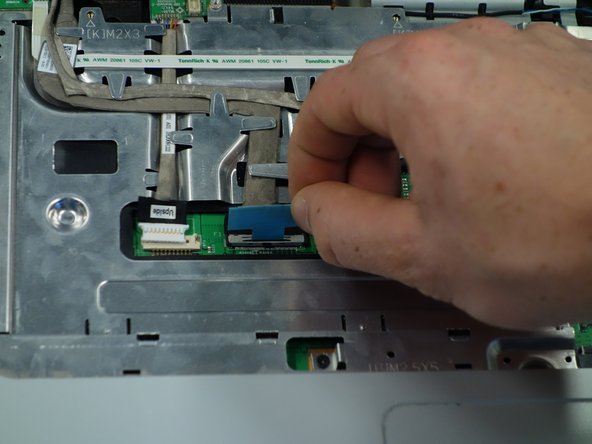
Locate the three wires in the top left corner of the metal panel.
-
Use the spudger to push the two cables out of their ports.
-
Pull the blue tab directly up to remove middle wire.
-
-
Questo passaggio è privo di traduzione. Aiuta a tradurlo
-
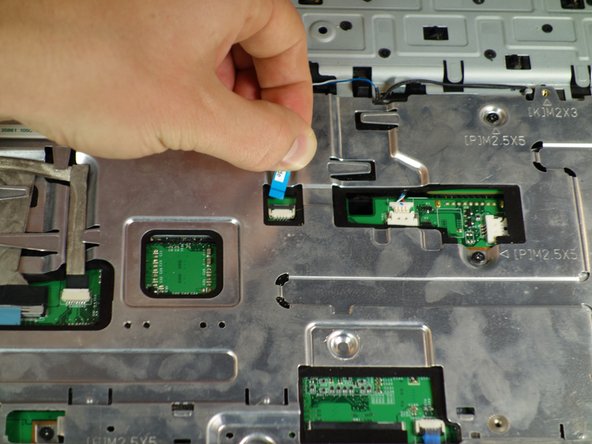
Remove the three 1mm Phillips #00 screws on the metal plate.
-
Lift the black cover and slide the blue tab away from the cover.
-
-
Questo passaggio è privo di traduzione. Aiuta a tradurlo
-
Gently remove the three grey wires from the metal tabs.
-
Insert the tip of the plastic opening tool into the bottom left corner of the panel.
-
Keeping its tip under the top panel, slide the plastic opening tool around the panel until the panel is completely loose.
-
Gently lift off the top metal panel.
-
-
Questo passaggio è privo di traduzione. Aiuta a tradurlo
-
Use the spudger to lift the wires from their connections.
-
Flip the laptop over and pull the connections through until they are free from the laptop interior.
-
-
Questo passaggio è privo di traduzione. Aiuta a tradurlo
-
Remove the two 2mm Phillips #0 screws from the screen hinges.
-
Lift the screen away from the laptop and gently set it down.
-
Put the rest of the laptop aside.
-
-
Questo passaggio è privo di traduzione. Aiuta a tradurlo
-
Use the plastic opening tool to remove the plastic cover from the screen.
-
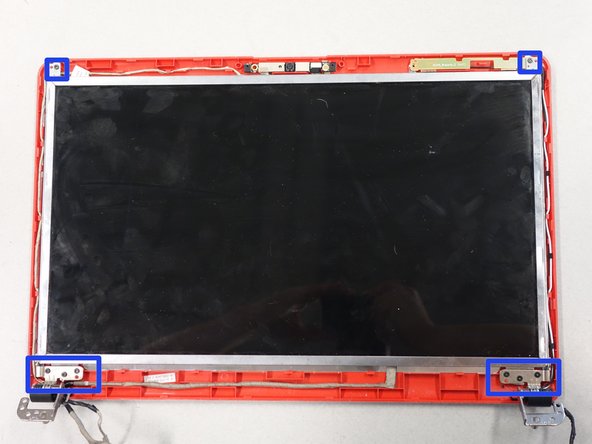
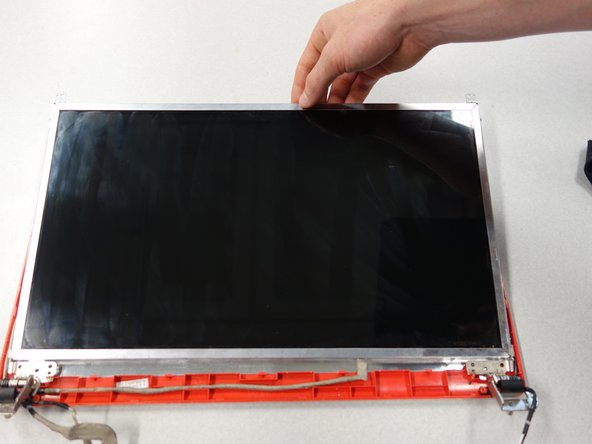
Remove the eight 2mm Phillips #0 screws from the corners of the screen.
-
Lift the screen away from the back panel.
-
-
Questo passaggio è privo di traduzione. Aiuta a tradurlo
-
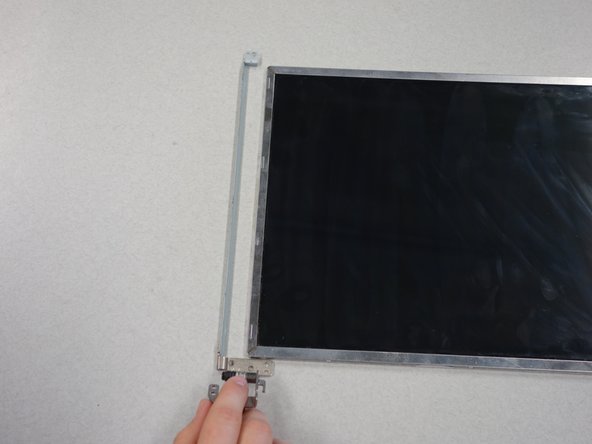
Remove the four 2mm Phillips #0 screws from the sides of the screen.
-
Remove the side railings from both sides of the screen by pulling the railings gently away from the screen.
-


Annulla: non ho completato questa guida.
Altre 3 persone hanno completato questa guida.
Team

Cal Poly, Team 6-3, Forte Spring 2014 Membro di Cal Poly, Team 6-3, Forte Spring 2014
CPSU-FORTE-S14S6G3
5 Membri
7 Guide realizzate