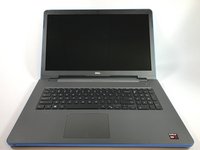
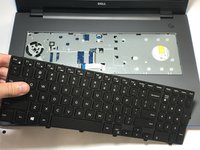
Salta al contenuto principale

Dell Inspiron 17-5755 Keyboard Replacement

Cosa ti serve

  1. Dell Inspiron 17-5755 Keyboard Replacement, Battery: passo 1, immagine 1 di 1
    • Make sure the computer has been shut down, and isn't plugged into an outlet before attempting to remove the battery.

  2. Dell Inspiron 17-5755 Keyboard Replacement: passo 2, immagine 1 di 2 Dell Inspiron 17-5755 Keyboard Replacement: passo 2, immagine 2 di 2
    • Find the battery release latch on the bottom side of the computer.

    • Slide the latch to the left until you hear a "click". This indicates that the battery has been released.

  3. Dell Inspiron 17-5755 Keyboard Replacement: passo 3, immagine 1 di 1
    • Safely remove the battery from the laptop.

  4. Dell Inspiron 17-5755 Keyboard Replacement, Keyboard: passo 4, immagine 1 di 2 Dell Inspiron 17-5755 Keyboard Replacement, Keyboard: passo 4, immagine 2 di 2
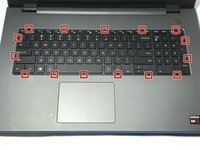
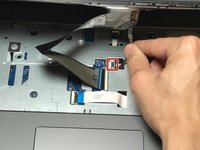
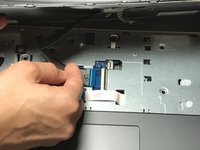
    • Open the display of the laptop as far as possible, and locate the tabs which secure the keyboard to the laptop.

  5. Dell Inspiron 17-5755 Keyboard Replacement: passo 5, immagine 1 di 1
    • Use a plastic opening tool to gently release the tabs that secure the keyboard to the laptop.

  6. Dell Inspiron 17-5755 Keyboard Replacement: passo 6, immagine 1 di 2 Dell Inspiron 17-5755 Keyboard Replacement: passo 6, immagine 2 di 2
    • Carefully lift the keyboard from the laptop, being mindful of any attachments that it may have.

  7. Dell Inspiron 17-5755 Keyboard Replacement: passo 7, immagine 1 di 3 Dell Inspiron 17-5755 Keyboard Replacement: passo 7, immagine 2 di 3 Dell Inspiron 17-5755 Keyboard Replacement: passo 7, immagine 3 di 3
    • Lift the zero insertion force (ZIF) tab that secures the keyboard back light ribbon cable

    • Afterwards, carefully detach the backlight cable from the laptop.

  8. Dell Inspiron 17-5755 Keyboard Replacement: passo 8, immagine 1 di 3 Dell Inspiron 17-5755 Keyboard Replacement: passo 8, immagine 2 di 3 Dell Inspiron 17-5755 Keyboard Replacement: passo 8, immagine 3 di 3
    • Gently release the ZIF tab that secures the keyboard ribbon cable to the laptop.

    • Afterwards, carefully slide the cable out of its slot.

  9. Dell Inspiron 17-5755 Keyboard Replacement: passo 9, immagine 1 di 2 Dell Inspiron 17-5755 Keyboard Replacement: passo 9, immagine 2 di 2
    • Now that the keyboard is detached from the laptop, you may safely remove it.

Conclusione

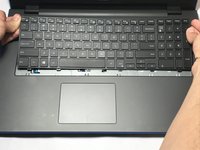
To reassemble your device, follow these instructions in reverse order.

Altre 2 persone hanno completato questa guida.

Team

USF Tampa, Team S6-G1, Lacy Spring 2017 Membro di USF Tampa, Team S6-G1, Lacy Spring 2017

USFT-LACY-S17S6G1

3 Membri

5 Guide realizzate

0 Commenti

Aggiungi Commento

Visualizza Statistiche:

Ultime 24 Ore: 0

Ultimi 7 Giorni: 5

Ultimi 30 Giorni: 12

Tutti i Tempi: 721