Introduzione
If your computer is not functioning properly or you would like to upgrade your computer for faster data transfer, better graphics, or a faster CPU, this guide will show you how to remove the motherboard on the Dell Inspiron 15R 5537.
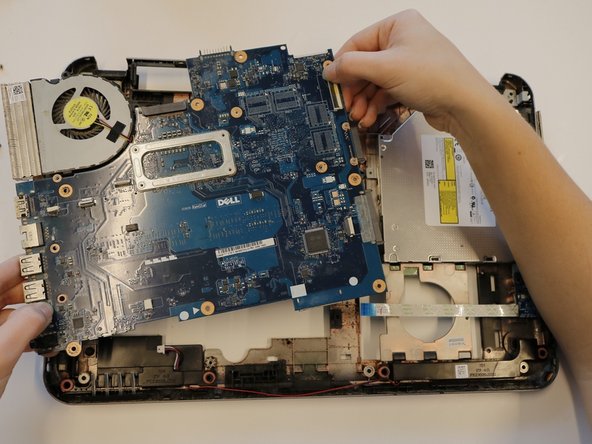
The motherboard is the fundamental element of your laptop, sort of like the brains behind everything. It connects all of the components of your laptop together. A faulty motherboard can result in freezing of your computer, blue screen of death, or a burning odor.
It is important to be sure to run a windows diagnostics test on your computer to ensure that your motherboard is the part having issues. You can also do a visual check of your motherboard by checking for blown capacitors or bent pins, but this can only be done if you break down your computer to where the motherboard is properly exposed.
Before beginning this guide, make sure your laptop is powered off and disconnected from any external power source.
Cosa ti serve
-
-
Close the display and turn over the computer to see the battery locking tabs.
-
-
-
Turn the laptop over so that the keyboard is facing up.
-
Use an opening tool to pry the keyboard from the base of the laptop.
-
Once the top of the keyboard is released, slide the keyboard upwards.
-
-
-
Remove the screws that secure the hard-drive assembly to the computer base.
-
-
-
Slide the hard-drive assembly forward to disconnect the hard-drive assembly from the system board.
-
-
-
Using the pull-tab, lift the hard-drive assembly out of the computer base.
-
-
-
-
Remove the screws that secure the hard-drive bracket to the hard drive.
-
-
-
Align the screw holes on the hard-drive bracket with the screw holes on the NEW hard drive.
-
-
-
Replace the screws that secure the hard-drive bracket to the hard drive.
-
-
-
Slide and place the hard-drive assembly in the hard-drive bay.
-
-
-
Slide the hard-drive assembly backward to connect the hard-drive assembly to the system board.
-
-
-
Replace the screws that secure the hard-drive assembly to the computer base.
-
-
-
Remove thirteen 5mm Phillips #000 screws from the back cover of the laptop.
-
-
-
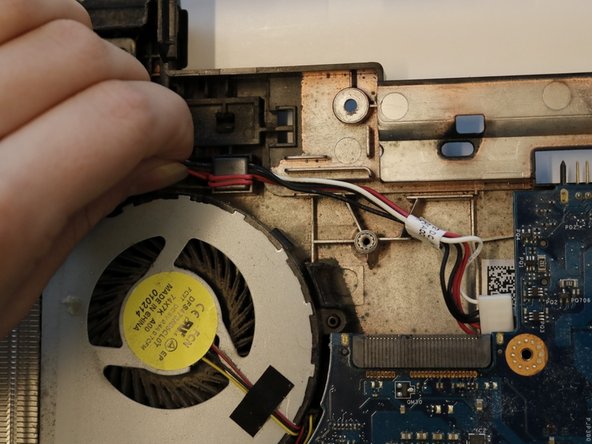
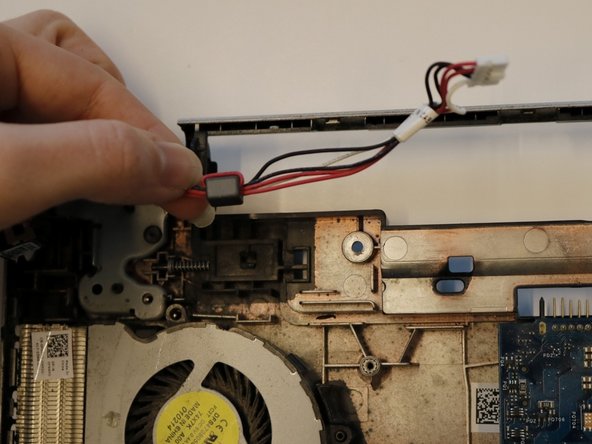
Remove the DC jack once the display is removed by pulling the cable assembly upwards.
-


To reassemble your device, follow these instructions in reverse order.
To reassemble your device, follow these instructions in reverse order.
Annulla: non ho completato questa guida.
Un'altra persona ha completato questa guida.

Team

Embry-Riddle Aeronautical University, Team S6-G5, Salas Fall 2019 Membro di Embry-Riddle Aeronautical University, Team S6-G5, Salas Fall 2019
ERAU-SALAS-F19S6G5
4 Membri
6 Guide realizzate
5 Commenti
Do you have a photo from the back of this motherboard? Does it support M.2?
Hey Daniel,
My names Cody and I was apart of the team that created this guide. To answer your question, sadly we did not take any pictures of the back of the motherboard when we had it disassembled. As for the compatibility for an M.2 drive I did not see a port that would be compatible with it but our computer could have a different motherboard than yours does, which means there is always a possibility that yours does have a slot for one. The only way to know is to take off the bottom cover of your computer and you would be able to see an existing M.2 in your motherboard or an empty slot for one.
Thank you for leaving a comment, I hope this helped you out.
Sincerely,
Cody Charnisky
hi
need to ask about somethings i have laptop dell inspiron 15R 5537 ( I5 / Ram 4g / GPU amd ) and need to upgrade Processor and the GPU i know it’s hard to do so i wonder if i can change the motherboard with high Processor like I7 ????
thank you
Hi ma7ame7oo,
I'm cody and helped in the original making of this guide. To answer your question what you're looking for is compatibility. What I mean by that is Dell only made (from my knowledge) two different motherboards for this computer that would be compatible for it. That would be the inspiron GPU and the AMD GPU. There is always a possibility of being creative enough to find a motherboard to fit the computer, but that task is a little out of the ball park for the average person. So to answer your question I don't believe it would be possible to find a new motherboard with an I7 that would fit this specific computer and just plug and play. I'm sorry I couldn't help more but I hoped I answer you're question.
Hello, my name is Nico and I was wondering if I can buy a OEM motherboard same make/model/year, however with the i7? I currently have the Inspiron 15r 5537 with the i5, and thought I might be able to buy the Inspiron 15r 5537 motherboard with the i7 and swap them out with intentions of upgrading the CPU and GPU that comes with the OEM i7 motherboard?? I’ve been looking for an answer on the internet however have yet to find a direct answer.