Questa versione può contenere modifiche errate. Passa all'ultima istantanea verificata.
Cosa ti serve
-
Questo passaggio è privo di traduzione. Aiuta a tradurlo
-
Make sure the display is closed. Then, flip the computer over so that you can see the bottom cover.
-
Loosen the two 5 mm Phillips #0 on the upper edge of the cover.
-
-
Questo passaggio è privo di traduzione. Aiuta a tradurlo
-
Remove the two 5 mm interior screws that connect the cover to the assembly using the same Philips head screwdriver from the previous step.
-
-
Questo passaggio è privo di traduzione. Aiuta a tradurlo
-
Use a spudger to remove the base cover from the rest of bottom cover.
-
-
Questo passaggio è privo di traduzione. Aiuta a tradurlo
-
Remove the three 5mm Phillips #0 screws that keep the battery connected to the computer.
-
-
Questo passaggio è privo di traduzione. Aiuta a tradurlo
-
Using the pull tab on the battery, lift the battery out of the computer.
-
-
Questo passaggio è privo di traduzione. Aiuta a tradurlo
-
The model device did not come with a hard drive. However, you will need to remove the hard drive to proceed. Please remove the hard drive following the steps on page 16 of the official Dell Inspiron 15-7537 manual.
-
-
-
Questo passaggio è privo di traduzione. Aiuta a tradurlo
-
Remove the single 5mm screw that connects the keyboard to the palm assembly with the Phillips head screwdriver.
-
-
Questo passaggio è privo di traduzione. Aiuta a tradurlo
-
Flip over the computer and open the display as far as it can go.
-
Use the spudger to remove the keyboard from the palm assembly.
-
-
Questo passaggio è privo di traduzione. Aiuta a tradurlo
-
Gently flip over the keyboard and place it on the palm rest assembly.
-
Lift the connector latches and disconnect the keyboard and the keyboard back-light cables.
-
-
Questo passaggio è privo di traduzione. Aiuta a tradurlo
-
Take the keyboard off the palm rest assembly.
-
-
Questo passaggio è privo di traduzione. Aiuta a tradurlo
-
Unscrew the two black 5 mm screws underneath the keyboard using a Phillips head screwdriver.
-
-
Questo passaggio è privo di traduzione. Aiuta a tradurlo
-
Flip the computer and remove the two silver 5 mm screws on the corners of the base cover with the Phillips head screwdriver.
-
-
Questo passaggio è privo di traduzione. Aiuta a tradurlo
-
Unscrew the three black 5 mm screws with the Phillips head screwdriver.
-
-
Questo passaggio è privo di traduzione. Aiuta a tradurlo
-
Remove the three silver 2 mm screws (with large flat circular heads) from where the battery was taken out with the Phillips head screwdriver.
-
-
Questo passaggio è privo di traduzione. Aiuta a tradurlo
-
Place a plastic spudger underneath the base cover and move it along the outside of the cover. Once the cover is disconnected lift the off the base cover.
-
-
Questo passaggio è privo di traduzione. Aiuta a tradurlo
-
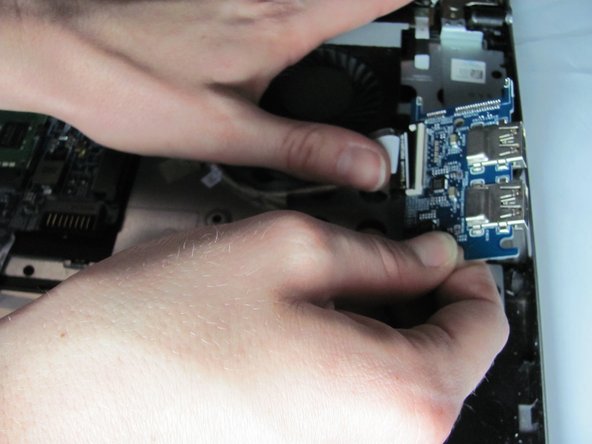
Pull back the tape that is securing the cable to the USB board.
-
-
Questo passaggio è privo di traduzione. Aiuta a tradurlo
-
Lift the black latch and remove the USB cable from the USB board.
-


