Questa versione può contenere modifiche errate. Passa all'ultima istantanea verificata.
Cosa ti serve
-
Questo passaggio è privo di traduzione. Aiuta a tradurlo
-
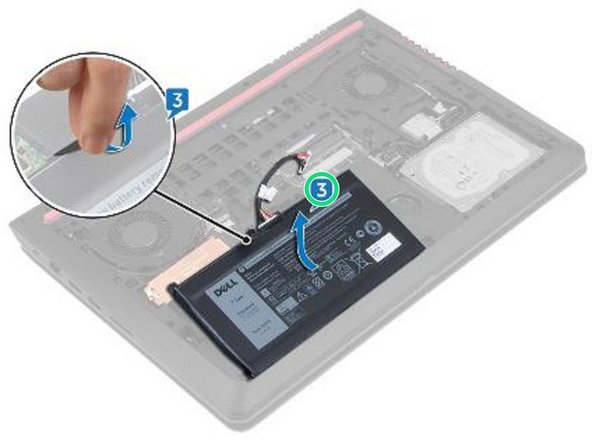
Remove the battery cable from the routing guides on the computer base.
-
-
Questo passaggio è privo di traduzione. Aiuta a tradurlo
-
Remove the five screws (M2x5 T8) that secure the battery to the computer base.
-
-
Questo passaggio è privo di traduzione. Aiuta a tradurlo
-
Using the pull tab, lift the battery, along with its cable, off the computer base.
-
-
-
Questo passaggio è privo di traduzione. Aiuta a tradurlo
-
Turn the computer over, open the display, and press and hold the power button for five seconds to ground the system board.
-
-
Questo passaggio è privo di traduzione. Aiuta a tradurlo
-
Slide the NEW battery in the slot on the computer base.
-
-
Questo passaggio è privo di traduzione. Aiuta a tradurlo
-
Align the screw holes on the battery with the screw holes on the computer base.
-
-
Questo passaggio è privo di traduzione. Aiuta a tradurlo
-
Replace the five screws (M2x5 T8) that secure the battery to the computer base.
-
-
Questo passaggio è privo di traduzione. Aiuta a tradurlo
-
Route the battery cable through the routing guides on the computer base.
-


Annulla: non ho completato questa guida.
Altre 3 persone hanno completato questa guida.

Team

Un commento
Please include a screwdriver valid for the M2x5 T8 battery screws under tools. Thanks.