Salta al contenuto principale

Dell Chromebook 3100 Back Panel Replacement

Cosa ti serve

  1. Dell Chromebook 3100 Back Panel Replacement, Back Panel: passo 1, immagine 1 di 3 Dell Chromebook 3100 Back Panel Replacement, Back Panel: passo 1, immagine 2 di 3 Dell Chromebook 3100 Back Panel Replacement, Back Panel: passo 1, immagine 3 di 3
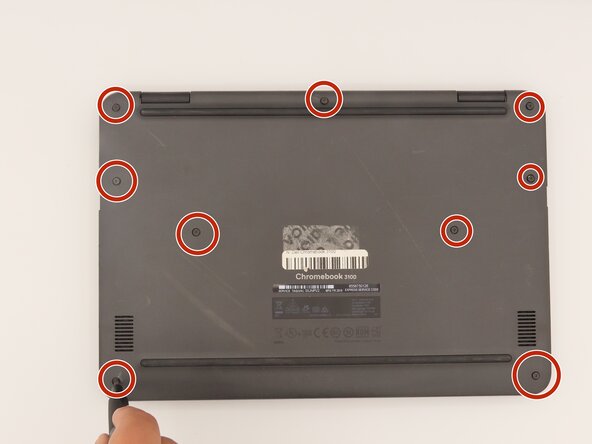
    • Flip the laptop so the bottom is facing upwards.

    • Loosen the nine screws from the back panel using a Phillips #0 screwdriver.

  2. Dell Chromebook 3100 Back Panel Replacement: passo 2, immagine 1 di 1
    • Pry the back panel away from the rest of the laptop using an iFixit opening tool.

Conclusione

To reassemble your device, follow these instructions in reverse order.

Kristen Gismondi

Membro da: 11/12/14

99.267 Reputazione

255 Guide realizzate

0Commenti sulla guida

Aggiungi Commento

Visualizza Statistiche:

Ultime 24 Ore: 0

Ultimi 7 Giorni: 1

Ultimi 30 Giorni: 9

Tutti i Tempi: 98