Salta al contenuto principale

Dell Alienware M17x R2 Memory Modules Replacement

Cosa ti serve

  1. Dell Alienware M17x R2 Memory Modules Replacement, Loosen the Screw: passo 1, immagine 1 di 1
    • WARNING: Before working inside your computer, read the safety information that shipped with your computer.

    • CAUTION: To avoid electrostatic discharge, ground yourself by using a wrist grounding strap or by periodically touching an unpainted metal surface (such as a connector on the back of the computer).

    • Loosen the captive screw that secures the memory-module door to the computer base.

  2. Dell Alienware M17x R2 Memory Modules Replacement, Sliding the Memory Module Door: passo 2, immagine 1 di 1
    • Slide the memory-module door to release the tabs and lift the memory- module door out of the computer base.

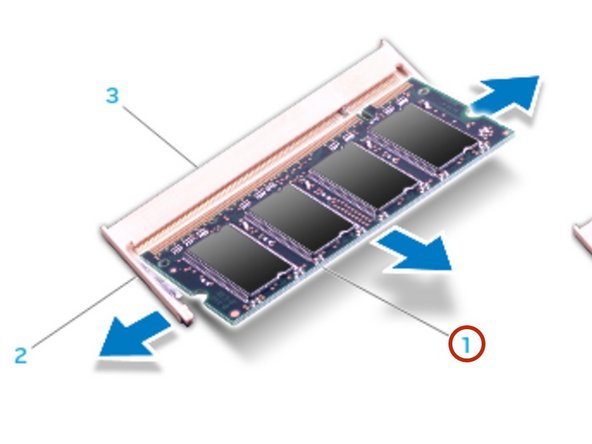
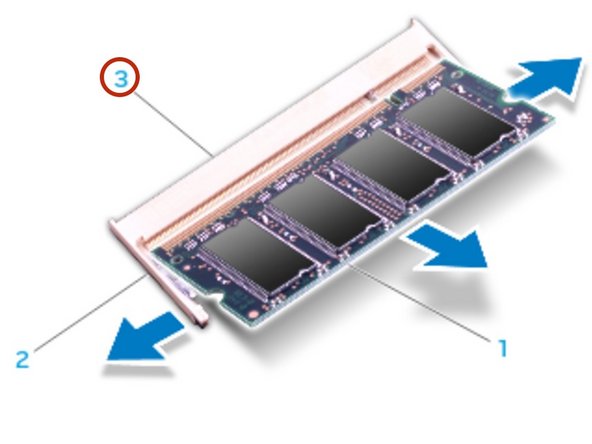
  3. Dell Alienware M17x R2 Memory Modules Replacement, Popping up the Memory Module: passo 3, immagine 1 di 3 Dell Alienware M17x R2 Memory Modules Replacement, Popping up the Memory Module: passo 3, immagine 2 di 3 Dell Alienware M17x R2 Memory Modules Replacement, Popping up the Memory Module: passo 3, immagine 3 di 3
    • CAUTION: If you need to remove memory modules from both connectors, remove the memory module in the upper connector before you remove the module in the lower connector.

    • Use your fingertips to carefully spread apart the spring-locks on the memory module connector until the module pops up.

  4. Dell Alienware M17x R2 Memory Modules Replacement, Removing the Memory Module: passo 4, immagine 1 di 1
    • Remove the memory module.

  5. Dell Alienware M17x R2 Memory Modules Replacement, Align the Notch: passo 5, immagine 1 di 2 Dell Alienware M17x R2 Memory Modules Replacement, Align the Notch: passo 5, immagine 2 di 2
    • CAUTION: If you need to install memory modules in two connectors, install a memory module in the lower connector before you install a module in the upper connector

    • Align the notch on the NEW memory module with the tab on the memory module connector.

  6. Dell Alienware M17x R2 Memory Modules Replacement, Inserting the Memory Module: passo 6, immagine 1 di 2 Dell Alienware M17x R2 Memory Modules Replacement, Inserting the Memory Module: passo 6, immagine 2 di 2
    • Insert the module into the memory module connector at a 45-degree angle, and press the module down until it clicks into place. If you do not hear the click, remove the module and reinstall it.

    • CAUTION: If the memory module door is difficult to close, remove the memory module and reinstall it. Forcing the memory module door to close may damage your computer.

    • NOTE: If the memory module is not installed properly, the computer may not boot.

Conclusione

To reassemble your device, follow these instructions in reverse order.

Terrence15

Membro da: 12/18/17

79.121 Reputazione

441 Guide realizzate

Team

RampUP America, Inc. Membro di RampUP America, Inc.

Community

42 Membri

1.985 Guide realizzate

0 Commenti

Aggiungi Commento

Visualizza Statistiche:

Ultime 24 Ore: 1

Ultimi 7 Giorni: 4

Ultimi 30 Giorni: 8

Tutti i Tempi: 693