Salta al contenuto principale

DeWalt DWD112 Chuck Replacement

Cosa ti serve

  1. DeWalt DWD112 Chuck Replacement, Chuck: passo 1, immagine 1 di 1
    • Remove seven TR20 Torx Security screws from the side of the drill.

  2. DeWalt DWD112 Chuck Replacement: passo 2, immagine 1 di 1
    • Remove the top cover to reveal the inside of the drill.

    • Set the top cover of the drill aside.

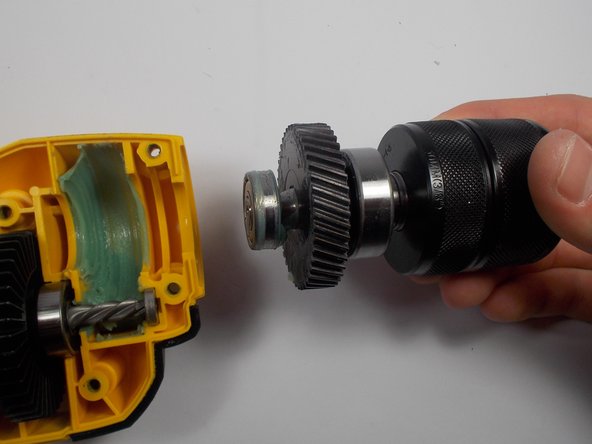
  3. DeWalt DWD112 Chuck Replacement: passo 3, immagine 1 di 3 DeWalt DWD112 Chuck Replacement: passo 3, immagine 2 di 3 DeWalt DWD112 Chuck Replacement: passo 3, immagine 3 di 3
    • Take note of the gears meshed together.

    • Grab the metal chuck by the rotating spindle as if you are to tighten in a drill bit.

    • Remove the chuck assembly from the drill.

Conclusione

To reassemble your device, follow these instructions in reverse order.

Un'altra persona ha completato questa guida.

Team

Un commento

Or actually read the manual, and find you can use an allen wrench with no dissasembly at all.

Ian Stirling - Replica

Aggiungi Commento

Visualizza Statistiche:

Ultime 24 Ore: 3

Ultimi 7 Giorni: 7

Ultimi 30 Giorni: 28

Tutti i Tempi: 2,741