Salta al contenuto principale

DeWalt DW936 Trigger Replacement

Cosa ti serve

  1. DeWalt DW936 Trigger Replacement, Plastic Cover: passo 1, immagine 1 di 1
    • Use a T-20 hexhead screw to unscrew 4 hexagonal screws surrounding the base of the black air filter. The screws are on the yellow portion.

  2. DeWalt DW936 Trigger Replacement: passo 2, immagine 1 di 1
    • Use a T-15 hexhead screw to unscrew 5 hexagonal screws. These screws are located on the opposite side of the saw from previous step.

  3. DeWalt DW936 Trigger Replacement: passo 3, immagine 1 di 1
    • Remove Allen Key.

  4. DeWalt DW936 Trigger Replacement: passo 4, immagine 1 di 1
    • Unscrew the black plastic knob underneath the trigger.

  5. DeWalt DW936 Trigger Replacement: passo 5, immagine 1 di 1
    • Grab hold of the black air filter portion and pull off.

  6. DeWalt DW936 Trigger Replacement: passo 6, immagine 1 di 1
    • This is what the inside of the saw looks like.

  7. DeWalt DW936 Trigger Replacement, Trigger: passo 7, immagine 1 di 1
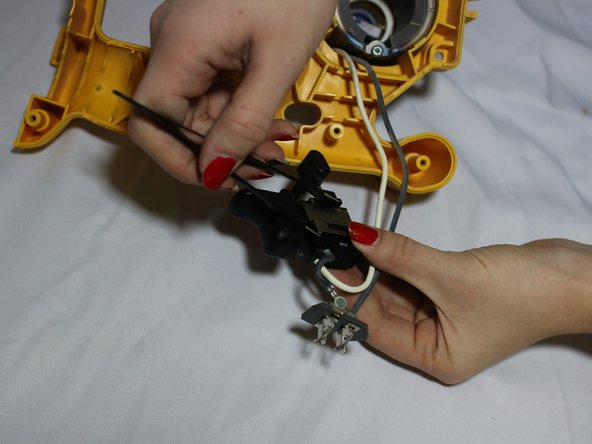
    • The trigger has black and white wires coming off of it. Grip the trigger with both hands, one on the plastic trigger part and the other on the plastic by the silver metal piece.

    • Pull up.

  8. DeWalt DW936 Trigger Replacement: passo 8, immagine 1 di 1
    • The trigger should be able to sit freely.

  9. DeWalt DW936 Trigger Replacement: passo 9, immagine 1 di 2 DeWalt DW936 Trigger Replacement: passo 9, immagine 2 di 2
    • Lift off the silver metal piece using tweezers.

    • Lift off each hook. (4 corners)

  10. DeWalt DW936 Trigger Replacement: passo 10, immagine 1 di 1
    • Pull plastic trigger out of the black plastic casing.

Conclusione

To reassemble your device, follow these instructions in reverse order.

Altre 2 persone hanno completato questa guida.

Team

Cal Poly, Team 8-2, Banghart Winter 2017 Membro di Cal Poly, Team 8-2, Banghart Winter 2017

CPSU-BANGHART-W17S8G2

3 Membri

5 Guide realizzate

Un commento

Then repair trigger by stripping,cleaning,soldering and whatever else before replacing to unit as you can no longer buy the part as it is obsolete!

donald.mcguinnes - Replica

Aggiungi Commento

Visualizza Statistiche:

Ultime 24 Ore: 0

Ultimi 7 Giorni: 5

Ultimi 30 Giorni: 10

Tutti i Tempi: 689