Salta al contenuto principale

DeWalt D28110 Power Cord Replacement

Cosa ti serve

  1. DeWalt D28110 Power Cord Replacement, Disassembling DeWalt D28110 Back Panel Disassembly: passo 1, immagine 1 di 1
    • Using the T-15 screwdriver, remove the four 22-mm torx screws holding the back panel in place.

    • Unplug the grinder before any disassembly.

  2. DeWalt D28110 Power Cord Replacement: passo 2, immagine 1 di 1
    • Use the edge of the spudger to loosen and remove the back panel.

  3. DeWalt D28110 Power Cord Replacement: passo 3, immagine 1 di 1
    • Remove the single 20-mm torx screw holding the rear panel in place.

  4. DeWalt D28110 Power Cord Replacement: passo 4, immagine 1 di 1
    • Pull back the rear side of the back panel.

  5. DeWalt D28110 Power Cord Replacement, Power Cord: passo 5, immagine 1 di 3 DeWalt D28110 Power Cord Replacement, Power Cord: passo 5, immagine 2 di 3 DeWalt D28110 Power Cord Replacement, Power Cord: passo 5, immagine 3 di 3
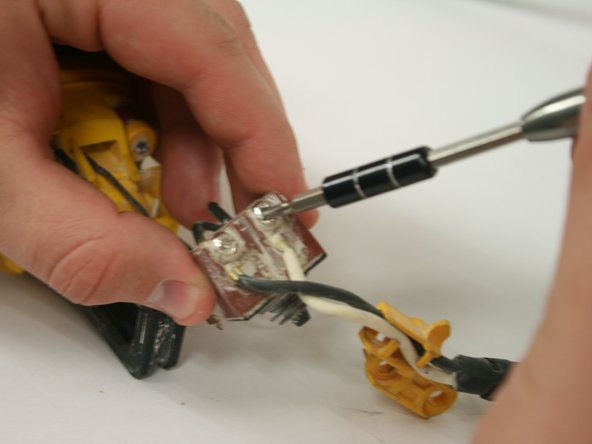
    • Locate the red switch box.

    • Using the J-10 screwdriver, unscrew the screws and detach the wires.

    • Be sure to remember under which screw the "ground" wire (black) goes.

  6. DeWalt D28110 Power Cord Replacement: passo 6, immagine 1 di 1
    • Unthread the two wires from the power cord clamp.

Conclusione

To reassemble your device, follow these instructions in reverse order.

Andrew

Membro da: 01/22/15

270 Reputazione

1 Guida realizzata

Team

Cal Poly, Team 18-6, Maness Winter 2015 Membro di Cal Poly, Team 18-6, Maness Winter 2015

CPSU-MANESS-W15S18G6

5 Membri

7 Guide realizzate

0 Commenti

Aggiungi Commento

Visualizza Statistiche:

Ultime 24 Ore: 1

Ultimi 7 Giorni: 4

Ultimi 30 Giorni: 11

Tutti i Tempi: 1,760