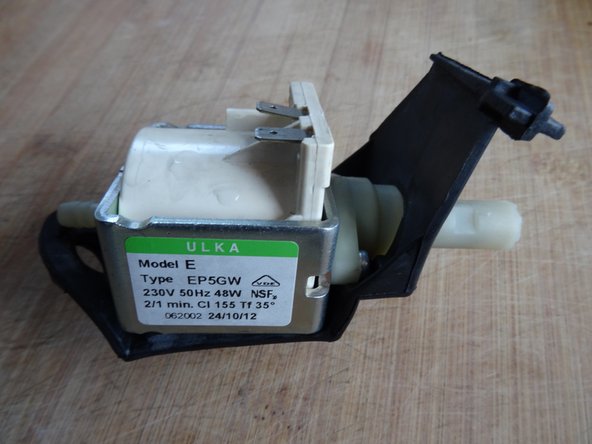
Salta al contenuto principale

DeLonghi ECAM series pump replacement

Cosa ti serve

  1. DeLonghi ECAM series pump replacement, DeLonghi ECAM back panel removal: passo 1, immagine 1 di 1
    • Unplug the power cord!

    • Remove all attachments such as water tank, pulp drawer, brew group.

    • Turn the machine with the back facing you.

    • Remove five Torx T20 security screws.

    • A small hurdle: These screws have a pin in the middle, so the screwdriver must have a hole.

  2. DeLonghi ECAM series pump replacement: passo 2, immagine 1 di 2 DeLonghi ECAM series pump replacement: passo 2, immagine 2 di 2
    • Lift out the back.

    • The following components are immediately visible:

    • grinder

    • pump

    • flowmeter

  3. DeLonghi ECAM series pump replacement, DeLonghi ECAM Series left side panel: passo 3, immagine 1 di 3 DeLonghi ECAM series pump replacement, DeLonghi ECAM Series left side panel: passo 3, immagine 2 di 3 DeLonghi ECAM series pump replacement, DeLonghi ECAM Series left side panel: passo 3, immagine 3 di 3
    • Push the side panel back about 1.5 cm.

    • Lift off the panel.

    • The following compononents are exposed:

    • Heater

    • Expansion chamber

    • Gear drive

    • Steam valve

  4. DeLonghi ECAM series pump replacement, Pump: passo 4, immagine 1 di 1
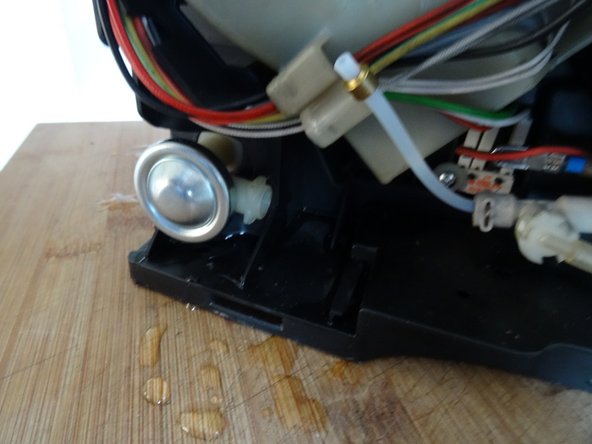
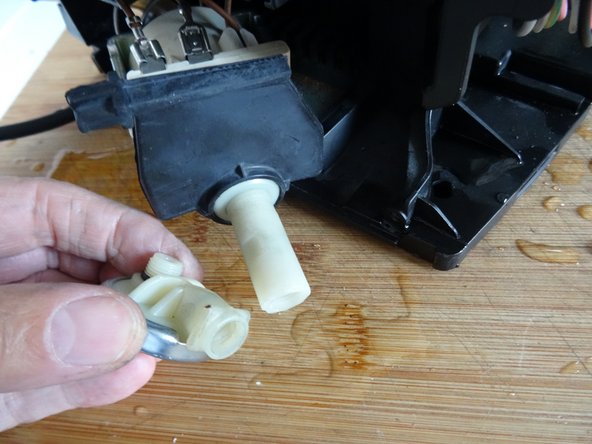
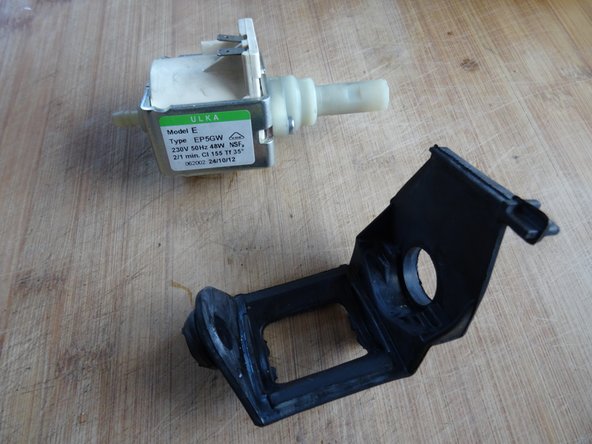
    • The pump is located on the back of the device. It is supported by a spring and a rubber surround.

  5. DeLonghi ECAM series pump replacement: passo 5, immagine 1 di 2 DeLonghi ECAM series pump replacement: passo 5, immagine 2 di 2
    • Pull out the metal clip at the outlet of the mebrand damper.

    • Pull off the pressure hose. There is an O-ring at the end of the hose, which is usually stuck in the connection. Replace it during reassembly.

  6. DeLonghi ECAM series pump replacement: passo 6, immagine 1 di 2 DeLonghi ECAM series pump replacement: passo 6, immagine 2 di 2
    • Pull the pump out to the rear.

    • Unscrew the diaphragm damper counterclockwise.

  7. DeLonghi ECAM series pump replacement: passo 7, immagine 1 di 1
    • Disconnect the two flat connectors and the thermal protection switch.

  8. DeLonghi ECAM series pump replacement: passo 8, immagine 1 di 3 DeLonghi ECAM series pump replacement: passo 8, immagine 2 di 3 DeLonghi ECAM series pump replacement: passo 8, immagine 3 di 3
    • Detach the silicone hose on the left side and pull out the pump completely.

    • Remove the spring and the hose on the left side.

    • Detach the rubber holder.

Conclusione

Work through the steps in reverse order to reassemble your device.

Un ringraziamento speciale a questi traduttori:

de en

100%

oldturkey03 ci sta aiutando ad aggiustare il mondo! Vuoi partecipare?
Inizia a tradurre ›

VauWeh

Membro da: 10/19/15

203.663 Reputazione

246 Guide realizzate

Team

Repair is War on Entropy Membro di Repair is War on Entropy

Community

25 Membri

1.126 Guide realizzate

0 Commenti

Aggiungi Commento

Visualizza Statistiche:

Ultime 24 Ore: 1

Ultimi 7 Giorni: 43

Ultimi 30 Giorni: 151

Tutti i Tempi: 2,011