Introduzione
This guide will show how to take apart a D-Link DCS 936L Wi-Fi security camera and remove the motherboard using an opening tool and a Philips 00 screwdriver. There are not many loose pieces making this a quick process as long as you're careful.
Cosa ti serve
-
-
Place the camera upwards between your thumb and first finger.
-
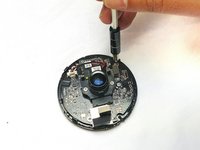
Tilt the camera to the best position and loosen the captive linings using a plastic opening tool.
-
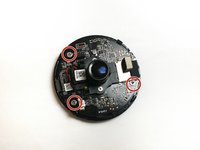
Slide the top cover outwards to separate the upper section from the lower lid using the plastic opening tool.
-
-


To reassemble your device, follow these instructions in reverse order.
Team

Idaho State University, Team S4-G2, Watkins Fall 2017 Membro di Idaho State University, Team S4-G2, Watkins Fall 2017
ISU-WATKINS-F17S4G2
3 Membri
10 Guide realizzate
1Commento della guida
Where can I get the replacement motherboard? Been trying to search online, but to no avail.