Salta al contenuto principale

CyberHome CH-DVD 300 Disc Tray Bracket Replacement

Cosa ti serve

  1. CyberHome CH-DVD 300 Disc Tray Bracket Replacement, Top Panel: passo 1, immagine 1 di 2 CyberHome CH-DVD 300 Disc Tray Bracket Replacement, Top Panel: passo 1, immagine 2 di 2
    • Turn the DVD player off. Unplugging the DVD player while it is on may result in damage to the DVD player or an inserted CD.

    • Unplug the DVD player from the wall socket.

    • Locate the 15mm Phillips screws on the left side (1 screw), right side (1 screw), and back (4 screws) of the DVD Player. Use the appropriate Phillips head screwdriver to remove the six screws.

  2. CyberHome CH-DVD 300 Disc Tray Bracket Replacement: passo 2, immagine 1 di 2 CyberHome CH-DVD 300 Disc Tray Bracket Replacement: passo 2, immagine 2 di 2
    • Remove the top panel of the DVD Player by:

    • Sliding the top panel backwards.

    • Gently lifting the back of the top panel up.

  3. CyberHome CH-DVD 300 Disc Tray Bracket Replacement, Disc Tray Bracket: passo 3, immagine 1 di 2 CyberHome CH-DVD 300 Disc Tray Bracket Replacement, Disc Tray Bracket: passo 3, immagine 2 di 2
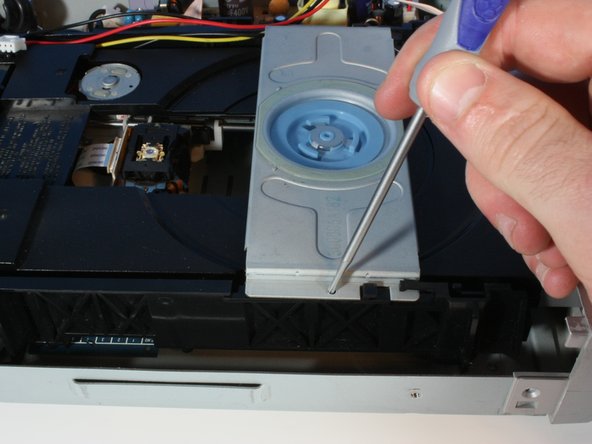
    • Remove the 6.3mm screws keeping the disc tray bracket connected to the disc tray.

  4. CyberHome CH-DVD 300 Disc Tray Bracket Replacement: passo 4, immagine 1 di 2 CyberHome CH-DVD 300 Disc Tray Bracket Replacement: passo 4, immagine 2 di 2
    • Lift up on the bracket by:

    • Sliding the disc tray bracket forward.

    • Lifting the back edge up.

Conclusione

To reassemble your device, follow these instructions in reverse order.

Altre 3 persone hanno completato questa guida.

Team

Cal Poly, Team 6-5, Forte Spring 2014 Membro di Cal Poly, Team 6-5, Forte Spring 2014

CPSU-FORTE-S14S6G5

5 Membri

5 Guide realizzate

0 Commenti

Aggiungi Commento

Visualizza Statistiche:

Ultime 24 Ore: 1

Ultimi 7 Giorni: 6

Ultimi 30 Giorni: 11

Tutti i Tempi: 4,129