Introduzione
This guide will allow you to replace a damaged rubber safety switch cover on your Cuisinart or Robot Coupe CFP 4, 5, 5A, 9, 9A, RC2000 and 2100 Food Processors with a new Silicone Version.
Is your Cuisinart CFP Safety Switch not working? This is very dangerous as the machine can turn on while you are inserting the blades. This happened to us. I called Cuisinart and Robot Coupe (French Version) to get replacement parts and was told that internal parts for these appliances were not available.
I took this project on to 3D model a new switch cover and have some 3D printed out of Silicone.
Over time the rubber cover for this safety switch gets warn out and then liquid can begin to leak down inside the machine. This can causes the safety switch to seize up. The switch can be cleaned and fixed but the switch cover needs to be replaced or the same problem will continue to happen again. The solution is to get a new Silicone Switch Cover. I am pretty sure that this cover will fit on all the early consumer French and USA Robot Coupe and Cuisinart Food Processors.
A comment from a satisfied customer: "Perfect - finally able to fix my old Robot-Coupe food processor (they don't make them like they used to). Thanks a million!!"
Cosa ti serve
-
-
Turn your food processor motor base upside down on a work surface. Remove the two flat head screws, which are on the underside of the case just below the product name on the front of the food processor. You will need a thin flat bladed screwdriver.
-
-
-
Carefully separate the motor housing case, first from the side where you removed the two flat head screws. Then gently pivot this front edge and you should be able to carefully open and separate the tabs on the back side of the bottom of the motor cover case. Be careful not to break these plastic tabs. Set this piece aside for reassembly.
-
-
-
Use the same thin flat blade screwdriver to remove both of the screws, which are holding the safety switch in place.
-
-
-
Lift up and check your safety switch. Its possible that your safety switch may be seized up. Check that it is working smoothly. If it needs cleaning, you can separate it from the machine wiring (make a note of the color of each of the wires that are connected to the switch). Taking a photo with your phone is a good idea here.
-
The switch is connected with simple automotive push on wire connectors. You can use your screwdriver to help pry these push on connectors apart from the switch connection points.
-
The switch can be removed from the metal mounting plate by unscrewing the brass nut with a small Crescent wrench or pliers.
-
Carefully separate the switch into two halves being careful not to loose any of the internal copper springs and plates. A small flat bladed screwdriver can help to pry the switch apart. Taking another phone photo here is also a good idea so you can get these small parts back into their original positions.
-
Clean the push button part of the switch with a bit of emery cloth to make sure it is moving smoothly inside its tube. Once cleaned, carefully snap the switch back together. Then reattach the motor wiring push on connectors to the switch.
-
-
-
-
Grab the Safety Switch Cover holder with your fingers and wiggle a bit to remove it from the motor housing.
-
Separate the Safety Switch holder from the old rubber switch cover. Keep this clear plastic part, you will be re-installing this.
-
-
-
With a damp piece of paper towel, clean the safety switch cover mounting area. Then dry with another piece of paper towel.
-
-
-
Insert your new Silicon Safety Switch Cover onto the clear plastic holder. The "V" notches should face towards the switch push button.
-
Then replace this holder with Silicone Switch cover back into the motor housing.
-
-
-
Re-Install your safety switch with the two flat head screws.
-
-
-
Carefully align the plastic tabs at the back of the motor cover case and reassemble the two case haves. Then you can insert and tighten the two flat head screws under the front cover.
-
-
-
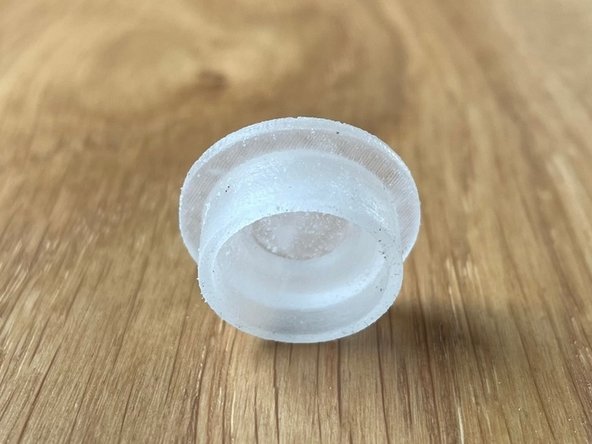
Photos of the new 3D Printed Silicone Safety Switch Cover.
-


To reassemble your device, follow these instructions in reverse order.
To reassemble your device, follow these instructions in reverse order.
Annulla: non ho completato questa guida.
Altre 2 persone hanno completato questa guida.
