Salta al contenuto principale

Creative Ziio 7" Right Speaker Replacement

Cosa ti serve

  1. Creative Ziio 7" Right Speaker Replacement, Back Panel: passo 1, immagine 1 di 3 Creative Ziio 7" Right Speaker Replacement, Back Panel: passo 1, immagine 2 di 3 Creative Ziio 7" Right Speaker Replacement, Back Panel: passo 1, immagine 3 di 3
    • Remove the back panel by using the plastic opening tool to carefully pry around the panel's edges.

    • The volume control button and the top power button may fall out during this step.

  2. Creative Ziio 7" Right Speaker Replacement, Right Speaker: passo 2, immagine 1 di 1
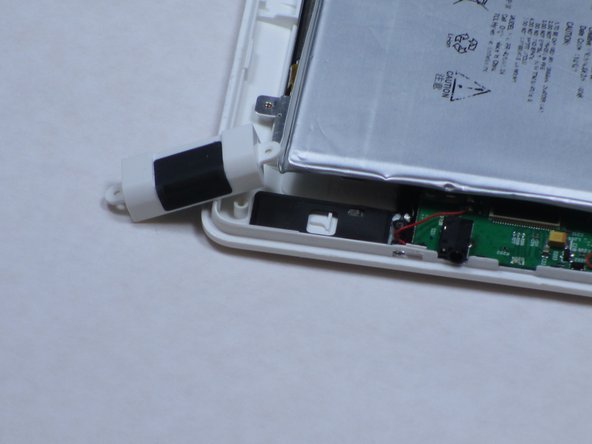
    • The right speaker is directly below the battery as shown.

    • Remove the two 4mm Phillips #00 screws found in the speaker at the bottom left corner of the device.

  3. Creative Ziio 7" Right Speaker Replacement: passo 3, immagine 1 di 2 Creative Ziio 7" Right Speaker Replacement: passo 3, immagine 2 di 2
    • Once the screws are removed, discard the broken speaker.

    • Replace the broken speaker with a new right speaker.

Conclusione

To reassemble your device, follow these instructions in reverse order.

Un'altra persona ha completato questa guida.

Bryce Simmons

Membro da: 04/16/13

147 Reputazione

2 Guide realizzate

Team

Cal Poly, Team 14-10, Maness Spring 2013 Membro di Cal Poly, Team 14-10, Maness Spring 2013

CPSU-MANESS-S13S14G10

4 Membri

13 Guide realizzate

0 Commenti

Aggiungi Commento

Visualizza Statistiche:

Ultime 24 Ore: 0

Ultimi 7 Giorni: 0

Ultimi 30 Giorni: 0

Tutti i Tempi: 170