Salta al contenuto principale

Questa guida ha delle modifiche più recenti. Passa all'ultima versione non verificata.

Creative Ziio 7" Camera Replacement

Cosa ti serve

  1. Creative Ziio 7" Camera Replacement, Back Panel: passo 1, immagine 1 di 3 Creative Ziio 7" Camera Replacement, Back Panel: passo 1, immagine 2 di 3 Creative Ziio 7" Camera Replacement, Back Panel: passo 1, immagine 3 di 3
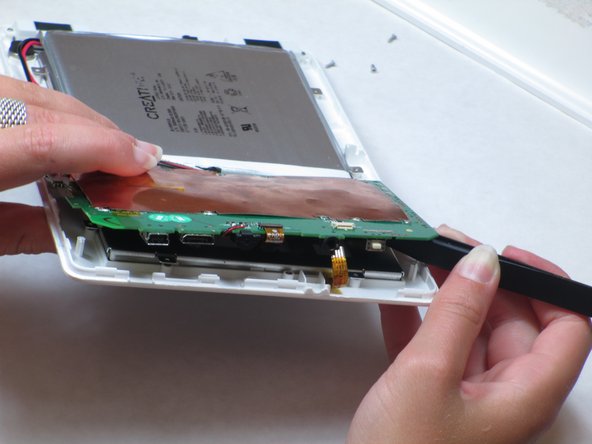
    • Remove the back panel by using the plastic opening tool to carefully pry around the panel's edges.

    • The volume control button and the top power button may fall out during this step.

  2. Creative Ziio 7" Camera Replacement, Camera: passo 2, immagine 1 di 3 Creative Ziio 7" Camera Replacement, Camera: passo 2, immagine 2 di 3 Creative Ziio 7" Camera Replacement, Camera: passo 2, immagine 3 di 3
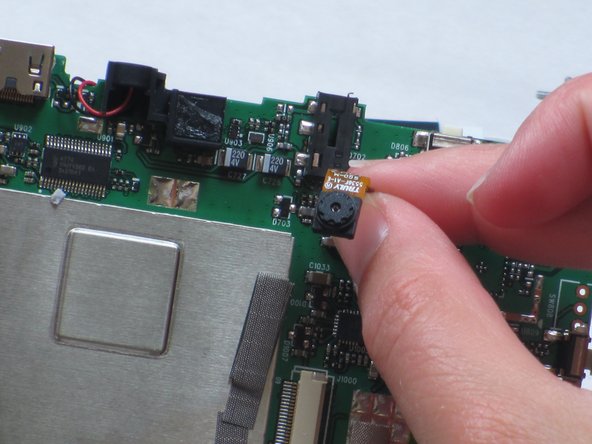
    • Unscrew the four 3mm Phillips #00 screws found in each corner of the motherboard.

  3. Creative Ziio 7" Camera Replacement: passo 3, immagine 1 di 3 Creative Ziio 7" Camera Replacement: passo 3, immagine 2 di 3 Creative Ziio 7" Camera Replacement: passo 3, immagine 3 di 3
    • Unplug the ribbon cable that is connected near the edge of the motherboard, located in the bottom right of the device.

  4. Creative Ziio 7" Camera Replacement: passo 4, immagine 1 di 2 Creative Ziio 7" Camera Replacement: passo 4, immagine 2 di 2
    • Lift up the motherboard.

    • A mesh-like strip on the right side will be connected to the bottom of the motherboard.

    • Remove the tape on top of the strip. Use tweezers or pliers to pull on the strip and unplug it.

  5. Creative Ziio 7" Camera Replacement: passo 5, immagine 1 di 2 Creative Ziio 7" Camera Replacement: passo 5, immagine 2 di 2
    • Completely lift up the motherboard and locate the ribbon cable (burnt orange-colored strip) centered on top of the motherboard.

    • The ribbon cable with the attached camera is plugged into the motherboard.

    • To unplug the ribbon cable, use your fingers to pull up on the flap.

  6. Creative Ziio 7" Camera Replacement: passo 6, immagine 1 di 2 Creative Ziio 7" Camera Replacement: passo 6, immagine 2 di 2
    • Use a spudger to pry the camera away from the rubber camera mount.

    • Do not remove the entire rubber camera mount. Only remove the camera attached with adhesive.

    • Remove the broken camera and use electronic-friendly adhesive to attach a new camera.

Conclusione

To reassemble your device, follow these instructions in reverse order.

Un'altra persona ha completato questa guida.

Team

Cal Poly, Team 14-10, Maness Spring 2013 Membro di Cal Poly, Team 14-10, Maness Spring 2013

CPSU-MANESS-S13S14G10

4 Membri

13 Guide realizzate

0 Commenti

Aggiungi Commento

Visualizza Statistiche:

Ultime 24 Ore: 0

Ultimi 7 Giorni: 2

Ultimi 30 Giorni: 2

Tutti i Tempi: 332