Salta al contenuto principale

Google Cr-48 Chromebook RAM Replacement

Cosa ti serve

  1. Google Cr-48 Chromebook RAM Replacement, Battery: passo 1, immagine 1 di 3 Google Cr-48 Chromebook RAM Replacement, Battery: passo 1, immagine 2 di 3 Google Cr-48 Chromebook RAM Replacement, Battery: passo 1, immagine 3 di 3
    • Slide the switch on the bottom of the laptop until the battery pops out.

    • Once the battery pops out, you can remove it.

  2. Google Cr-48 Chromebook RAM Replacement, Remove Rear Rubber Feet: passo 2, immagine 1 di 2 Google Cr-48 Chromebook RAM Replacement, Remove Rear Rubber Feet: passo 2, immagine 2 di 2
    • Using a pair of tweezers, remove the two rear rubber feet to expose two hidden screws.

  3. Google Cr-48 Chromebook RAM Replacement, Remove Screws: passo 3, immagine 1 di 3 Google Cr-48 Chromebook RAM Replacement, Remove Screws: passo 3, immagine 2 di 3 Google Cr-48 Chromebook RAM Replacement, Remove Screws: passo 3, immagine 3 di 3
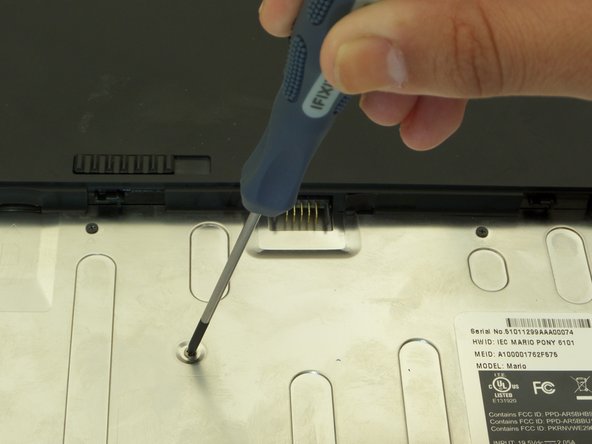
    • Remove ten 3 mm screws in the battery compartment using a Phillips #00 screwdriver.

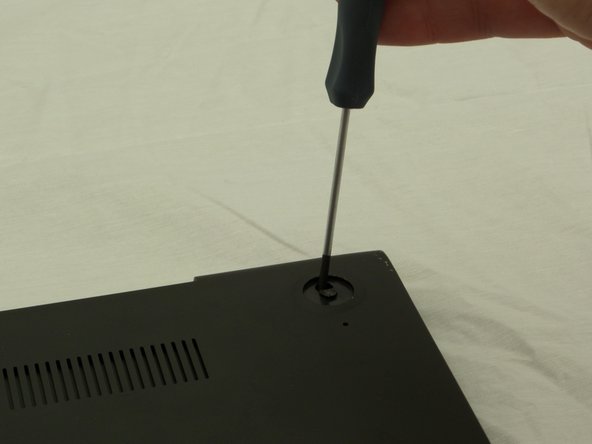
    • Remove two 4.5 mm screws under the rubber feet using a Phillips #00 screwdriver.

  4. Google Cr-48 Chromebook RAM Replacement: passo 4, immagine 1 di 3 Google Cr-48 Chromebook RAM Replacement: passo 4, immagine 2 di 3 Google Cr-48 Chromebook RAM Replacement: passo 4, immagine 3 di 3
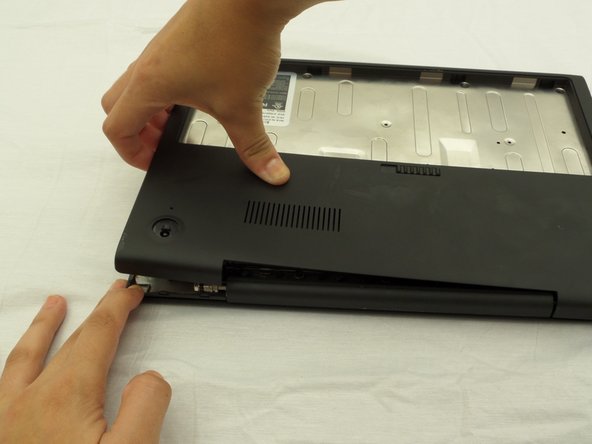
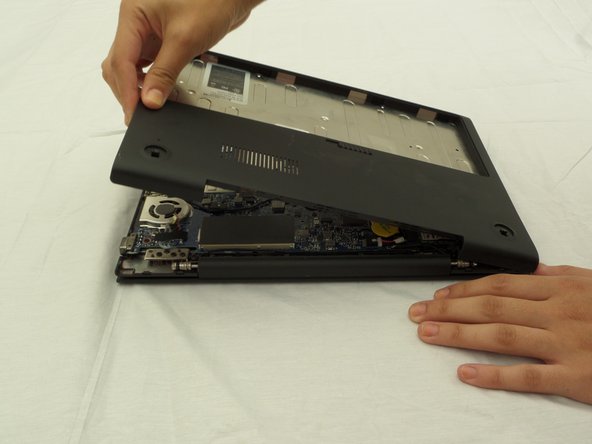
    • Starting where the body of the laptop and the laptop screen meet, pry apart the lower case from the rest of the laptop.

    • The case is easier to remove when separating in a clockwise motion, as seen in the pictures.

  5. Google Cr-48 Chromebook RAM Replacement, RAM: passo 5, immagine 1 di 3 Google Cr-48 Chromebook RAM Replacement, RAM: passo 5, immagine 2 di 3 Google Cr-48 Chromebook RAM Replacement, RAM: passo 5, immagine 3 di 3
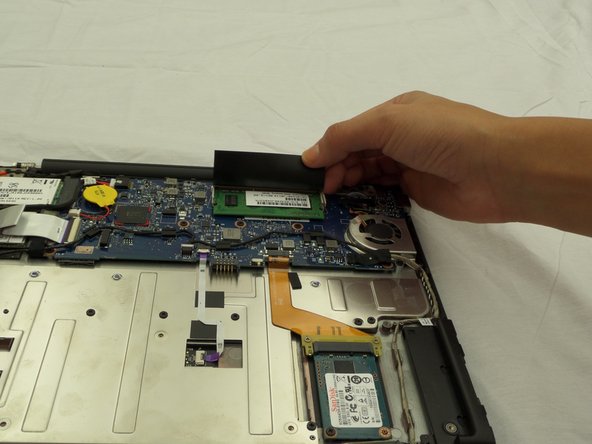
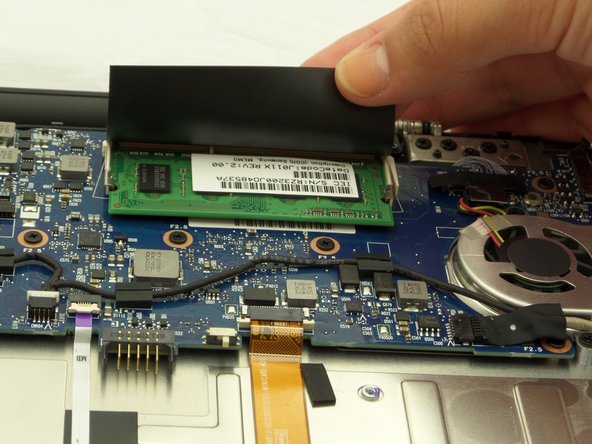
    • Locate the RAM under a black flap alongside where the laptop screen and device body meet.

  6. Google Cr-48 Chromebook RAM Replacement: passo 6, immagine 1 di 3 Google Cr-48 Chromebook RAM Replacement: passo 6, immagine 2 di 3 Google Cr-48 Chromebook RAM Replacement: passo 6, immagine 3 di 3
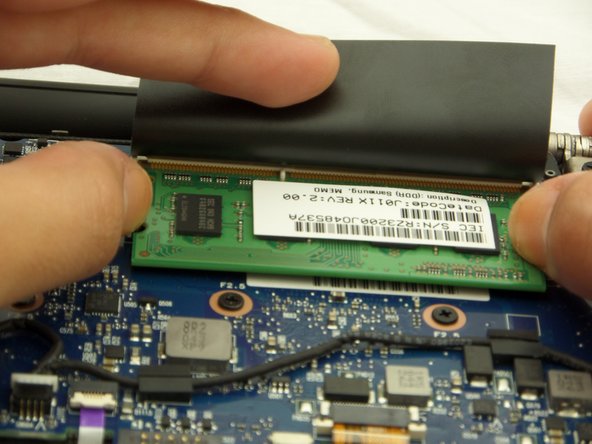
    • Using your thumbs, pull the metal arms away from the RAM and then the RAM card should pop up.

  7. Google Cr-48 Chromebook RAM Replacement: passo 7, immagine 1 di 2 Google Cr-48 Chromebook RAM Replacement: passo 7, immagine 2 di 2
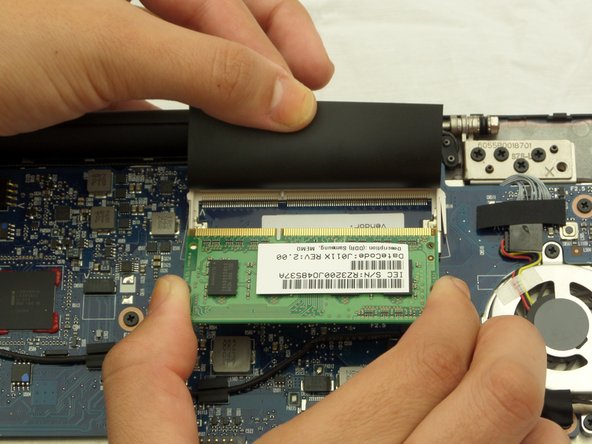
    • Use two fingers to slide the RAM out at the angle that it has been released.

    • Be careful when removing or replacing the RAM sticks that you don't bend the pins or they won't attach properly to the socket.

Conclusione

To reassemble your device, follow these instructions in reverse order.

Altre 2 persone hanno completato questa guida.

Athar

Membro da: 09/09/14

365 Reputazione

2 Guide realizzate

Team

CSU Fullerton, Team 2-2, Bruce Fall 2014 Membro di CSU Fullerton, Team 2-2, Bruce Fall 2014

CSUF-BRUCE-F14S2G2

3 Membri

10 Guide realizzate

0 Commenti

Aggiungi Commento

Visualizza Statistiche:

Ultime 24 Ore: 0

Ultimi 7 Giorni: 2

Ultimi 30 Giorni: 11

Tutti i Tempi: 1,937