Salta al contenuto principale

Coby DVD209 DVD Laser Reader Replacement

Cosa ti serve

  1. Coby DVD209 DVD Laser Reader Replacement, The bottom portion of the DVD player: passo 1, immagine 1 di 3 Coby DVD209 DVD Laser Reader Replacement, The bottom portion of the DVD player: passo 1, immagine 2 di 3 Coby DVD209 DVD Laser Reader Replacement, The bottom portion of the DVD player: passo 1, immagine 3 di 3
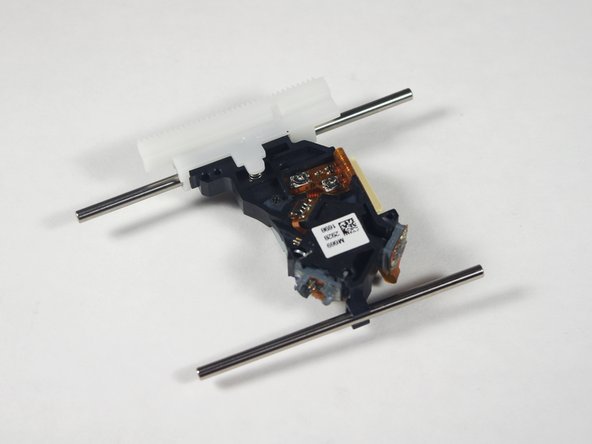
    • Press the eject button to view the laser inside.

    • Using the blue plastic tool and the tweezers, remove the ribbon cable.

  2. Coby DVD209 DVD Laser Reader Replacement: passo 2, immagine 1 di 3 Coby DVD209 DVD Laser Reader Replacement: passo 2, immagine 2 di 3 Coby DVD209 DVD Laser Reader Replacement: passo 2, immagine 3 di 3
    • Remove the six 1cm screws on the bottom of the device with the Phillips #1 screwdriver.

    • Do not lift the top of the DVD player too quickly because there are wires attached on the inside.

    • Pry the top of the device open from the right side where the buttons are located.

  3. Coby DVD209 DVD Laser Reader Replacement: passo 3, immagine 1 di 3 Coby DVD209 DVD Laser Reader Replacement: passo 3, immagine 2 di 3 Coby DVD209 DVD Laser Reader Replacement: passo 3, immagine 3 di 3
    • When pulling the ribbon cables out, make sure not to pull by the wires, as this can cause damage to them.

    • Pinch the plastic adapter with two fingers to remove the wires circled in red from the circuit board.

  4. Coby DVD209 DVD Laser Reader Replacement, DVD Laser Reader: passo 4, immagine 1 di 2 Coby DVD209 DVD Laser Reader Replacement, DVD Laser Reader: passo 4, immagine 2 di 2
    • Remove the two 6.35mm screws circled in black with a #1 Philips head screwdriver.

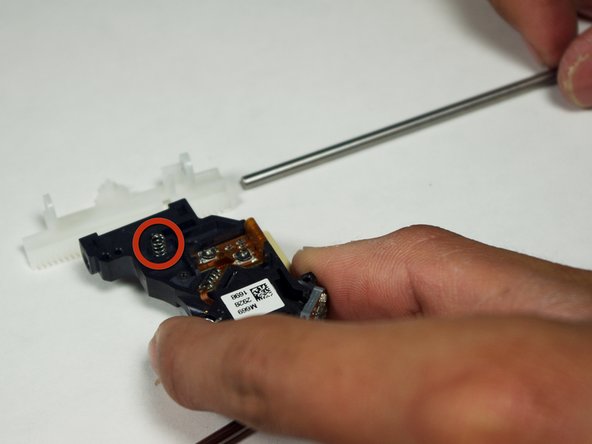
    • Remove one 4mm screw circled in red with a #1 Philips head screwdriver.

  5. Coby DVD209 DVD Laser Reader Replacement: passo 5, immagine 1 di 3 Coby DVD209 DVD Laser Reader Replacement: passo 5, immagine 2 di 3 Coby DVD209 DVD Laser Reader Replacement: passo 5, immagine 3 di 3
    • There are three small 4.5mm springs that can be easily lost. Be careful when lifting up the railing assembly to make sure you don't lose them.

    • The location of the springs are circled.

    • Using two plastic tool removers, lift the two rails up at an angle. Keep the rods angled as shown.

    • The rail at the top of the picture is 82mm and the rail at the bottom of the picture is 65mm.

  6. Coby DVD209 DVD Laser Reader Replacement: passo 6, immagine 1 di 2 Coby DVD209 DVD Laser Reader Replacement: passo 6, immagine 2 di 2
    • Be careful not to lose the spring at the top of the laser.

    • Lift the laser assembly out of the fixture.

  7. Coby DVD209 DVD Laser Reader Replacement: passo 7, immagine 1 di 3 Coby DVD209 DVD Laser Reader Replacement: passo 7, immagine 2 di 3 Coby DVD209 DVD Laser Reader Replacement: passo 7, immagine 3 di 3
    • Remove the rails from the disk reader.

    • Once the top rail is removed, the white gear will come off and under it will be one of the springs.

Conclusione

To reassemble your device, follow these instructions in reverse order.

Un'altra persona ha completato questa guida.

Yufay Chow

Membro da: 01/23/12

92 Reputazione

4 Guide realizzate

Team

Cal Poly, Team 10-36, Amido Winter 2012 Membro di Cal Poly, Team 10-36, Amido Winter 2012

CPSU-AMIDO-W12S10G36

4 Membri

7 Guide realizzate

0 Commenti

Aggiungi Commento

Visualizza Statistiche:

Ultime 24 Ore: 0

Ultimi 7 Giorni: 1

Ultimi 30 Giorni: 1

Tutti i Tempi: 815