Salta al contenuto principale
Cleaning the Controller Buttons

Cleaning the Controller Buttons

Jason Gittler

Jason Gittler e 9 altri collaboratori

Ultimo aggiornamento il March 1, 2016

40 minuti
Moderato

Introduzione

Vai al passo 1

You will learn how to take apart the necessary parts of the controller, how to clean the inside, and how certain parts are supposed to aligned or inserted into other parts.

Cosa ti serve

Strumenti

Mostra di più…

  1. Cleaning the Controller Buttons, Cleaning the Controller Buttons: passo 1, immagine 1 di 2 Cleaning the Controller Buttons, Cleaning the Controller Buttons: passo 1, immagine 2 di 2
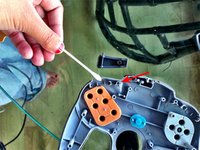
    • Remove the 9 external screws (4.8 mm Phillips head) on the back of the controller.

    • Remove the back panel from the controller.

  2. Cleaning the Controller Buttons: passo 2, immagine 1 di 3 Cleaning the Controller Buttons: passo 2, immagine 2 di 3 Cleaning the Controller Buttons: passo 2, immagine 3 di 3
    • Remove the 3 screws (4.8 mm Phillips head) from the back of the white box.

    • Remove the back panel of the joystick box.

    • There are many small plastic components loose in this box; be careful not to lose these.

    • Separate the rubber pads and plastic buttons from the controller.

  3. Cleaning the Controller Buttons: passo 3, immagine 1 di 2 Cleaning the Controller Buttons: passo 3, immagine 2 di 2
    • Using a soft cleaning material, clean the plastic buttons.

    • Using a toothpick, clean the pole slot, shown at the right of the Q-Tip.

  4. Cleaning the Controller Buttons: passo 4, immagine 1 di 2 Cleaning the Controller Buttons: passo 4, immagine 2 di 2
    • Using a damp, soft cleaning material, clean the rubber button pads.

    • To ensure that no electrical damage occurs, ensure that you dry the pieces completely after cleaning them.

  5. Cleaning the Controller Buttons, Put it back together: passo 5, immagine 1 di 1
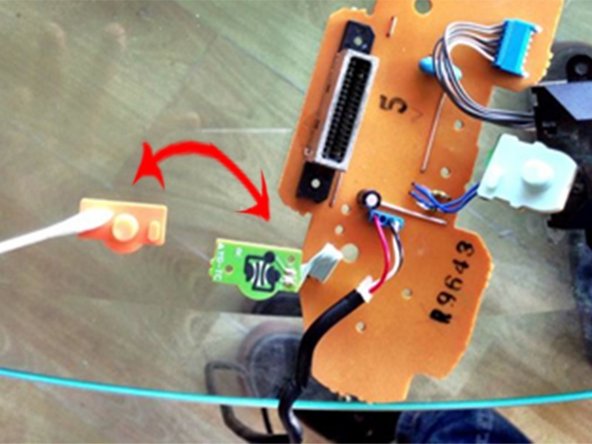
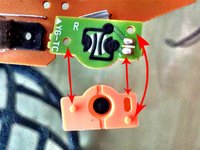
    • Reinsert the buttons, ensuring that the rubber, cylindrical pieces protruding from the buttons are lined up with their corresponding circuits.

Conclusione

Follow these steps in reverse order to reassemble your device.

Altre 7 persone hanno completato questa guida.

0Commenti sulla guida

Aggiungi Commento

Visualizza Statistiche:

Ultime 24 Ore: 0

Ultimi 7 Giorni: 4

Ultimi 30 Giorni: 16

Tutti i Tempi: 5,926