Salta al contenuto principale

Cisco 7945G IP Phone | Disassembly | Keys, handset hook, etc. Replacement

Cosa ti serve

  1. Cisco 7945G IP Phone | Disassembly | Keys, handset hook, etc. Replacement, Disconnect handset and stand: passo 1, immagine 1 di 1
    • Flip the phone over. Disconnect all wires. Detach a stand. To do it, you need to squeeze two latches that hold the stand. You may need to use a screwdriver or something else to push them

  2. Cisco 7945G IP Phone | Disassembly | Keys, handset hook, etc. Replacement, Remove screws that hold back.: passo 2, immagine 1 di 3 Cisco 7945G IP Phone | Disassembly | Keys, handset hook, etc. Replacement, Remove screws that hold back.: passo 2, immagine 2 di 3 Cisco 7945G IP Phone | Disassembly | Keys, handset hook, etc. Replacement, Remove screws that hold back.: passo 2, immagine 3 di 3
    • Remove two visible screws on the upper part of the phone.

    • Two screws on the bottom are covered with a rubber feet.

    • Fifth screw is hidden under the handset hook. Use star screwdriver to remove it.

  3. Cisco 7945G IP Phone | Disassembly | Keys, handset hook, etc. Replacement, Remove back cover: passo 3, immagine 1 di 1
    • Removing back part may be tricky... Bottom part may come off easily *after screws removed, however top part has hooks.

    • You may need to try to "shift" back part down, or try to pray it so front part goes up.

  4. Cisco 7945G IP Phone | Disassembly | Keys, handset hook, etc. Replacement, Disconnecting a screen: passo 4, immagine 1 di 1
    • To remove flat cable, carefully push a gray lock, and then remove the ribbon cable.

  5. Cisco 7945G IP Phone | Disassembly | Keys, handset hook, etc. Replacement, Remove main board: passo 5, immagine 1 di 1
    • Disconnect all visible wires (microphone, speakerphone, and handset hook controls)

    • Remove all visible screws. Two screws on the top are smaller, so, you may use smaller fillips bit.

  6. Cisco 7945G IP Phone | Disassembly | Keys, handset hook, etc. Replacement, Clean rubber keypad elements: passo 6, immagine 1 di 2 Cisco 7945G IP Phone | Disassembly | Keys, handset hook, etc. Replacement, Clean rubber keypad elements: passo 6, immagine 2 di 2
    • Now you may clean a rubber button pad. If user spilled something on the phone, you may need to clean not just rubber part, but plastic buttons as well.

  7. Cisco 7945G IP Phone | Disassembly | Keys, handset hook, etc. Replacement, Clean handset hook area: passo 7, immagine 1 di 3 Cisco 7945G IP Phone | Disassembly | Keys, handset hook, etc. Replacement, Clean handset hook area: passo 7, immagine 2 di 3 Cisco 7945G IP Phone | Disassembly | Keys, handset hook, etc. Replacement, Clean handset hook area: passo 7, immagine 3 di 3
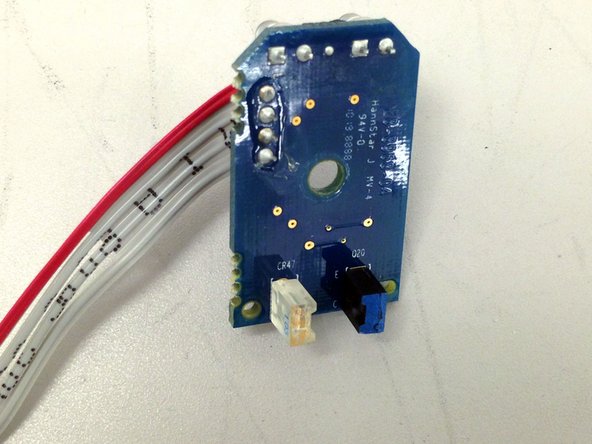
    • Remove one screw that holds a handset control board.

    • Unhook a spring that holds hook switch.

    • Clean the area.

  8. Cisco 7945G IP Phone | Disassembly | Keys, handset hook, etc. Replacement, Open and clean speaker: passo 8, immagine 1 di 3 Cisco 7945G IP Phone | Disassembly | Keys, handset hook, etc. Replacement, Open and clean speaker: passo 8, immagine 2 di 3 Cisco 7945G IP Phone | Disassembly | Keys, handset hook, etc. Replacement, Open and clean speaker: passo 8, immagine 3 di 3
    • Speaker box is covered with some kind of rubbery film. You may need to save it, as it improves sound.

    • There are four screws, one exposed, and three covered with rubber film.

    • After all four screws removed, pry and pull the speaker box cover. It has rubber gasket that may hold it in place.

  9. Cisco 7945G IP Phone | Disassembly | Keys, handset hook, etc. Replacement, Front part of the case with display: passo 9, immagine 1 di 1
    • After main board removed, display and all buttons are exposed.

  10. Cisco 7945G IP Phone | Disassembly | Keys, handset hook, etc. Replacement, Display with a touch screen: passo 10, immagine 1 di 1
    • Display with touch screen

  11. Cisco 7945G IP Phone | Disassembly | Keys, handset hook, etc. Replacement, Phone speaker: passo 11, immagine 1 di 1
    • Phone speaker

  12. Cisco 7945G IP Phone | Disassembly | Keys, handset hook, etc. Replacement, Cisco microphone: passo 12, immagine 1 di 1
    • Cisco IP Phone microphone. It installed in the soft rubber block.

Conclusione

To reassemble your device, follow these instructions in reverse order.

0 Commenti

Aggiungi Commento

Visualizza Statistiche:

Ultime 24 Ore: 2

Ultimi 7 Giorni: 13

Ultimi 30 Giorni: 28

Tutti i Tempi: 5,668