Salta al contenuto principale

Cineyo BT-03 Device Charging Port Replacement

Cosa ti serve

  1. Cineyo BT-03 Device Charging Port Replacement, Cineyo BT-03 Device Disassembly: passo 1, immagine 1 di 3 Cineyo BT-03 Device Charging Port Replacement, Cineyo BT-03 Device Disassembly: passo 1, immagine 2 di 3 Cineyo BT-03 Device Charging Port Replacement, Cineyo BT-03 Device Disassembly: passo 1, immagine 3 di 3
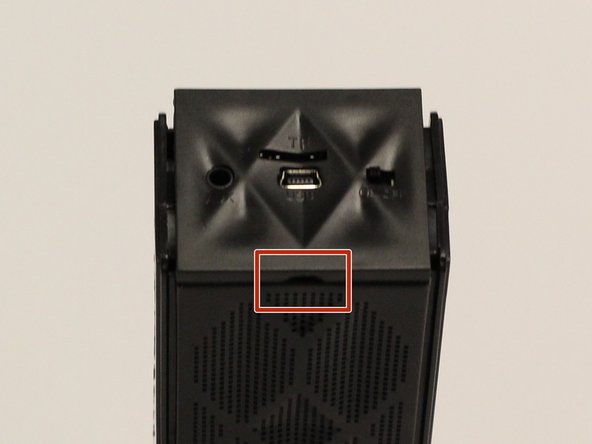
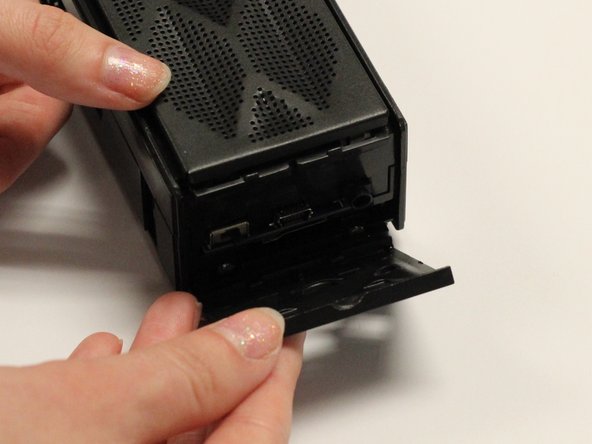
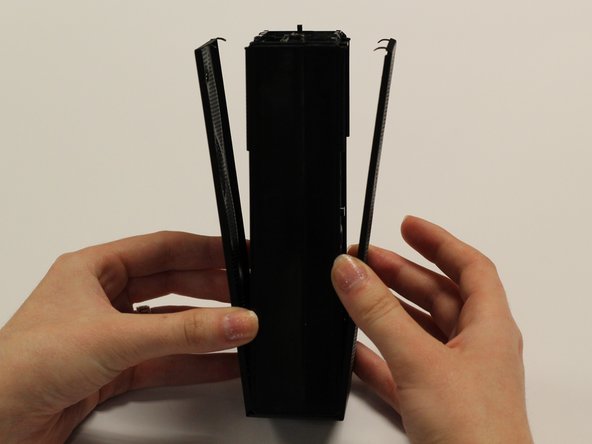
    • Remove the top (button side) rubber cover using your hands.

  2. Cineyo BT-03 Device Charging Port Replacement: passo 2, immagine 1 di 2 Cineyo BT-03 Device Charging Port Replacement: passo 2, immagine 2 di 2
    • Flip over the device and remove the bottom rubber cover using your hands.

  3. Cineyo BT-03 Device Charging Port Replacement: passo 3, immagine 1 di 3 Cineyo BT-03 Device Charging Port Replacement: passo 3, immagine 2 di 3 Cineyo BT-03 Device Charging Port Replacement: passo 3, immagine 3 di 3
    • Using your hands, pull off the plastic side cover (on the side with the audio jack) using the indented tab. The indented tab has been highlighted in the picture.

  4. Cineyo BT-03 Device Charging Port Replacement: passo 4, immagine 1 di 3 Cineyo BT-03 Device Charging Port Replacement: passo 4, immagine 2 di 3 Cineyo BT-03 Device Charging Port Replacement: passo 4, immagine 3 di 3
    • Detach the plastic speaker cover on both the front and back sides. Then slide the cover off of the device.

    • The cover should remain as one solid piece.

  5. Cineyo BT-03 Device Charging Port Replacement: passo 5, immagine 1 di 1
    • Remove the five 1 cm screws on the back side (opposite of the speakers) of the device using a Phillips #1 screwdriver.

  6. Cineyo BT-03 Device Charging Port Replacement: passo 6, immagine 1 di 1
    • Gently pull apart the two sections of the device.

  7. Cineyo BT-03 Device Charging Port Replacement, Charging Port: passo 7, immagine 1 di 1
    • Disconnect all wires from the top of the circuit board.

  8. Cineyo BT-03 Device Charging Port Replacement: passo 8, immagine 1 di 1
    • Using a small Philips head screwdriver, remove the two 5 mm screws from the main circuit board.

  9. Cineyo BT-03 Device Charging Port Replacement: passo 9, immagine 1 di 3 Cineyo BT-03 Device Charging Port Replacement: passo 9, immagine 2 di 3 Cineyo BT-03 Device Charging Port Replacement: passo 9, immagine 3 di 3
    • Use the soldering iron to melt the two contact points that attach the wires to the rear side of the circuit board.

    • This will require soldering off the wires connecting the bottom of the circuit board to the device. iFixit's Soldering Guide is available to aid in soldering.

  10. Cineyo BT-03 Device Charging Port Replacement: passo 10, immagine 1 di 2 Cineyo BT-03 Device Charging Port Replacement: passo 10, immagine 2 di 2
    • Remove the circuit board from the device.

  11. Cineyo BT-03 Device Charging Port Replacement: passo 11, immagine 1 di 1
    • Using a soldering iron, remove the charging port from the circuit board.

Conclusione

To reassemble your device, follow these instructions in reverse order.

Rene Klopf

Membro da: 01/30/17

463 Reputazione

4 Guide realizzate

Team

Baylor, Team 8-3, Whitney Spring 2017 Membro di Baylor, Team 8-3, Whitney Spring 2017

BU-WHITNEY-S17S8G3

5 Membri

5 Guide realizzate

0 Commenti

Aggiungi Commento

Visualizza Statistiche:

Ultime 24 Ore: 0

Ultimi 7 Giorni: 0

Ultimi 30 Giorni: 0

Tutti i Tempi: 136