Salta al contenuto principale

Canon ZR70MC Lens Replacement

Cosa ti serve

  1. Canon ZR70MC Lens Replacement, Front Panel: passo 1, immagine 1 di 2 Canon ZR70MC Lens Replacement, Front Panel: passo 1, immagine 2 di 2
    • Unscrew the 3.35mm screw.

  2. Canon ZR70MC Lens Replacement: passo 2, immagine 1 di 1
    • Turn the ZR70MC so that you can see the bottom of the camcorder.

    • Unscrew the 3.35 mm located in the top left portion of the camera.

  3. Canon ZR70MC Lens Replacement: passo 3, immagine 1 di 3 Canon ZR70MC Lens Replacement: passo 3, immagine 2 di 3 Canon ZR70MC Lens Replacement: passo 3, immagine 3 di 3
    • Turn the camera on the side and remove the cover for the audio inputs. There is a 2.65 mm screw located behind the cover.

    • Remove the 2.65 mm screw.

  4. Canon ZR70MC Lens Replacement: passo 4, immagine 1 di 3 Canon ZR70MC Lens Replacement: passo 4, immagine 2 di 3 Canon ZR70MC Lens Replacement: passo 4, immagine 3 di 3
    • Remove the cover located on the front of the camcorder and remove the cover by pulling on the bottom groove.

    • Locate and remove the two 3.35 mm screws.

  5. Canon ZR70MC Lens Replacement: passo 5, immagine 1 di 2 Canon ZR70MC Lens Replacement: passo 5, immagine 2 di 2
    • Turn the camcorder so that the bottom is facing up and open the tape cassette compartment.

    • There is one 3.35 mm screw located under the tape cassette panel on the front left side of the camcorder. Remove the screw.

  6. Canon ZR70MC Lens Replacement: passo 6, immagine 1 di 3 Canon ZR70MC Lens Replacement: passo 6, immagine 2 di 3 Canon ZR70MC Lens Replacement: passo 6, immagine 3 di 3
    • Now that all of the screws are removed, remove the front panel by gently pulling on the front panel.

    • The speaker will be connected to the main body by a wire. Be careful not to damage this wire.

  7. Canon ZR70MC Lens Replacement: passo 7, immagine 1 di 3 Canon ZR70MC Lens Replacement: passo 7, immagine 2 di 3 Canon ZR70MC Lens Replacement: passo 7, immagine 3 di 3
    • Use tweezers to gently pull the speaker wire from the main body of the camcorder.

    • Pull the front panel completely away from the main body of the camcorder.

  8. Canon ZR70MC Lens Replacement, Side Panel: passo 8, immagine 1 di 1
    • Remove all 3.75 mm screws from the bottom of the camcorder.

  9. Canon ZR70MC Lens Replacement: passo 9, immagine 1 di 2 Canon ZR70MC Lens Replacement: passo 9, immagine 2 di 2
    • Turn the camcorder so that the back is facing you.

    • Remove the 3.75 mm screws from the back of the camcorder that hold the side panel in place.

  10. Canon ZR70MC Lens Replacement: passo 10, immagine 1 di 2 Canon ZR70MC Lens Replacement: passo 10, immagine 2 di 2
    • Now that all of the screws are removed, gently pull off the side panel of the camcorder.

  11. Canon ZR70MC Lens Replacement: passo 11, immagine 1 di 2 Canon ZR70MC Lens Replacement: passo 11, immagine 2 di 2
    • Gently pull the two black wires from their connections. These black wires are the only thing left connecting the side panel to the main body of the camcorder.

  12. Canon ZR70MC Lens Replacement: passo 12, immagine 1 di 1
    • Gently pull the orange films out of their connections. This will allow you access to all components of the main body.

  13. Canon ZR70MC Lens Replacement, Lens: passo 13, immagine 1 di 3 Canon ZR70MC Lens Replacement, Lens: passo 13, immagine 2 di 3 Canon ZR70MC Lens Replacement, Lens: passo 13, immagine 3 di 3
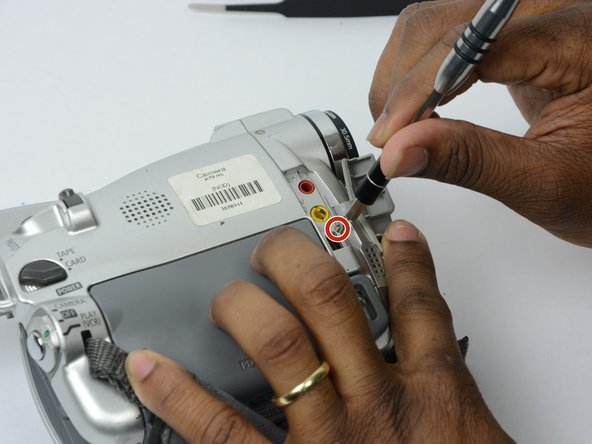
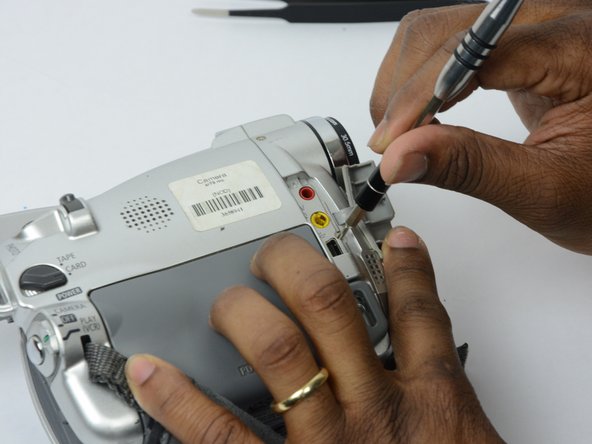
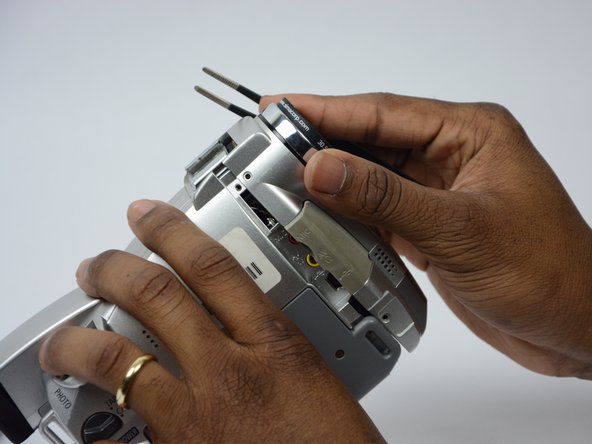
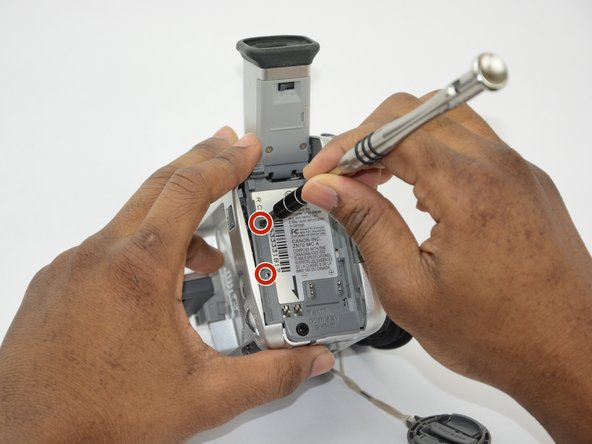
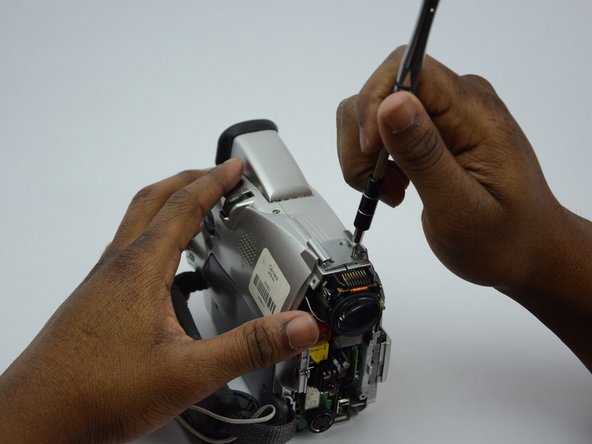
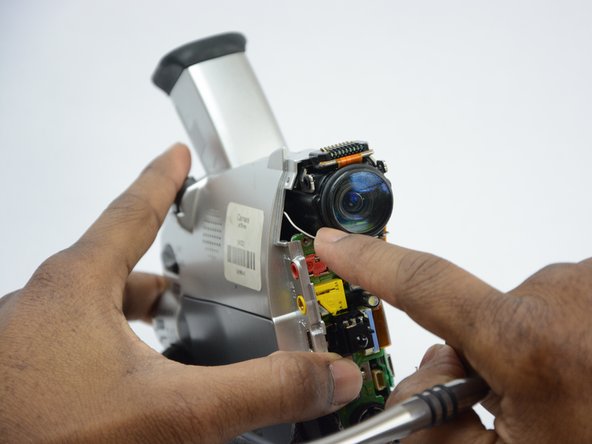
    • Locate the four 3.5 mm screws on the top of the camcorder that holds the lens in place.

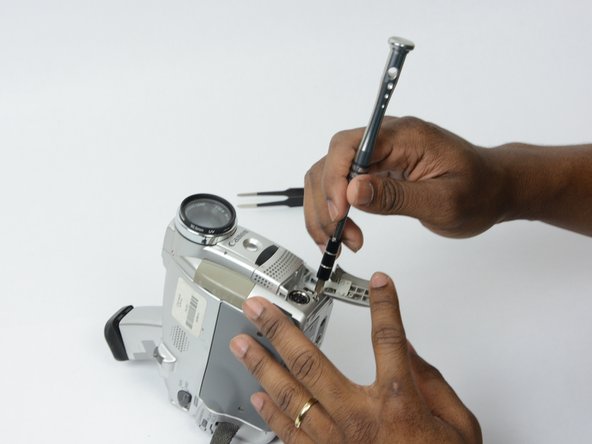
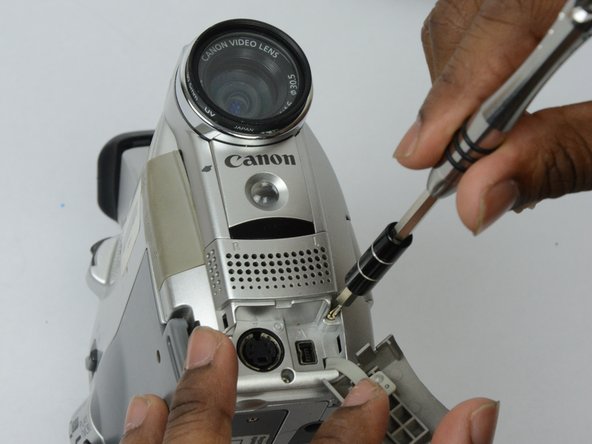
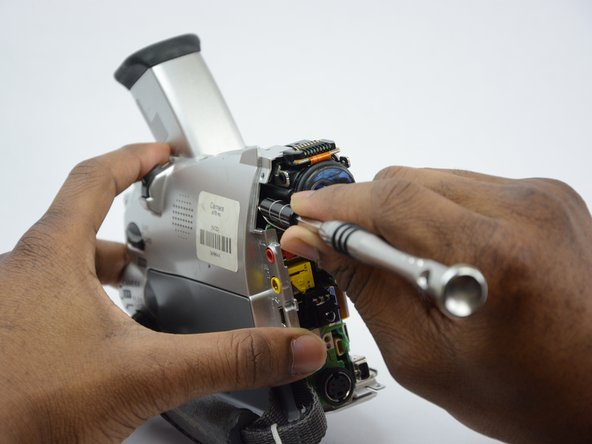
    • Remove the four 3.5 mm screws.

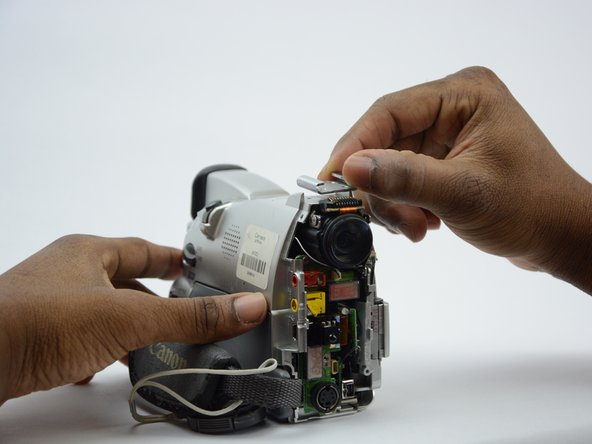
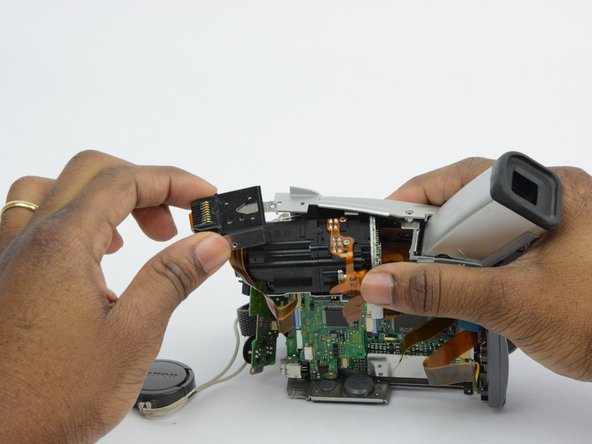
    • Remove the metal plate that the screws were holding down.

  14. Canon ZR70MC Lens Replacement: passo 14, immagine 1 di 3 Canon ZR70MC Lens Replacement: passo 14, immagine 2 di 3 Canon ZR70MC Lens Replacement: passo 14, immagine 3 di 3
    • Remove the first 2.75 mm screw that holds the lens in place.

    • The second 2.75 mm screw that holds the lens n place is difficult to see. If you look directly into the "hole" beside the lens you will see the 2.75 mm screw.

    • Remove the second 2.75 mm screw.

  15. Canon ZR70MC Lens Replacement: passo 15, immagine 1 di 3 Canon ZR70MC Lens Replacement: passo 15, immagine 2 di 3 Canon ZR70MC Lens Replacement: passo 15, immagine 3 di 3
    • Turn the camera so that you can see the orange film that needs to be pulled away.

    • Use tweezers to gently pull the orange film away from the connection.

  16. Canon ZR70MC Lens Replacement: passo 16, immagine 1 di 3 Canon ZR70MC Lens Replacement: passo 16, immagine 2 di 3 Canon ZR70MC Lens Replacement: passo 16, immagine 3 di 3
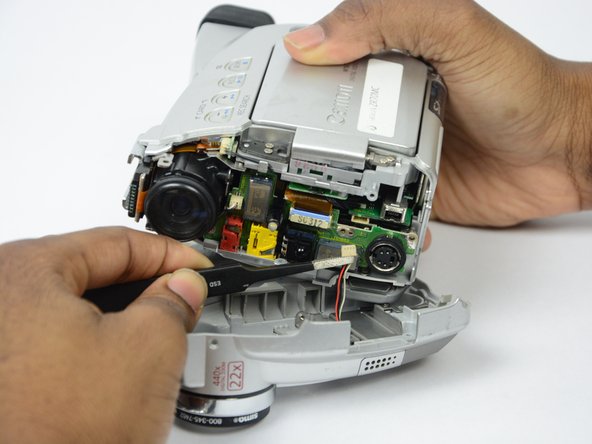
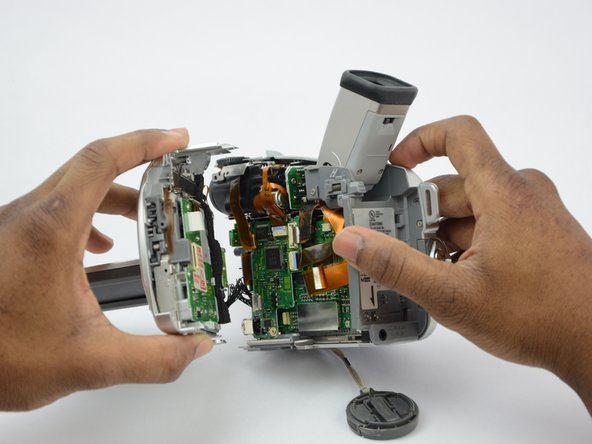
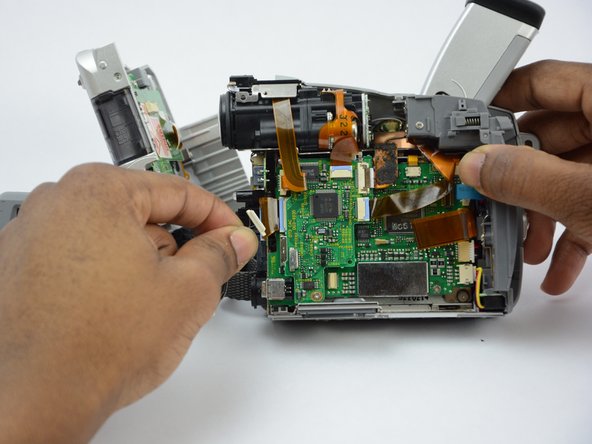
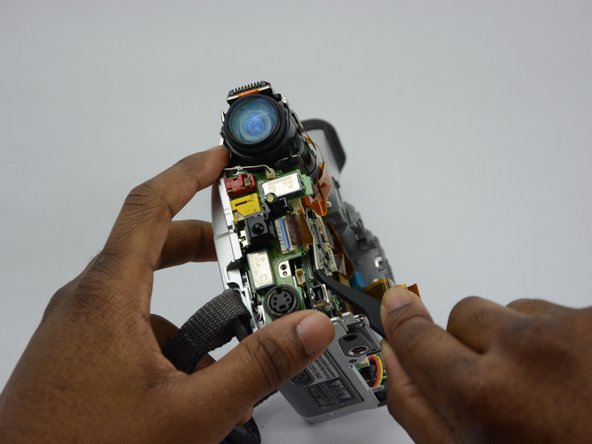
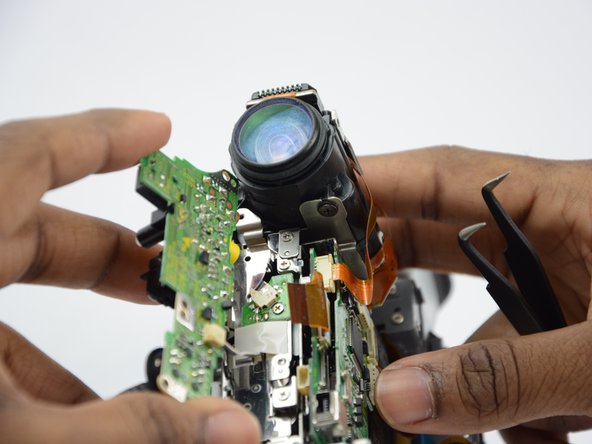
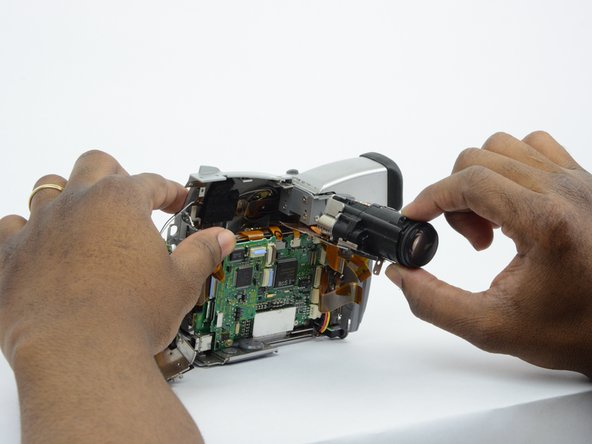
    • Use the tweezers to pull the green circuit board away from the main body of the camcorder.

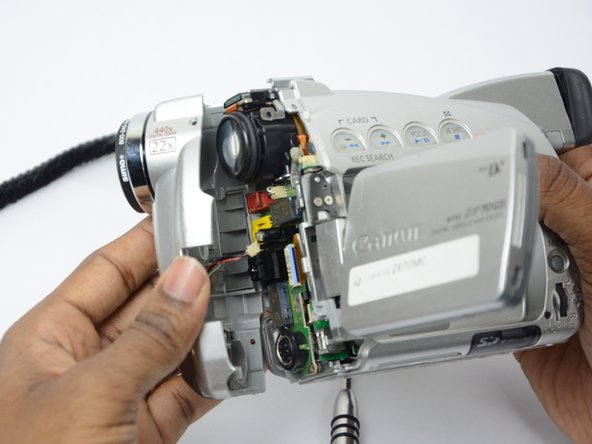
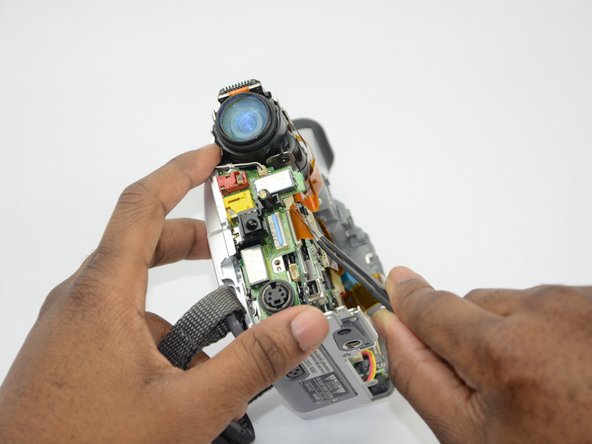
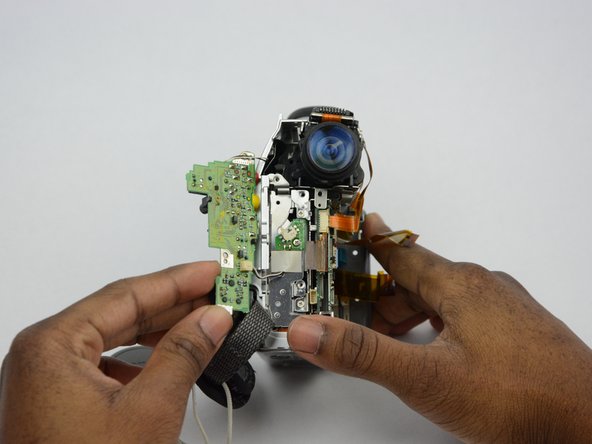
    • Pull out the white wire from its connection so that the green circuit board can be completely removed form the main body of the camcorder.

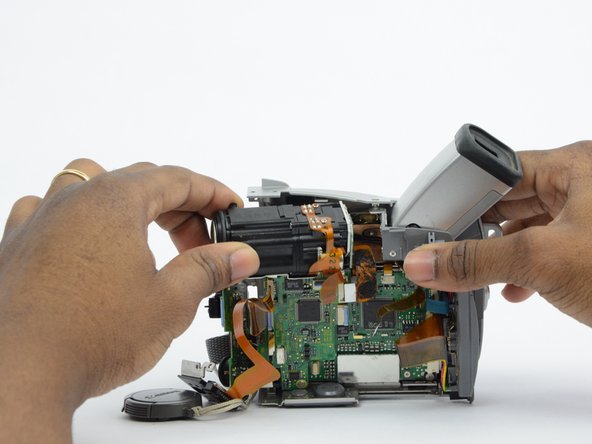
    • Removing this green circuit board allows access to the camcorder lens.

  17. Canon ZR70MC Lens Replacement: passo 17, immagine 1 di 2 Canon ZR70MC Lens Replacement: passo 17, immagine 2 di 2
    • Remove the final black metal plate that is holding the lens in place.

  18. Canon ZR70MC Lens Replacement: passo 18, immagine 1 di 3 Canon ZR70MC Lens Replacement: passo 18, immagine 2 di 3 Canon ZR70MC Lens Replacement: passo 18, immagine 3 di 3
    • Remove the camcorder lens.

Conclusione

To reassemble your device, follow these instructions in reverse order.

Team

USF Tampa, Team S13-G2, Boczar Fall 2017 Membro di USF Tampa, Team S13-G2, Boczar Fall 2017

USFT-BOCZAR-F17S13G2

3 Membri

14 Guide realizzate

0 Commenti

Aggiungi Commento

Visualizza Statistiche:

Ultime 24 Ore: 0

Ultimi 7 Giorni: 1

Ultimi 30 Giorni: 4

Tutti i Tempi: 247