Salta al contenuto principale

Canon Powershot SX500 IS Back Cover Replacement

Cosa ti serve

  1. Canon Powershot SX500 IS Back Cover Replacement, Battery: passo 1, immagine 1 di 1
    • Rotate the camera to expose the underside of the camera.

  2. Canon Powershot SX500 IS Back Cover Replacement: passo 2, immagine 1 di 1
    • Slide the rounded rectangle tab to the left to release the battery cover.

  3. Canon Powershot SX500 IS Back Cover Replacement: passo 3, immagine 1 di 1
    • Push the small orange tab forward to release the battery (Battery is ready for removal).

  4. Canon Powershot SX500 IS Back Cover Replacement, Back Cover: passo 4, immagine 1 di 3 Canon Powershot SX500 IS Back Cover Replacement, Back Cover: passo 4, immagine 2 di 3 Canon Powershot SX500 IS Back Cover Replacement, Back Cover: passo 4, immagine 3 di 3
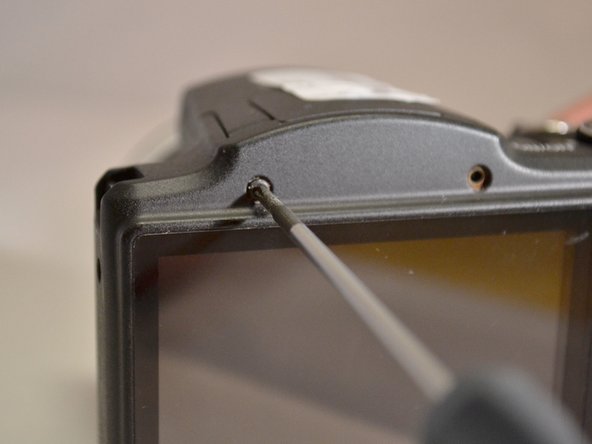
    • Using the Phillips 00 screwdriver, remove the two 4mm top screws above the LCD screen.

  5. Canon Powershot SX500 IS Back Cover Replacement: passo 5, immagine 1 di 1
    • Using the Phillips 00 screwdriver, remove the two 4mm side screws to the left of the LCD screen.

  6. Canon Powershot SX500 IS Back Cover Replacement: passo 6, immagine 1 di 1
    • Using the Phillips 00 screwdriver, remove the two 4mm side screws to the left of the LCD screen.

  7. Canon Powershot SX500 IS Back Cover Replacement: passo 7, immagine 1 di 1
    • Using the Phillips 00 screwdriver, remove the three 4mm screws from the underside of the camera.

  8. Canon Powershot SX500 IS Back Cover Replacement: passo 8, immagine 1 di 2 Canon Powershot SX500 IS Back Cover Replacement: passo 8, immagine 2 di 2
    • Using the plastic pry tool, remove the back cover from camera.

Conclusione

To reassemble your device, follow these instructions in reverse order.

Altre 3 persone hanno completato questa guida.

0 Commenti

Aggiungi Commento

Visualizza Statistiche:

Ultime 24 Ore: 0

Ultimi 7 Giorni: 3

Ultimi 30 Giorni: 6

Tutti i Tempi: 486