Questa versione può contenere modifiche errate. Passa all'ultima istantanea verificata.
Cosa ti serve
-
Questo passaggio è privo di traduzione. Aiuta a tradurlo
-
Remove the battery and SD card from the camera.
-
-
Questo passaggio è privo di traduzione. Aiuta a tradurlo
-
Remove the three 3.8 mm screws from the underside of the camera.
-
-
Questo passaggio è privo di traduzione. Aiuta a tradurlo
-
Remove the 3.2 mm screw from the right side of the camera.
-
Remove the 2.2 mm screw from the right side of the camera.
-
Lift the side panel off.
-
Remove the 1.8 mm screw from underneath the side panel.
-
-
-
Questo passaggio è privo di traduzione. Aiuta a tradurlo
-
Remove the two 2.2 mm screws from the left side of the camera.
-
Lift the plate from the camera.
-
-
Questo passaggio è privo di traduzione. Aiuta a tradurlo
-
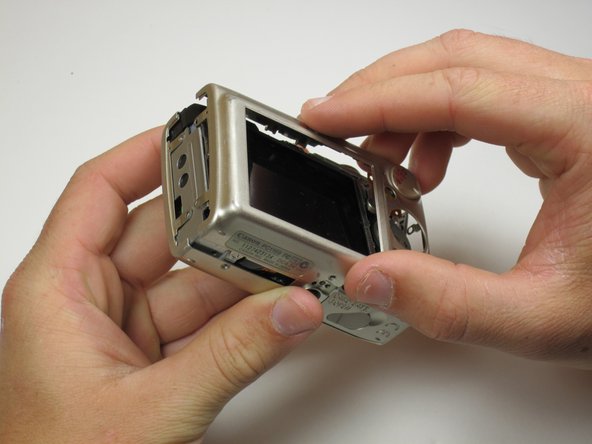
Gently lift the rear of the case to remove it from the camera.
-
-
Questo passaggio è privo di traduzione. Aiuta a tradurlo
-
Peel the navigation buttons from the button panel and set them aside.
-
To free the LCD display, remove the 2.9 mm screw in the top left corner.
-
Rotate the screen clockwise until it lifts away from the camera.
-
-
Questo passaggio è privo di traduzione. Aiuta a tradurlo
-
To unplug the ribbon cables, pull them straight out of their plugs. Do this gently to avoid damaging the connections.
-
After disconnecting both cables, pull the screen away from the camera to remove it.
-
Annulla: non ho completato questa guida.
Un'altra persona ha completato questa guida.


