Salta al contenuto principale

Canon PowerShot SD850 IS Housing Replacement

Guida Archiviata
Questa guida è mantenuta solo per scopi storici. Usa la versione aggiornata della guida per eseguire la riparazione.

Cosa ti serve

  1. Canon PowerShot SD850 IS Housing Replacement, Housing: passo 1, immagine 1 di 3 Canon PowerShot SD850 IS Housing Replacement, Housing: passo 1, immagine 2 di 3 Canon PowerShot SD850 IS Housing Replacement, Housing: passo 1, immagine 3 di 3
    • To avoid severe electric shock do not remove or tamper with internal camera flash components. An electrical capacitor is attached to the flash that can discharge if contact is made.

    • Remove the two side screws, indicated by the red circles, using a Phillips #00 screwdriver.

    • Remove the screw in the battery port, indicated by the blue circle, again using a Phillips #00 screwdriver.

    • Remove the front face by gently peeling the housing away from the camera.

  2. Canon PowerShot SD850 IS Housing Replacement: passo 2, immagine 1 di 3 Canon PowerShot SD850 IS Housing Replacement: passo 2, immagine 2 di 3 Canon PowerShot SD850 IS Housing Replacement: passo 2, immagine 3 di 3
    • Remove the back face by using a spudger to lift the tab highlighted in yellow

    • Pivot the back face clockwise as seen in the second photo.

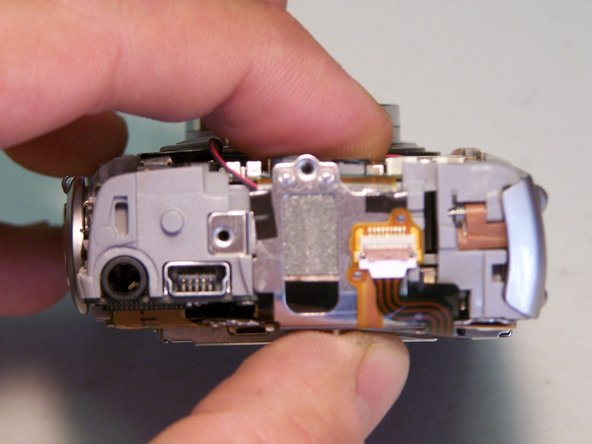
  3. Canon PowerShot SD850 IS Housing Replacement: passo 3, immagine 1 di 2 Canon PowerShot SD850 IS Housing Replacement: passo 3, immagine 2 di 2
    • Remove the A/V port cover [no tools are necessary]

Conclusione

To reassemble your device, follow these instructions in reverse order.

iDeleted

Membro da: 07/07/10

2.101 Reputazione

39 Guide realizzate

0 Commenti

Aggiungi Commento

Visualizza Statistiche:

Ultime 24 Ore: 0

Ultimi 7 Giorni: 0

Ultimi 30 Giorni: 0

Tutti i Tempi: 841