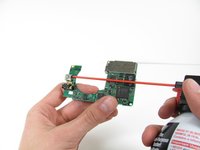
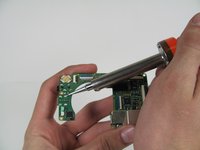
Salta al contenuto principale

Canon PowerShot S500 AV Port Replacement

Cosa ti serve

  1. Canon PowerShot S500 AV Port Replacement, Front and Rear Casing : passo 1, immagine 1 di 2 Canon PowerShot S500 AV Port Replacement, Front and Rear Casing : passo 1, immagine 2 di 2
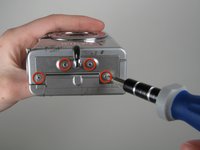
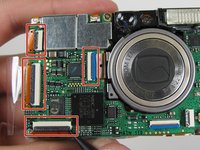
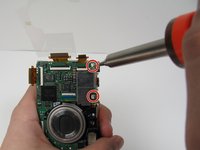
    • Unscrew five Phillips screws using a #0 Phillips screwdriver.

    • One screw is on upper right corner of the back panel.

    • The other four screws are on the bottom of the camera.

  2. Canon PowerShot S500 AV Port Replacement: passo 2, immagine 1 di 1
    • Open the memory card cover by moving the slide switch toward the top end of of the camera.

    • Remove the memory card from the slot.

  3. Canon PowerShot S500 AV Port Replacement: passo 3, immagine 1 di 1
    • Remove the rear cover from the rest of the camera.

    • This may require gentle rocking of the case to free it.

  4. Canon PowerShot S500 AV Port Replacement: passo 4, immagine 1 di 2 Canon PowerShot S500 AV Port Replacement: passo 4, immagine 2 di 2
    • Unscrew the four Phillips screws from the side of the casing and one screw from the bottom using a #0 Phillips screwdriver.

  5. Canon PowerShot S500 AV Port Replacement: passo 5, immagine 1 di 1
    • Free the front cover from the rest of the camera.

    • The cover may require gentle rocking to remove.

  6. Canon PowerShot S500 AV Port Replacement, LCD: passo 6, immagine 1 di 1
    • Unscrew two Phillips screws above the LCD using a #0 Phillips screwdriver.

  7. Canon PowerShot S500 AV Port Replacement: passo 7, immagine 1 di 1
    • Gently separate the top of LCD from the rest of the camera using your thumb.

    • Be careful not pull the LCD too far because of the ribbon cable connection.

    • Place the Spudger in the hole of the electrical ribbon.

    • Gently pull the ribbon down using the Spudger until it is free from the camera but still connected to the LCD.

    • The LCD will still be connected to the rest of the camera

  8. Canon PowerShot S500 AV Port Replacement: passo 8, immagine 1 di 2 Canon PowerShot S500 AV Port Replacement: passo 8, immagine 2 di 2
    • Unscrew single Phillips screw with a #0 Phillips screwdriver.

    • Free the bottom panel and attached ribbon from the rest of the camera.

    • Be careful not to damage the ribbon.

  9. Canon PowerShot S500 AV Port Replacement: passo 9, immagine 1 di 1
    • Turn over the camera.

    • Lift the clear plastic from the face of the camera, peeling the adhesive just below the zoom lens.

    • The plastic will still be connected on the left side.

  10. Canon PowerShot S500 AV Port Replacement: passo 10, immagine 1 di 1
    • Place the Spudger between the orange ribbon and the black ribbon gate.

    • Lift the ribbon gate using the Spudger.

  11. Canon PowerShot S500 AV Port Replacement: passo 11, immagine 1 di 1
    • Place the Spudger in the corner of the ribbon above the hole.

    • Remove the ribbon from the ribbon gate by pulling the Spudger away from the gate.

  12. Canon PowerShot S500 AV Port Replacement: passo 12, immagine 1 di 1
    • Free this ribbon and the bottom panel from the rest of the camera.

    • Be careful not to damage the ribbon.

  13. Canon PowerShot S500 AV Port Replacement: passo 13, immagine 1 di 1
    • Turn the camera over so you can see the LCD.

    • Remove single Phillips screw below the LCD using a #0 Phillips screwdriver.

  14. Canon PowerShot S500 AV Port Replacement: passo 14, immagine 1 di 1
    • Lift the blue ribbon gate using the Spudger.

  15. Canon PowerShot S500 AV Port Replacement: passo 15, immagine 1 di 1
    • Insert the Spudger into the hole of the ribbon.

    • Move the Spudger away from the gate to fully remove ribbon.

    • Be careful not to damage the ribbon.

  16. Canon PowerShot S500 AV Port Replacement: passo 16, immagine 1 di 1
    • Lift the LCD away from the rest of the camera.

  17. Canon PowerShot S500 AV Port Replacement, Logic Board: passo 17, immagine 1 di 2 Canon PowerShot S500 AV Port Replacement, Logic Board: passo 17, immagine 2 di 2
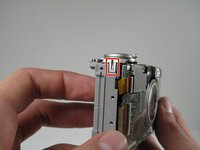
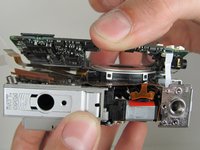
    • Lift off the capture button by wiggling it back and forth while pulling upward.

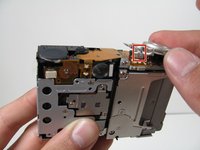
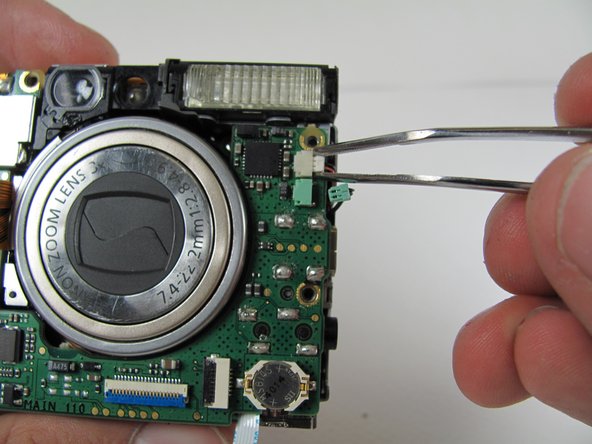
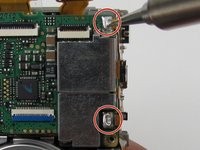
    • Be careful not to damage the two clips.

  18. Canon PowerShot S500 AV Port Replacement: passo 18, immagine 1 di 2 Canon PowerShot S500 AV Port Replacement: passo 18, immagine 2 di 2
    • Flip open the four ribbon gates using the Spudger.

    • Gently pull out the ribbon cables from the gates using the Spudger.

  19. Canon PowerShot S500 AV Port Replacement: passo 19, immagine 1 di 1
    • Unscrew the four Phillips screws using a #0 Phillips screwdriver.

  20. Canon PowerShot S500 AV Port Replacement: passo 20, immagine 1 di 2 Canon PowerShot S500 AV Port Replacement: passo 20, immagine 2 di 2
    • Gently lift the logic board.

    • Be careful not to pull too hard and damage the white ribbon cable.

    • Place the Spudger so that it is between the logic board, the white ribbon cable, and the rest of the camera.

    • Remove the white ribbon cable by pulling the Spudger away from the camera, keeping it parallel to the logic board.

  21. Canon PowerShot S500 AV Port Replacement: passo 21, immagine 1 di 1
    • Lay the logic board back down so that it is resting on the body of the camera.

    • Pull the two plugs (white and green) out to the right from the logic board using the tweezers.

  22. Canon PowerShot S500 AV Port Replacement: passo 22, immagine 1 di 2 Canon PowerShot S500 AV Port Replacement: passo 22, immagine 2 di 2
    • We're now ready to begin the desoldering process. You'll need a soldering iron, solder, and desoldering wick. You should be able to find these items at a Radio Shack if you don't already have them.

    • Please do not perform this step if you are not comfortable or have previous experience with soldering. Doing so, could cause severe damage to your camera.

    • Desolder the two soldered ribbon cables attached to the logic board.

  23. Canon PowerShot S500 AV Port Replacement: passo 23, immagine 1 di 1
    • Free the logic board from the rest of the camera.

  24. Canon PowerShot S500 AV Port Replacement, AV Port: passo 24, immagine 1 di 1
    • Pick up the Logic Board

  25. Canon PowerShot S500 AV Port Replacement: passo 25, immagine 1 di 2 Canon PowerShot S500 AV Port Replacement: passo 25, immagine 2 di 2
    • Blow the Particles out of the AV Port or USB Port using compressed air.

    • If the pins are damaged or missing, flip over the logic board and desolder the component from the logic board.

Conclusione

To reassemble your device, follow these instructions in reverse order.

Team

Cal Poly, Team 16-28, Maness Winter 2010 Membro di Cal Poly, Team 16-28, Maness Winter 2010

CPSU-MANESS-W10S16G28

4 Membri

8 Guide realizzate

0 Commenti

Aggiungi Commento

Visualizza Statistiche:

Ultime 24 Ore: 0

Ultimi 7 Giorni: 1

Ultimi 30 Giorni: 3

Tutti i Tempi: 2,949