Questa versione può contenere modifiche errate. Passa all'ultima istantanea verificata.
Cosa ti serve
-
Questo passaggio è privo di traduzione. Aiuta a tradurlo
-
Turn off your camera.
-
Remove the battery to prevent risk of shock.
-
-
Questo passaggio è privo di traduzione. Aiuta a tradurlo
-
Turn off your camera by pressing the power button, located on the top-center of the device.
-
Locate the battery door on the bottom right area of the camera case.
-
Place your finger firmly on the black rubber pad on the battery door and slide the door to the right to open it.
-
Locate the orange battery release button beneath the battery door.
-
Slide the battery release button downward to release the battery.
-
-
Questo passaggio è privo di traduzione. Aiuta a tradurlo
-
Remove the two screws located on the left side of the camera case, using the Phillips screwdriver #00 (2.0 mm).
-
-
Questo passaggio è privo di traduzione. Aiuta a tradurlo
-
Remove the two screws on the bottom of the camera located near the battery door (Phillips #00 screwdriver) (4.0 mm).
-
-
-
Questo passaggio è privo di traduzione. Aiuta a tradurlo
-
Remove the screw located on the lower right side of the camera case (Phillips #00 screwdriver) (4.0 mm).
-
Remove the HDMI A/V out port cover located on the upper right side of the camera.
-
Remove the screw located just beneath the port cover removed in step 2. (Phillips #00 screwdriver) (2.0 mm).
-
-
Questo passaggio è privo di traduzione. Aiuta a tradurlo
-
Remove the back portion of the camera case to reveal the screw located on the top of the case.
-
Remove the screw from the top of camera case, located next to the shutter button (Phillips #00 screwdriver) (1.5 mm).
-
-
Questo passaggio è privo di traduzione. Aiuta a tradurlo
-
Carefully pry the case apart at the seem, using your fingers.
-
-
Questo passaggio è privo di traduzione. Aiuta a tradurlo
-
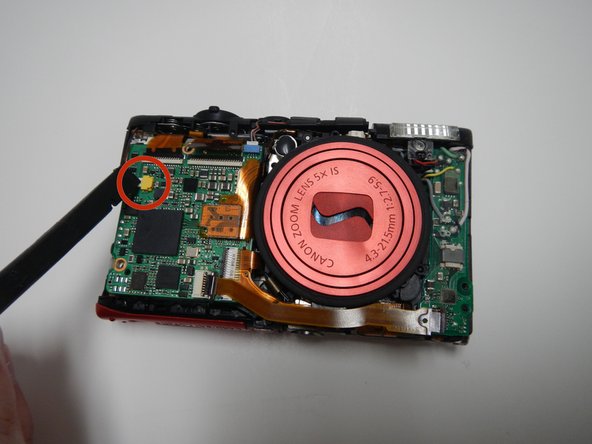
Disconnect the small cable from the yellow port on the motherboard
-
-
Questo passaggio è privo di traduzione. Aiuta a tradurlo
-
Disconnect the small cable from the blue port on the motherboard
-
-
Questo passaggio è privo di traduzione. Aiuta a tradurlo
-
Lift the plastic over the HDMI port on the side of the camera
-
-
Questo passaggio è privo di traduzione. Aiuta a tradurlo
-
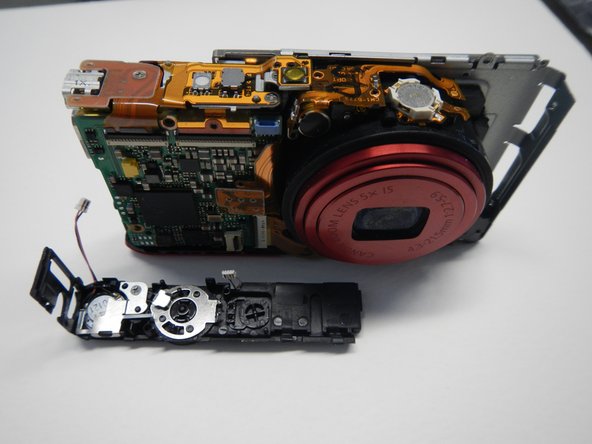
Lift from the back of the camera, angling forward and pull off to remove the power button assembly
-


Team

Michigan Tech, Team 5-6, Lauer Spring 2014 Membro di Michigan Tech, Team 5-6, Lauer Spring 2014
MTU-LAUER-S14S5G6
3 Membri
6 Guide realizzate