Salta al contenuto principale

Canon Optura 100MC Speaker Replacement

Cosa ti serve

  1. Canon Optura 100MC Speaker Replacement, The side of the Device: passo 1, immagine 1 di 1
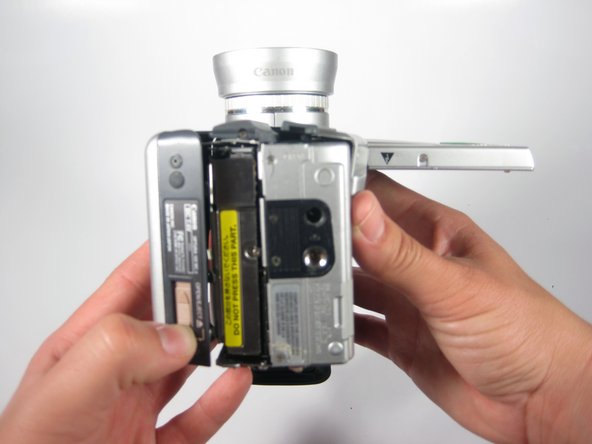
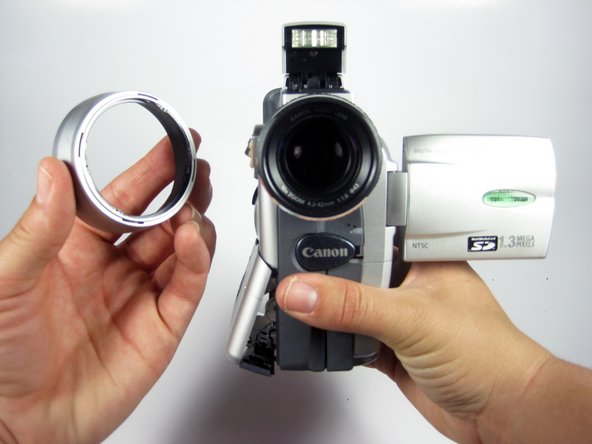
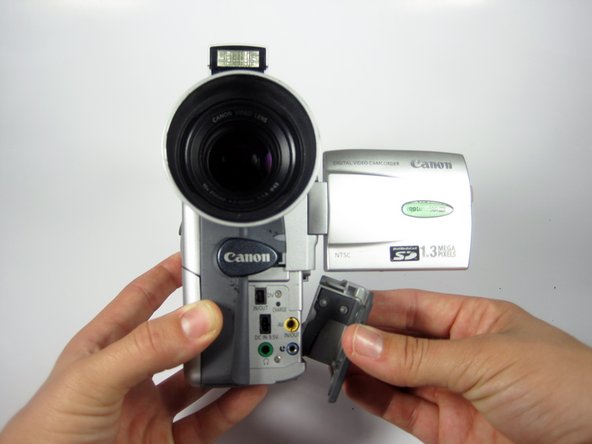
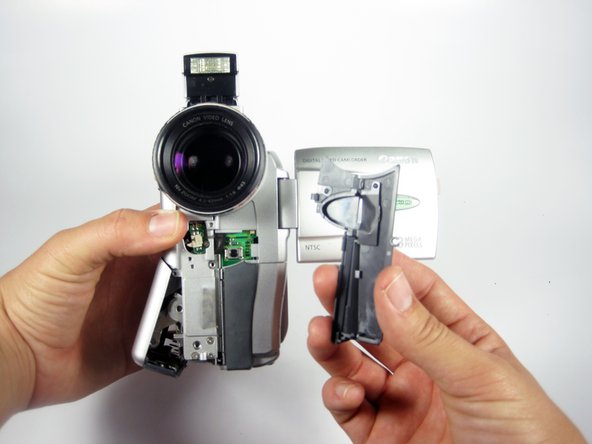
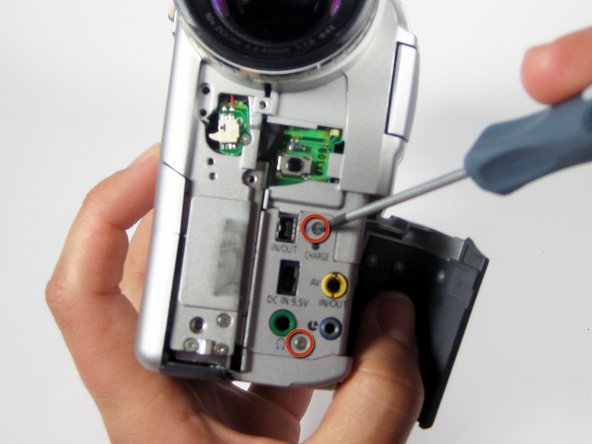
    • Orient the camera so that the viewfinder is on your left and the lens is on your right.

    • Remove the 4mm #00 Phillips screw.

  2. Canon Optura 100MC Speaker Replacement: passo 2, immagine 1 di 1
    • Reorient the camera with the back button pad and viewfinder towards you.

    • Remove the three 4mm #00 Phillips screws shown on the rear face of camcorder.

  3. Canon Optura 100MC Speaker Replacement: passo 3, immagine 1 di 2 Canon Optura 100MC Speaker Replacement: passo 3, immagine 2 di 2
    • Remove the plastic cover from the rear of the camcorder by gently pulling it towards you while holding the camera as shown.

    • The Battery Should be removed at this point, please ignore it in the picture.

  4. Canon Optura 100MC Speaker Replacement: passo 4, immagine 1 di 1
    • Remove the 4mm #00 Phillips screw located to the right of the LCD release switch.

  5. Canon Optura 100MC Speaker Replacement: passo 5, immagine 1 di 1
    • Open the LCD by using the release switch.

    • Reorient the camera with the playback button pad and edge of LCD screen facing you.

    • Remove the 4mm #00 Phillips screw shown.

  6. Canon Optura 100MC Speaker Replacement: passo 6, immagine 1 di 1
    • Reorient the camera with the top facing you. The side with the LCD screen should be on the right and the other side panel should be on the right.

    • Open the pop up flash on the top of the camcorder.

    • A loud clicking noise is expected.

    • Remove the 4mm #00 Phillips screw shown.

  7. Canon Optura 100MC Speaker Replacement: passo 7, immagine 1 di 2 Canon Optura 100MC Speaker Replacement: passo 7, immagine 2 di 2
    • Reorient the camera with the bottom facing you, LCD screen on the right, side panel on the left.

    • Open the tape deck by sliding the switch and moving the deck cover to the left as shown.

  8. Canon Optura 100MC Speaker Replacement: passo 8, immagine 1 di 1
    • Remove 4mm #00 Phillips screw.

  9. Canon Optura 100MC Speaker Replacement: passo 9, immagine 1 di 1
    • Reorient camera with lens facing you.

    • Remove the #00 Philips 4mm screw shown on the hinge of the tape deck cover.

  10. Canon Optura 100MC Speaker Replacement: passo 10, immagine 1 di 2 Canon Optura 100MC Speaker Replacement: passo 10, immagine 2 di 2
    • To remove the camcorder lens hood, twist the hood to counterclockwise and it will come loose, then pull towards you.

  11. Canon Optura 100MC Speaker Replacement: passo 11, immagine 1 di 2 Canon Optura 100MC Speaker Replacement: passo 11, immagine 2 di 2
    • Close the tape deck by gently pushing it toward the body of the camera.

    • Slide and remove the plastic cover on the bottom right, exposing the interface shown.

  12. Canon Optura 100MC Speaker Replacement: passo 12, immagine 1 di 2 Canon Optura 100MC Speaker Replacement: passo 12, immagine 2 di 2
    • Gently pull the front plastic cover towards you to remove.

  13. Canon Optura 100MC Speaker Replacement: passo 13, immagine 1 di 1
    • Remove 2 Philips #00 4mm screw shown.

  14. Canon Optura 100MC Speaker Replacement: passo 14, immagine 1 di 1
    • Reorient the camera so you are looking at the side of the camera with the viewfinder on the left and lens on the right.

    • Holding the camera as shown,remove the 4mm #00 Phillips screw.

  15. Canon Optura 100MC Speaker Replacement: passo 15, immagine 1 di 1
    • Remove the 4 Philips #00 4mm screws shown.

  16. Canon Optura 100MC Speaker Replacement: passo 16, immagine 1 di 1
    • Reorient the camera with the lens facing you.

    • Gently pull the side panel of the camera to the right to remove.

    • Be aware that that there are wires connecting the cover to the body of the device, so the side cover will not come off entirely.

  17. Canon Optura 100MC Speaker Replacement: passo 17, immagine 1 di 1
    • The side of the device should now be open as shown. Again, there are wire connections between the side cover and the body of the camcorder. Do not separate the two entirely!

  18. Canon Optura 100MC Speaker Replacement, Speaker: passo 18, immagine 1 di 1
    • Remove the screw above the speaker's housing.

  19. Canon Optura 100MC Speaker Replacement: passo 19, immagine 1 di 1
    • Remove the small battery with the "Caution" on it.

  20. Canon Optura 100MC Speaker Replacement: passo 20, immagine 1 di 1
    • Remove the screw from inside the battery housing.

  21. Canon Optura 100MC Speaker Replacement: passo 21, immagine 1 di 1
    • Remove the 3 screws holding the metal piece over the speaker.

  22. Canon Optura 100MC Speaker Replacement: passo 22, immagine 1 di 1
    • Lift up and remove the metal cover.

  23. Canon Optura 100MC Speaker Replacement: passo 23, immagine 1 di 1
    • Lift and remove the speaker.

  24. Canon Optura 100MC Speaker Replacement: passo 24, immagine 1 di 1
    • Replace the broken speaker with a new one.

    • The speaker's wires need to be desoldered.

Conclusione

To reassemble your device, follow these instructions in reverse order.

Team

Cal Poly, Team 1-12, Amido Winter 2011 Membro di Cal Poly, Team 1-12, Amido Winter 2011

CPSU-AMIDO-W11S1G12

4 Membri

11 Guide realizzate

0 Commenti

Aggiungi Commento

Visualizza Statistiche:

Ultime 24 Ore: 0

Ultimi 7 Giorni: 0

Ultimi 30 Giorni: 3

Tutti i Tempi: 699