Questa versione può contenere modifiche errate. Passa all'ultima istantanea verificata.
Cosa ti serve
-
Questo passaggio è privo di traduzione. Aiuta a tradurlo
-
Lay the camera on its back so that the card/battery door is facing you.
-
Using your fingernail, slide the tab on the battery door up to release the battery door latch.
-
-
Questo passaggio è privo di traduzione. Aiuta a tradurlo
-
Lift the now free card/battery door to reveal the battery compartment.
-
Push the gray lever to the right side so that the battery can be removed and replaced with a new one.
-
-
Questo passaggio è privo di traduzione. Aiuta a tradurlo
-
Turn the camera so that the back is facing to your right.
-
Remove the 5mm Phillips #000 screw above the rubber USB port cover.
-
-
Questo passaggio è privo di traduzione. Aiuta a tradurlo
-
Remove the rubber piece.
-
Unscrew the two screws under the rubber cover to completely remove the rubber cover piece.
-
-
Questo passaggio è privo di traduzione. Aiuta a tradurlo
-
Turn your camera so that the bottom is facing you.
-
Remove the 5mm Phillips #000 screws.
-
-
-
Questo passaggio è privo di traduzione. Aiuta a tradurlo
-
Now turn the camera so that the front is facing towards your right.
-
Remove the two remaining 5mm Phillips #000 screws.
-
-
Questo passaggio è privo di traduzione. Aiuta a tradurlo
-
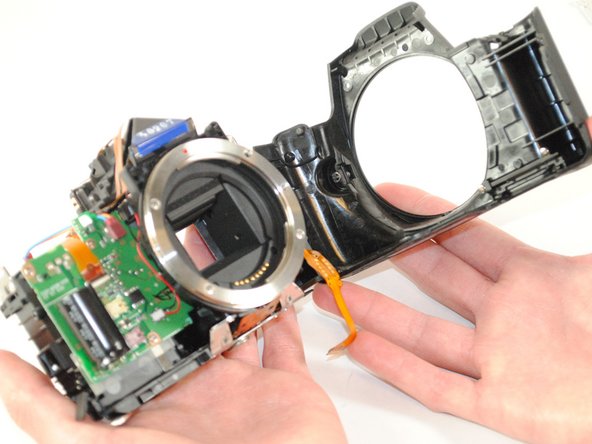
Now that all of the exterior screws have been removed, grip the camera firmly on both sides.
-
Gently pry the back panel from the main body of the camera.
-
-
Questo passaggio è privo di traduzione. Aiuta a tradurlo
-
Remove all ribbon cables with the plastic spudger.
-
Gently pry up the black plastic tabs to slide out the ribbon cables
-
-
Questo passaggio è privo di traduzione. Aiuta a tradurlo
-
Turn your camera so that the top is facing you.
-
Remove the two black 5 mm Phillips #000 screws.
-
-
Questo passaggio è privo di traduzione. Aiuta a tradurlo
-
Turn the grip side toward you.
-
Remove the rubber grip, using the plastic spudger.
-
-
Questo passaggio è privo di traduzione. Aiuta a tradurlo
-
Remove the black 5 mm Phillips #000 screw, located under the grip.
-
-
Questo passaggio è privo di traduzione. Aiuta a tradurlo
-
Remove the five silver 5mm Phillips #000 screws.
-
The motherboard can now be removed.
-


Annulla: non ho completato questa guida.
Altre 9 persone hanno completato questa guida.
Team

USF Tampa, Team 16-4, Wollert Fall 2015 Membro di USF Tampa, Team 16-4, Wollert Fall 2015
USFT-WOLLERT-F15S16G4
4 Membri
16 Guide realizzate
2 Commenti
This guide is amazing, but if you change the mainboard do you have to initialize it by software, like Spt?
New main board from canon .
How to instalize?