Questa versione può contenere modifiche errate. Passa all'ultima istantanea verificata.
Cosa ti serve
-
Questo passaggio è privo di traduzione. Aiuta a tradurlo
-
Take the LCD out of its place to expose the Phillips #PH00 screws.
-
Remove the two 2.5 mm Phillips #PH00 black screws on both sides of the LCD screen.
-
Next remove the two 3 mm Phillips #PH00 black screws near both sides of the base where the screen swivels.
-
-
Questo passaggio è privo di traduzione. Aiuta a tradurlo
-
Using a plastic opening tool, carefully pry off the back cover of the LCD.
-
-
Questo passaggio è privo di traduzione. Aiuta a tradurlo
-
Remove the 3 mm Phillips #PH00 silver screw on the side of the screen.
-
Turn the screen to remove the second 3 mm Phillips #PH00 silver screw.
-
-
-
Questo passaggio è privo di traduzione. Aiuta a tradurlo
-
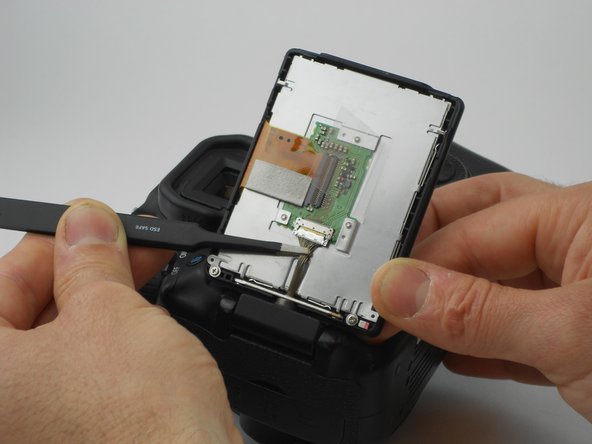
Using the tweezers, carefully disconnect the rear connector by pulling it away from the screen.
-
-
Questo passaggio è privo di traduzione. Aiuta a tradurlo
-
Remove the two 2.5 mm Phillips #PH00 silver screws using the PH00 screwdriver.
-
Using the plastic Spudger opening tool, carefully lift up on the medal tabs next to where the screws were located.
-
-
Questo passaggio è privo di traduzione. Aiuta a tradurlo
-
Finally, remove the LCD screen by grabbing the clear plastic tab and lifting it carefully.
-
-
Questo passaggio è privo di traduzione. Aiuta a tradurlo
-
Slowly insert the tip of the Jimmy between the damaged plastic cover and the plastic frame, which holds it, to loosen the connection between them.
-
-
Questo passaggio è privo di traduzione. Aiuta a tradurlo
-
Carefully slide the Jimmy through all corners of the plastic frame until it is detached from the plastic cover.
-
-
Questo passaggio è privo di traduzione. Aiuta a tradurlo
-
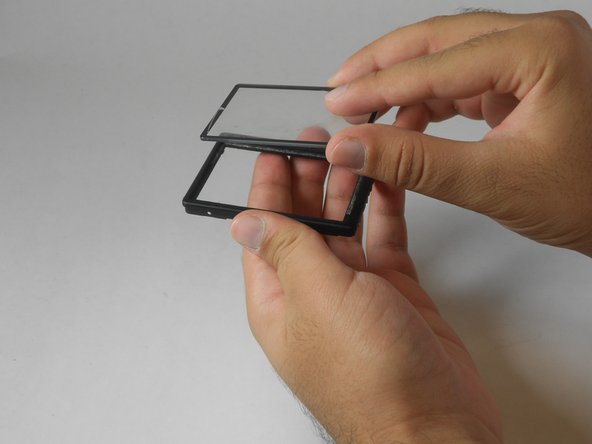
Using your hand, lift the detached plastic cover off the plastic frame.
-
To place a new plastic cover, simply stick it to the frame in the appropriate position.
-


Annulla: non ho completato questa guida.
Altre 2 persone hanno completato questa guida.
Team

USF Tampa, Team 16-6, Wollert Fall 2015 Membro di USF Tampa, Team 16-6, Wollert Fall 2015
USFT-WOLLERT-F15S16G6
3 Membri
14 Guide realizzate
2 Commenti
I followed all the steps and was able to dis- and reassamble everything in under 30min. When you reassamble make sure that in step 4 the metalplate of the housing is turned correctly and the connector is in the right position. Both could be turned 180° and mounted incorrectly. Other than that easy repair.
Thanks guys
Hi there, can anyone send me some amazon link so I can order the correct glass? Thanks so far.