Salta al contenuto principale

Canon EOS 40D LCD Replacement

Cosa ti serve

  1. Canon EOS 40D LCD Replacement, Battery: passo 1, immagine 1 di 1
    • Locate the battery compartment cover on the bottom of the camera below the shutter button.

  2. Canon EOS 40D LCD Replacement: passo 2, immagine 1 di 1
    • Find the marked arrow on the battery compartment cover labeled "BATT. OPEN". Slide the lever following the arrow's direction and lift at the same time to release the latch.

  3. Canon EOS 40D LCD Replacement: passo 3, immagine 1 di 1
    • Release the lever and allow the battery compartment cover to completely open.

    • Remove the battery.

  4. Canon EOS 40D LCD Replacement, LCD: passo 4, immagine 1 di 1
    • Remove the rubber eyepiece by sliding it upwards.

    Take care to pull the entire eyepiece and not just the rubber part or the upper part that holds the rubber. Eventually, it stuck a bit. In that case, - carefully - use a screwdriver between the LCD and the eyepiece frame to push it upwards

    Christian Budde - Replica

  5. Canon EOS 40D LCD Replacement: passo 5, immagine 1 di 3 Canon EOS 40D LCD Replacement: passo 5, immagine 2 di 3 Canon EOS 40D LCD Replacement: passo 5, immagine 3 di 3
    • Remove the three 5.0 mm Phillips #000 screws.

    • Remove the two 3.0 mm Phillips #000 screws on the bottom of the camera.

  6. Canon EOS 40D LCD Replacement: passo 6, immagine 1 di 3 Canon EOS 40D LCD Replacement: passo 6, immagine 2 di 3 Canon EOS 40D LCD Replacement: passo 6, immagine 3 di 3
    • Remove the side cover using a plastic opening tool or your hands.

    • Use a plastic opening tool to gently start prying the rear case up from the rest of the camera.

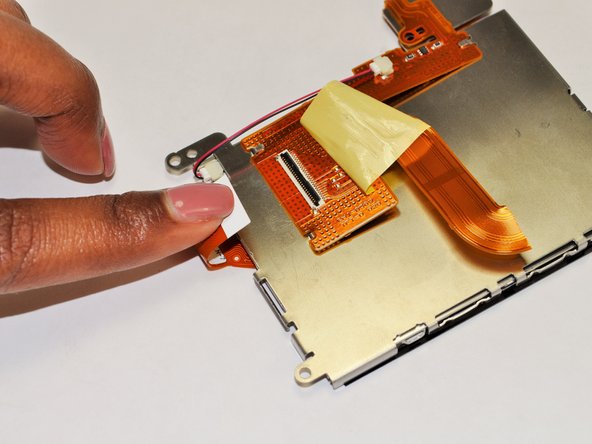
    • Use the tip of a spudger to disconnect the ZIF connector on the left side of the camera. The ribbon cable on this device was torn in the process of removing the back case, so there are no photos showing this step.

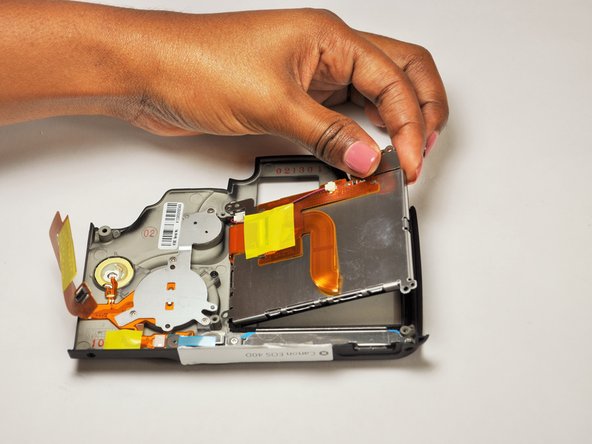
    • Disconnect the ribbon cable securing the rear case to the motherboard.

    • Separate the rear case from the camera.

  7. Canon EOS 40D LCD Replacement: passo 7, immagine 1 di 2 Canon EOS 40D LCD Replacement: passo 7, immagine 2 di 2
    • Remove the five 5.0 mm Phillips #000 screws securing the LCD to the rear case.

    • Lift the LCD free of the rear case.

  8. Canon EOS 40D LCD Replacement: passo 8, immagine 1 di 3 Canon EOS 40D LCD Replacement: passo 8, immagine 2 di 3 Canon EOS 40D LCD Replacement: passo 8, immagine 3 di 3
    • Remove the yellow tape covering the LCD ZIF connector.

    • Use a plastic opening tool to lift up the black retaining flap.

    • Pull the LCD ribbon cable out of the connector.

  9. Canon EOS 40D LCD Replacement: passo 9, immagine 1 di 1
    • Use a pair of tweezers to disconnect the cable connector.

    • The LCD frame should now come free of the LCD panel.

  10. Canon EOS 40D LCD Replacement: passo 10, immagine 1 di 1
    • LCD panel remains.

    • It's a good idea to use a soft cloth to wipe the LCD screen and rear cover before reassembly.

    can I fit a canon eos 50D LCD screen to my canon 40D?

    Julio Photo - Replica

Conclusione

To reassemble your device, follow these instructions in reverse order.

Altre 3 persone hanno completato questa guida.

Diarra Thomas

Membro da: 09/03/15

160 Reputazione

1 Guida realizzata

Team

USF Tampa, Team 12-3, Blackwell Fall 2015 Membro di USF Tampa, Team 12-3, Blackwell Fall 2015

USFT-BLACKWELL-F15S12G3

4 Membri

16 Guide realizzate

Un commento

For the life of me, I cannot remove the two screws on either side of the view-finder!

tomaska - Replica

Aggiungi Commento

Visualizza Statistiche:

Ultime 24 Ore: 1

Ultimi 7 Giorni: 3

Ultimi 30 Giorni: 31

Tutti i Tempi: 4,462