Salta al contenuto principale
Unisciti alla Community delle riparazioni - Crea un account

Canon CanoScan N670U Sensor Bar Replacement

Cosa ti serve

    1. Canon CanoScan N670U Sensor Bar Replacement, Canon CanoScan N670U Disassembly: passo 1, immagine 1 di 1
      • Open up your Canon CanoScan N670U to an upright position.

      Chiedi a FixBot

      Aggiungi Commento

    2. Canon CanoScan N670U Sensor Bar Replacement: passo 2, immagine 1 di 1
      • Turn your device so that you're facing the long side of the Canon CanoScan N670U.

      • Locate the small crevice between the plastic components of the scanner bed and the scanner base.

      Chiedi a FixBot

      Aggiungi Commento

    3. Canon CanoScan N670U Sensor Bar Replacement: passo 3, immagine 1 di 1
      • Carefully insert a metal spudger tool in the crevice and slowly cut through the adhesive between the plastic components.

      • You may cut small bits of the plastic as you're slicing the adhesive. Do not forcefully bend the plastic strip as you're cutting or it will snap.

      Chiedi a FixBot

      Aggiungi Commento

    4. Canon CanoScan N670U Sensor Bar Replacement: passo 4, immagine 1 di 1
      • Once the adhesive strip is sliced through, the plastic bar that is attached should release. Set aside the plastic bar.

      Chiedi a FixBot

      Aggiungi Commento

    5. Canon CanoScan N670U Sensor Bar Replacement: passo 5, immagine 1 di 1
      • Repeat steps 2-4 for the other side of the scanner.

      Chiedi a FixBot

      Aggiungi Commento

    6. Canon CanoScan N670U Sensor Bar Replacement: passo 6, immagine 1 di 1
      • Use your hands or a metal spudger tool to push the plastic bar at the bottom of the glass scanner bed forward until you can't push it any farther.

      Chiedi a FixBot

      Aggiungi Commento

    7. Canon CanoScan N670U Sensor Bar Replacement: passo 7, immagine 1 di 1
      • Insert the metal spudger tool underneath the glass scanner bed. The front of the scanner bed should be resting on top of the tool.

      Chiedi a FixBot

      Aggiungi Commento

    8. Canon CanoScan N670U Sensor Bar Replacement: passo 8, immagine 1 di 1
      • Slowly pull the glass scanner bed towards you and set the piece aside.

      Chiedi a FixBot

      Aggiungi Commento

    1. Canon CanoScan N670U Sensor Bar Replacement, Sensor Bar: passo 9, immagine 1 di 1
      • This is the sensor bar that you will replace.

      Chiedi a FixBot

      Aggiungi Commento

    2. Canon CanoScan N670U Sensor Bar Replacement: passo 10, immagine 1 di 2 Canon CanoScan N670U Sensor Bar Replacement: passo 10, immagine 2 di 2
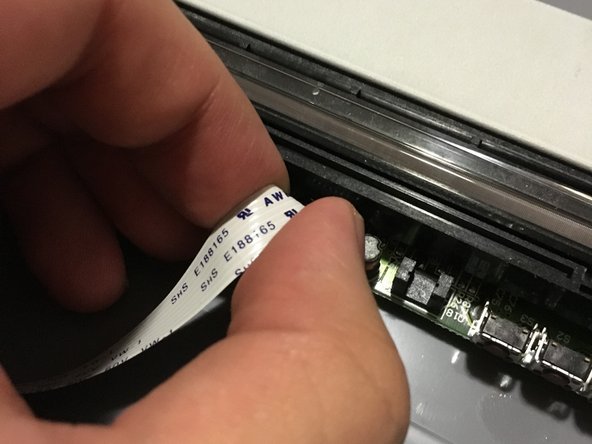
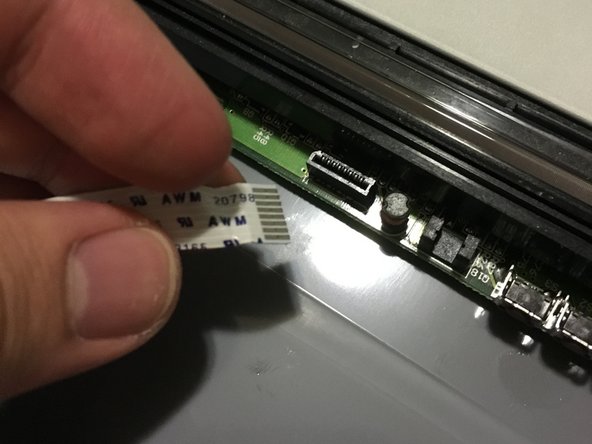
      • Locate the small plug where the white strip of cable is connected to.

      • Unfurl the cable strip if it's tucked in.

      Chiedi a FixBot

      Aggiungi Commento

    3. Canon CanoScan N670U Sensor Bar Replacement: passo 11, immagine 1 di 3 Canon CanoScan N670U Sensor Bar Replacement: passo 11, immagine 2 di 3 Canon CanoScan N670U Sensor Bar Replacement: passo 11, immagine 3 di 3
      Strumento utilizzato in questo passaggio:
      Tweezers
      $4.99
      • Gently use tweezers or your fingers to rock the cable back and forth to disconnect the it.

      • Do not apply too much pressure or you may damage some delicate components.

      Chiedi a FixBot

      Aggiungi Commento

    4. Canon CanoScan N670U Sensor Bar Replacement: passo 12, immagine 1 di 1
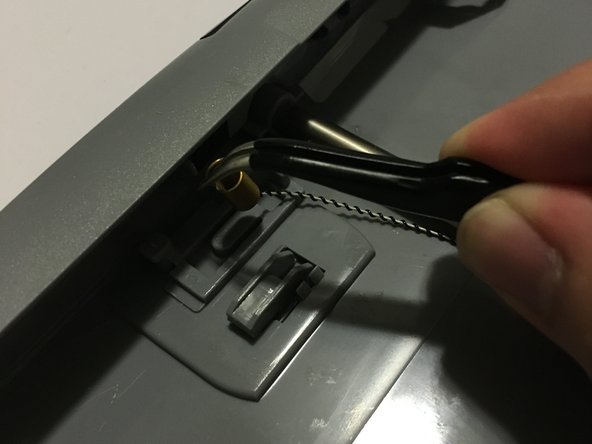
      • Locate the small metal spring behind the front buttons of the Canon CanoScan N670U.

      Chiedi a FixBot

      Aggiungi Commento

    5. Canon CanoScan N670U Sensor Bar Replacement: passo 13, immagine 1 di 2 Canon CanoScan N670U Sensor Bar Replacement: passo 13, immagine 2 di 2
      • Use tweezers to gently remove the metal spring from the plastic hook.

      • Due to the tension of the spring, it can be difficult to pull the metal end. You may attempt to use your hands to pull the spring itself if necessary.

      • Take caution to not bend the metal.

      Chiedi a FixBot

      Aggiungi Commento

    6. Canon CanoScan N670U Sensor Bar Replacement: passo 14, immagine 1 di 2 Canon CanoScan N670U Sensor Bar Replacement: passo 14, immagine 2 di 2
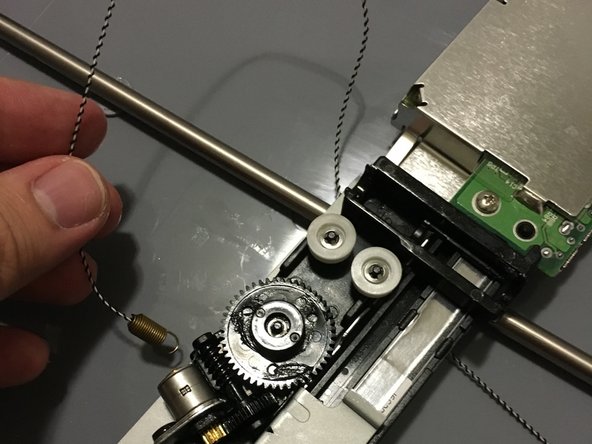
      • Flip the sensor bar over and unwind the belt from the gear system.

      Chiedi a FixBot

      Aggiungi Commento

    7. Canon CanoScan N670U Sensor Bar Replacement: passo 15, immagine 1 di 1
      • Remove the sensor bar from the scanner and replace it with the new one.

      Chiedi a FixBot

      Aggiungi Commento

Conclusione

To reassemble your device, follow these instructions in reverse order.

Annulla: non ho completato questa guida.

Un'altra persona ha completato questa guida.

0Commenti sulla guida

Aggiungi Commento

Visualizza statistiche:

Ultime 24 ore: 5

Ultimi 7 giorni: 20

Ultimi 30 giorni: 40

Tutti i Tempi: 1,303