Salta al contenuto principale
Bugaboo Cameleon 1 and 3 Brake Handle Replacement

Bugaboo Cameleon 1 and 3 Brake Handle Replacement

Rebecca Dowling

Rebecca Dowling e 2 altri collaboratori

Ultimo aggiornamento il July 31, 2024

15 minuti
Moderato
Dare To Repair
Guida fornita dalla comunità

Introduzione

Vai al passo 1

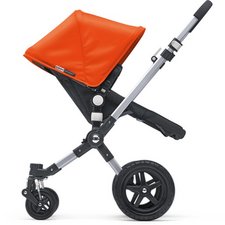
This guide is created by five students of the TU Delft, Pieter, Mansour, Yvo, Suzanne and Rebecca, to make older models of Bugaboo strollers more repairable if spare parts are no longer available. The Bugaboo frames are very durable, and often outlive the period in which spare parts are available for order.

Parts that most often break were 3D-modeled, and the files were used to print new parts with a performance that is acceptable and safe according to Bugaboo requirements.

Cosa ti serve

  1. Bugaboo Cameleon 1 and 3 Brake Handle Replacement, Brake Handle: passo 1, immagine 1 di 1
    • Remove both screws on the inner side of the black plastic part, connecting the brake to the frame.

    • Make sure not to lose the screws, since you will need them for the reassembly

  2. Bugaboo Cameleon 1 and 3 Brake Handle Replacement: passo 2, immagine 1 di 1
    • Remove the left piece that is holding the brake handle.

  3. Bugaboo Cameleon 1 and 3 Brake Handle Replacement: passo 3, immagine 1 di 1
    • Pull the brake line down and take the brake handle out of the black plastic part.

  4. Bugaboo Cameleon 1 and 3 Brake Handle Replacement: passo 4, immagine 1 di 1
    • Take the brake cable out of the groove in the brake handle.

  5. Bugaboo Cameleon 1 and 3 Brake Handle Replacement: passo 5, immagine 1 di 3 Bugaboo Cameleon 1 and 3 Brake Handle Replacement: passo 5, immagine 2 di 3 Bugaboo Cameleon 1 and 3 Brake Handle Replacement: passo 5, immagine 3 di 3
    • Pry the inside part out of the brake with a flat screwdriver.

    • Inside the brakes resides a spring. This can cause the part to fly out of the brake handle when the inner part is not clammed anymore.

  6. Bugaboo Cameleon 1 and 3 Brake Handle Replacement: passo 6, immagine 1 di 1
    • Put the spring into the replacement brake handle.

  7. Bugaboo Cameleon 1 and 3 Brake Handle Replacement: passo 7, immagine 1 di 1
    • Insert the inner piece of the brake handle into the replacement part. You have to align the small projection on the inner piece with the hole of the brake handle.

    • Use force until the inner piece is clamped into the brake handle.

  8. Bugaboo Cameleon 1 and 3 Brake Handle Replacement: passo 8, immagine 1 di 1
    • Insert the brake cable back into the brake handle.

    • The picture shows the brake handle without the inner parts inserted. This is not correct and you should first insert the inner pieces as shown in the previous steps before starting with this step.

  9. Bugaboo Cameleon 1 and 3 Brake Handle Replacement: passo 9, immagine 1 di 1
    • Insert the brake handle back into the frame.

  10. Bugaboo Cameleon 1 and 3 Brake Handle Replacement: passo 10, immagine 1 di 2 Bugaboo Cameleon 1 and 3 Brake Handle Replacement: passo 10, immagine 2 di 2
    • Insert the black inner piece onto the brake handle.

    • Screw the screws back into the frame using the Torx screwdriver.

  11. Bugaboo Cameleon 1 and 3 Brake Handle Replacement: passo 11, immagine 1 di 1
    • Enjoy your new brake handle!

Linea Traguardo

Un'altra persona ha completato questa guida.

Documenti Allegati

1Commento della guida

Nice, it looks awesome, im also missing the small plastic part, the one used to lock the brake. Do you also have the STL for that?

Thanks

andsk8 - Replica

Aggiungi Commento

Visualizza Statistiche:

Ultime 24 Ore: 1

Ultimi 7 Giorni: 5

Ultimi 30 Giorni: 20

Tutti i Tempi: 3,203