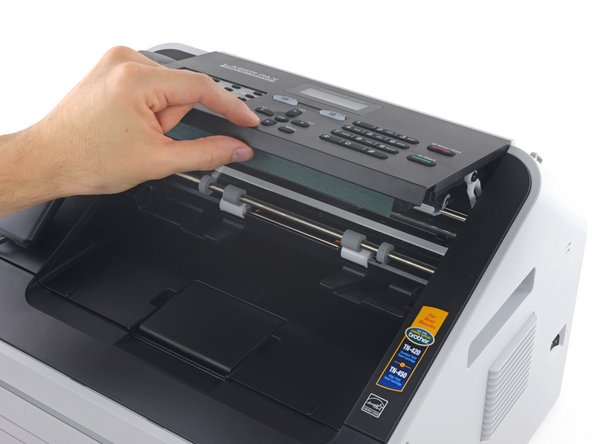
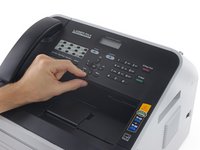
Salta al contenuto principale

Brother IntelliFax-2840 Control Panel Replacement

Cosa ti serve

  1. Brother IntelliFax-2840 Control Panel Replacement, Automatic Document Feeder: passo 1, immagine 1 di 1
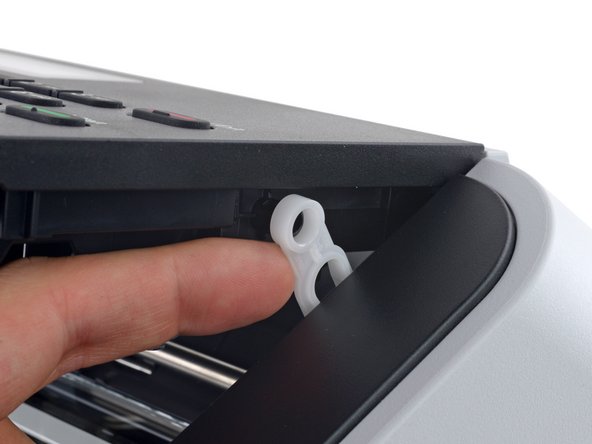
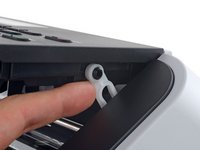
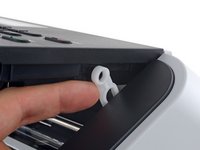
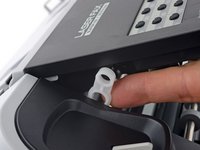
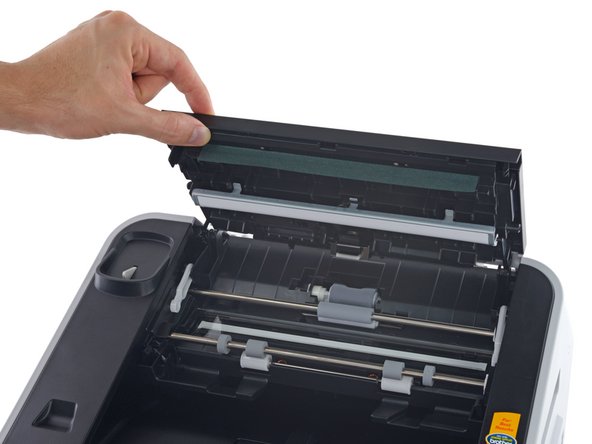
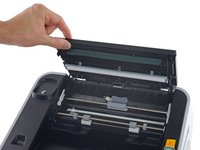
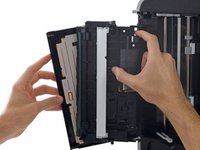
    • Remove the two 15 mm Phillips #1 screws securing the ADF at the rear of the fax machine.

  2. Brother IntelliFax-2840 Control Panel Replacement: passo 2, immagine 1 di 2 Brother IntelliFax-2840 Control Panel Replacement: passo 2, immagine 2 di 2
    • Gently pull the ADF up and away from the machine.

  3. Brother IntelliFax-2840 Control Panel Replacement, Control Panel: passo 3, immagine 1 di 2 Brother IntelliFax-2840 Control Panel Replacement, Control Panel: passo 3, immagine 2 di 2
    • Gently lift up the control panel.

  4. Brother IntelliFax-2840 Control Panel Replacement: passo 4, immagine 1 di 3 Brother IntelliFax-2840 Control Panel Replacement: passo 4, immagine 2 di 3 Brother IntelliFax-2840 Control Panel Replacement: passo 4, immagine 3 di 3
    • Use a finger or prying tool to gently pop off the right side control arm (furthest from the handset).

    • Repeat for the left side control arm.

    • You can make this task easier by taking the handset out of the cradle and setting it aside.

  5. Brother IntelliFax-2840 Control Panel Replacement: passo 5, immagine 1 di 2 Brother IntelliFax-2840 Control Panel Replacement: passo 5, immagine 2 di 2
    • Do not attempt to completely remove the control panel yet, as it is still connected by a cable.

    • Lifting from the front edge, gently flip up the control panel.

  6. Brother IntelliFax-2840 Control Panel Replacement: passo 6, immagine 1 di 1
    • While supporting the control panel with one hand, remove the three 12.2 mm Phillips #1 screws securing the rear control panel cover.

  7. Brother IntelliFax-2840 Control Panel Replacement: passo 7, immagine 1 di 1
    • While still supporting the control panel, use your fingers or a spudger to gently free the two plastic clips securing the rear control panel cover.

    • Slide the rear control panel cover down slightly to free it from the three clips along the upper edge.

  8. Brother IntelliFax-2840 Control Panel Replacement: passo 8, immagine 1 di 2 Brother IntelliFax-2840 Control Panel Replacement: passo 8, immagine 2 di 2
    • Separate the rear control panel cover from the control panel.

  9. Brother IntelliFax-2840 Control Panel Replacement: passo 9, immagine 1 di 2 Brother IntelliFax-2840 Control Panel Replacement: passo 9, immagine 2 di 2
    • Gently pull the control panel cable straight out from its connector.

    • The control panel should now come free.

Conclusione

To reassemble your device, follow these instructions in reverse order.

Un'altra persona ha completato questa guida.

Geoff Wacker

Membro da: 09/30/13

90.091 Reputazione

89 Guide realizzate

0 Commenti

Aggiungi Commento

Visualizza Statistiche:

Ultime 24 Ore: 0

Ultimi 7 Giorni: 4

Ultimi 30 Giorni: 17

Tutti i Tempi: 4,275