Salta al contenuto principale

Brightsign 4k LED Display Replacement

Cosa ti serve

  1. Brightsign 4k LED Display Replacement, Outer Shell: passo 1, immagine 1 di 3 Brightsign 4k LED Display Replacement, Outer Shell: passo 1, immagine 2 di 3 Brightsign 4k LED Display Replacement, Outer Shell: passo 1, immagine 3 di 3
    • Remove three 8mm screws from the left side of the device.

    • Remove four 8mm screws from the right side of the device.

  2. Brightsign 4k LED Display Replacement: passo 2, immagine 1 di 3 Brightsign 4k LED Display Replacement: passo 2, immagine 2 di 3 Brightsign 4k LED Display Replacement: passo 2, immagine 3 di 3
    • Apply pressure on the SD card to pop it out of the port.

    • Remove the card by pulling it out.

  3. Brightsign 4k LED Display Replacement: passo 3, immagine 1 di 3 Brightsign 4k LED Display Replacement: passo 3, immagine 2 di 3 Brightsign 4k LED Display Replacement: passo 3, immagine 3 di 3
    • Press down on the top cover of the device and slid it towards you until you see a slight gap created.

    • Lift the top cover off.

  4. Brightsign 4k LED Display Replacement: passo 4, immagine 1 di 3 Brightsign 4k LED Display Replacement: passo 4, immagine 2 di 3 Brightsign 4k LED Display Replacement: passo 4, immagine 3 di 3
    • Slide the body case back away from the bottom.

    • Pull up the body case to remove it from the bottom.

  5. Brightsign 4k LED Display Replacement, Motherboard Removal: passo 5, immagine 1 di 2 Brightsign 4k LED Display Replacement, Motherboard Removal: passo 5, immagine 2 di 2
    • Remove the four 8mm screws at each corner of the motherboard with a JIS #0 screwdriver.

  6. Brightsign 4k LED Display Replacement: passo 6, immagine 1 di 2 Brightsign 4k LED Display Replacement: passo 6, immagine 2 di 2
    • Lift the motherboard out of the casing.

  7. Brightsign 4k LED Display Replacement, LED Display: passo 7, immagine 1 di 2 Brightsign 4k LED Display Replacement, LED Display: passo 7, immagine 2 di 2
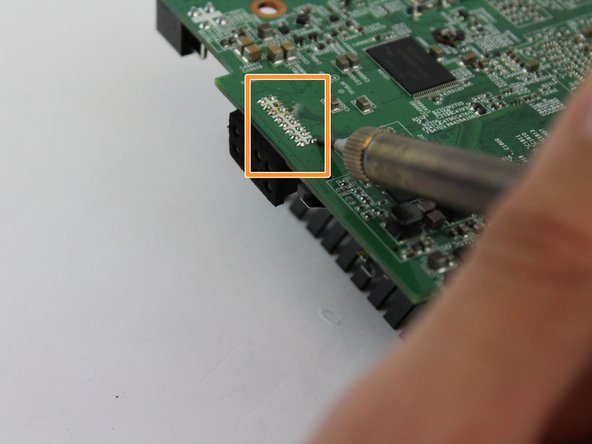
    • Turn the motherboard over and locate the solders holding the LED Display in place.

    • Use the soldering iron to desolder the sixteen solder joints and remove the melted solder with the pump shown in Step 8.

    • The soldering iron can become extremely hot, handle with caution.

  8. Brightsign 4k LED Display Replacement: passo 8, immagine 1 di 3 Brightsign 4k LED Display Replacement: passo 8, immagine 2 di 3 Brightsign 4k LED Display Replacement: passo 8, immagine 3 di 3
    Attrezzo utilizzato in questo passaggio:
    Desoldering Pump
    $3.99
    Compra
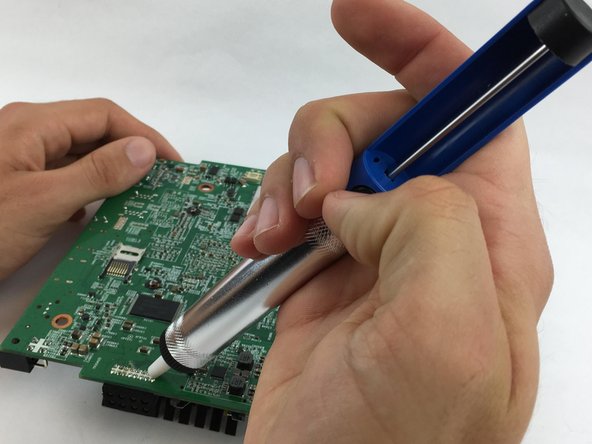
    • Apply the desoldering pump to remove the melted part from the motherboard (press the button to release it).

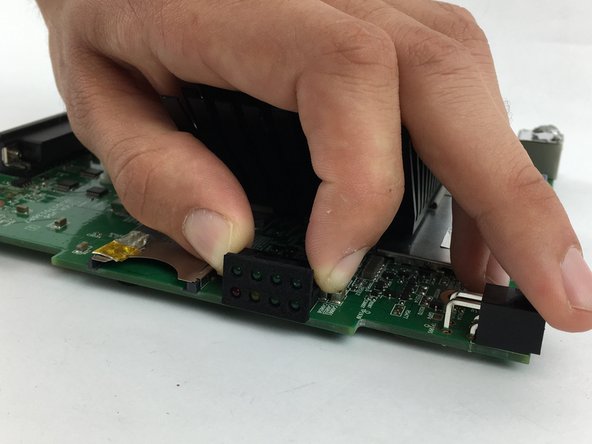
    • After the solders have been removed, gently pull the LED Display from the motherboard.

Conclusione

To reassemble your device, follow these instructions in reverse order.

Nhi Pham

Membro da: 02/15/18

169 Reputazione

2 Guide realizzate

Team

USF Tampa, Team S17-G6, Boczar Spring 2018 Membro di USF Tampa, Team S17-G6, Boczar Spring 2018

USFT-BOCZAR-S18S17G6

4 Membri

6 Guide realizzate

0 Commenti

Aggiungi Commento

Visualizza Statistiche:

Ultime 24 Ore: 0

Ultimi 7 Giorni: 0

Ultimi 30 Giorni: 1

Tutti i Tempi: 247