Introduzione
Braun Syncro Shaver Model 7680 Battery Assembly Replacement
Cosa ti serve
Panoramica Video
-
-
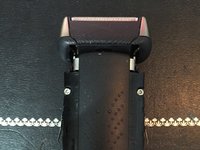
First pry the left side of the cover off, then pry the right side of the cover off before removing. Trying to pry the cover off from only one side will result in breaking the plastic tabs.
-
-
-
-
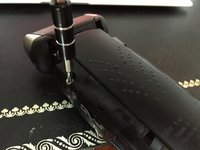
Remove the side covers by rotating them out and away from the body starting at the bottom of the shaver (where you just removed the cover).
-


To reassemble your device, follow these instructions in reverse order.
To reassemble your device, follow these instructions in reverse order.
Annulla: non ho completato questa guida.
Altre 2 persone hanno completato questa guida.
4 Commenti
WARNING to anyone who is using this guide to replace the batteries in their Braun Synchro shaver. The video guide stops at a critical moment - the point when you would actually replace the batteries!
It turns out that the batteries are glued to the orange circuit board, pretty firmly too. I wasn't too worried about this, I just angled in a screwdriver, twisted (hard), and cracked the glue seal. What I didn't realize was that the metal leads that connect the ends of the battery to the board, are soldered to the battery - so torquing out the battery broke the metal connector off the board. It snapped right at the base too - would be very difficult to fix without some decent soldering skills, which I don't have.
So my advice is simple - make sure to separate the batteries from their connections on both sides, before trying to remove the batteries. The metal connectors are quite thin and weak, and quite strongly fused, so good luck :-)
This is good advice from Jimmy C - we have a starter how-to here, the crucial part being the initial removal of the clip at the base, but there's more detail on YouTube especially with regard to detaching the batteries from their solder.
WHAT WOULD BE REALLY VALUABLE is info on the impenetrable SLIDER SWITCH that can lose its blue button and metal retainer spring. I'm on the verge of writing off my shaver that's in good working condition but won't turn off by breaking the switch apart to see how it works.
The slider switch has failed. It jams in one or two positions that make no difference. Mine is the Braun 7505, but essentially the same as the one here.
Anyone tackled the switch? Thx.
(Time-limited)
The slider switch has failed. It jams in one or two positions that make no difference. Mine is the Braun 7505, but essentially the same as the one here. YouTube has one video on the topic, solving the problem with a hammer. Unhelpful. :-/
Anyone tackled the switch? Thx.
Very valuable information. Thank you! What I learned was that the batteries are NOT! marked + and -. This makes it tough to decide how to put in the new batteries. The batteries are glued down worked in my favor in de-soldering them. A Very tiny screwdriver put under the lead from the battery side and while applying heat with the soldering iron on the pc side. I gently pried each lead out of the hole. The battery being glued down made this possible. Copper braid or soldering could not take away all the solder. A pointy knife opened the holes to get the new leads in. I had to clip the new leads width down to fit in the holes. Small wire cutters were needed. A razor blade was able to slit enough of the glue to pull the batteries away. Then I realized I had not marked where the plus and minus had been. Take Pictures and mark the batteries along the way! I found the + button of one cell had been up while the - flat end was up next to it. As soon as the solder hit the last lead the LED sprang to life. Good luck!