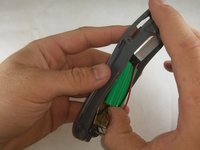
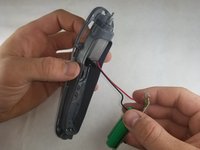
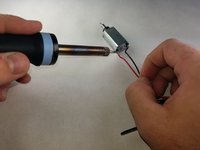
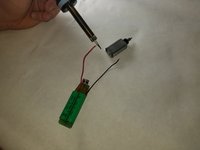
Salta al contenuto principale

Braun 5514 Motor Replacement

Cosa ti serve

  1. Braun 5514 Motor Replacement, Motor: passo 1, immagine 1 di 1
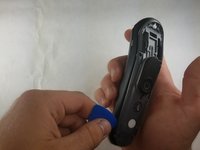
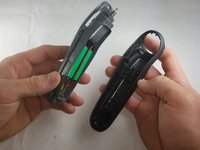
    • Remove any attached trimmer heads by gripping and pulling away from the body.

  2. Braun 5514 Motor Replacement: passo 2, immagine 1 di 3 Braun 5514 Motor Replacement: passo 2, immagine 2 di 3 Braun 5514 Motor Replacement: passo 2, immagine 3 di 3
    • Insert an opening pick between the top plate and the grey separator.

    • Slide the opening pick around the perimeter of the plate to release the hidden clips.

  3. Braun 5514 Motor Replacement: passo 3, immagine 1 di 1
    • Remove the four 7mm Torx T6 screws attaching the grey plastic frame to the black plastic casing.

  4. Braun 5514 Motor Replacement: passo 4, immagine 1 di 2 Braun 5514 Motor Replacement: passo 4, immagine 2 di 2
    • Use the opening pick to lift the grey frame from the black casing.

  5. Braun 5514 Motor Replacement: passo 5, immagine 1 di 2 Braun 5514 Motor Replacement: passo 5, immagine 2 di 2
    • Remove the circuit board assembly from the frame.

  6. Braun 5514 Motor Replacement: passo 6, immagine 1 di 1
    • Pull the small black plastic piece out of the frame.

  7. Braun 5514 Motor Replacement: passo 7, immagine 1 di 2 Braun 5514 Motor Replacement: passo 7, immagine 2 di 2
    • Desolder the wires attached to the motor.

    • Remember where the red and black wires attach in case the replacement motor doesn't have it labeled.

Conclusione

To reassemble your device, follow these instructions in reverse order.

Altre 3 persone hanno completato questa guida.

Team

IUPUI, Team S2-G2, Harley Summer 2018 Membro di IUPUI, Team S2-G2, Harley Summer 2018

IUPUI-HARLEY-SU18S2G2

4 Membri

5 Guide realizzate

0 Commenti

Aggiungi Commento

Visualizza Statistiche:

Ultime 24 Ore: 3

Ultimi 7 Giorni: 16

Ultimi 30 Giorni: 67

Tutti i Tempi: 2,983