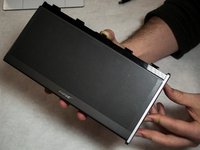
Salta al contenuto principale

Bose Soundlink II Side Cover Replacement

Cosa ti serve

  1. Bose Soundlink II Side Cover Replacement, Bose Soundlink II Cover Removal: passo 1, immagine 1 di 1
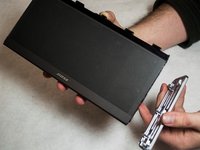
    • Using a 2.5 mm hex wrench, remove the two 13 mm screws from the bottom of the speaker.

  2. Bose Soundlink II Side Cover Replacement: passo 2, immagine 1 di 1
    • Push up on the back of the cover until it slides up slightly.

    • Pull the cover up and away from the speaker backing.

  3. Bose Soundlink II Side Cover Replacement, Side Cover: passo 3, immagine 1 di 1
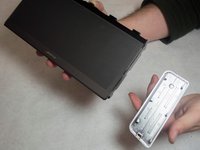
    • Remove the black electrical tape in order to reveal the screws attaching the side cover to the main body of the speaker. These screws are on the base of the device.

  4. Bose Soundlink II Side Cover Replacement: passo 4, immagine 1 di 1
    • Using the T-10 star tip screwdriver, remove the two 13 mm screws located on the bottom of the speaker on each side of the battery pack.

  5. Bose Soundlink II Side Cover Replacement: passo 5, immagine 1 di 3 Bose Soundlink II Side Cover Replacement: passo 5, immagine 2 di 3 Bose Soundlink II Side Cover Replacement: passo 5, immagine 3 di 3
    • Slide the silver side cover down toward the base of the speaker. The silver cover will come off easily.

Conclusione

To reassemble your device, follow these instructions in reverse order.

Altre 4 persone hanno completato questa guida.

Team

IUPUI, Team S3-G3, Harley Spring 2017 Membro di IUPUI, Team S3-G3, Harley Spring 2017

IUPUI-HARLEY-S17S3G3

4 Membri

3 Guide realizzate

0 Commenti

Aggiungi Commento

Visualizza Statistiche:

Ultime 24 Ore: 1

Ultimi 7 Giorni: 6

Ultimi 30 Giorni: 22

Tutti i Tempi: 2,603