Salta al contenuto principale

Boosted Board 1st Generation Rear Wheels Replacement

Cosa ti serve

  1. Boosted Board 1st Generation Rear Wheels Replacement, Rear Wheels: passo 1, immagine 1 di 2 Boosted Board 1st Generation Rear Wheels Replacement, Rear Wheels: passo 1, immagine 2 di 2
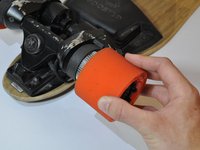
    • Loosen the two 16.74 mm motor mount hex nut screws with a 9/64" Allen wrench.

    • Do Not Remove the Screws.

  2. Boosted Board 1st Generation Rear Wheels Replacement: passo 2, immagine 1 di 1
    • Compress the motor mount back towards the wheel.

    • While keeping the motor mount compressed, tighten one of the hex nuts that you loosened in the previous step.

    • The motor mounts are spring tensioned so it is necessary compress them to loosen the belts.

  3. Boosted Board 1st Generation Rear Wheels Replacement: passo 3, immagine 1 di 2 Boosted Board 1st Generation Rear Wheels Replacement: passo 3, immagine 2 di 2
    • Remove the axel nut with a 1/2" socket wrench

  4. Boosted Board 1st Generation Rear Wheels Replacement: passo 4, immagine 1 di 3 Boosted Board 1st Generation Rear Wheels Replacement: passo 4, immagine 2 di 3 Boosted Board 1st Generation Rear Wheels Replacement: passo 4, immagine 3 di 3
    • Rotate and pull counterclockwise until the wheel comes off the axle completely.

    • The front washer will come off with the wheel.

    • Remove the back washer from the axle.

    • Replacing the wheel requires the bearings to be switched into the new wheel.

Conclusione

To reassemble your device, follow these instructions in reverse order.

Emily Imfeld

Membro da: 10/06/16

532 Reputazione

4 Guide realizzate

Team

Cal Poly, Team 15-7, Livingston Fall 2016 Membro di Cal Poly, Team 15-7, Livingston Fall 2016

CPSU-LIVINGSTON-F16S15G7

4 Membri

6 Guide realizzate

0 Commenti

Aggiungi Commento

Visualizza Statistiche:

Ultime 24 Ore: 0

Ultimi 7 Giorni: 2

Ultimi 30 Giorni: 11

Tutti i Tempi: 1,267