Introduzione
Replacing the display cable that connects the motherboard to the screen may resolve issues with the screen. This is a moderately difficult step that requires multiple tools.
Cosa ti serve
-
-
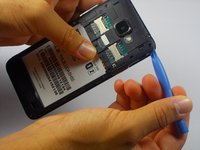
Find the small slot on the bottom left corner of the back panel.
-
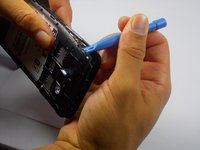
Slide the spudger into the small slot and lightly twist it. This will cause the corner of the back panel to pop up.
-
When the back panel is loose enough, use your fingers to remove it completely.
 Chiedi a FixBot
-
-
-
With the back panel off, you should see a large white rectangle. This is the battery. Slide the spudger under the indent on the bottom right of the battery and pull it up.
-
-
-
-
Using the PH00 Phillips head screwdriver unscrew the screws holding the panel down, making sure to keep track of the position of the screws.
-
The screw holes with the red circle around them hold screws with a 3.5 mm length.
-
The screw holes with the orange circle around them hold screws with a 2.5 mm length.
-
-
-
Insert the plastic opening tool into a corner of the plastic panel and gently pry it away from the rest of the phone.
-
Do this for each corner until the panel pops up.
-
-
Strumento utilizzato in questo passaggio:Tweezers$4.99
-
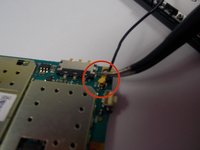
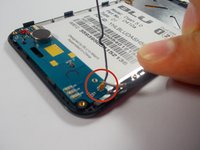
Along the right side of the phone you will see a long black wire with 2 gold end pieces on the end. This is the display cable.
-
To disconnect the gold end pieces from the motherboard, take the tweezers and gently but firmly pull upwards. Do this for both ends and the wire will disconnect.
-




To reassemble your device, follow these instructions in reverse order.
Annulla: non ho completato questa guida.
Altre 8 persone hanno completato questa guida.

Team

UMass Dartmouth, Team 4-7, Miles Fall 2014 Membro di UMass Dartmouth, Team 4-7, Miles Fall 2014
UMASSD-MILES-F14S4G7
3 Membri
3 guide realizzate
